![]()


Supermicro fan control for Linux (home) servers.
This is a systemd service running on Linux that can control fans with the help of IPMI on Supermicro X10-X13/H10-H13 (and some X9) motherboards.
- a Supermicro motherboard with ASPEED AST2400/2500/2600 chip
- Python 3.10-3.14
- a Linux distribution with:
systemdandbashcoretempkernel module for Intel CPUs ork10tempkernel module for AMD CPUsdrivetempkernel module (kernel version 5.6+ required) for SATA HDDs/SSDs
ipmitool- optional:
smartmontoolsfor SAS/SCSI disks and standby guard feature - optional:
nvidia-smifor Nvidia GPUs - optional:
rocm-smifor AMD GPUs
- Set up the IPMI threshold values for your fans (see chapter 6. for more details)
- Optional: enable advanced power management features for your CPU and SATA hard disks for lower power consumption, heat generation and fan noise.
- Load kernel modules (
coretemp/k10tempanddrivetemp) - Install
smfcservice or run it in docker (see chapter 9. for more details) - Edit the configuration file
/etc/smfc/smfc.confand command line options in/etc/default/smfc(see chapter 10. for more details). - Start
smfcservice (see chapter 11. for more details) - Check results in system log
- Leave feedback in discussion #55
Feel free to visit Discussions and raise your questions or share your experience on this project.
This service was designed for Supermicro motherboards with IPMI functionality. It implements fan controllers that control fan speed dynamically in one or more IPMI zones. The service operates the fans in IPMI FULL mode, where the fan rotation level can be adjusted with IPMI raw commands (read more details here).
Key features:
- Five independent fan controllers (CPU, HD, NVME, GPU, CONST) that can be enabled/disabled and combined freely
- Linear user-defined control function mapping a temperature interval to a fan level interval with configurable discrete steps
- Advanced multi-segment user-defined control function (via
control_function=) for arbitrary piecewise-linear fan curves - Support for multiple IPMI zones with automatic shared zone arbitration (highest fan level wins)
- Multiple fan curve instances per controller type for per-zone tuning (e.g.
[CPU]+[CPU:1]) - Temperature calculation methods: minimum, average, or maximum across multiple devices
- Temperature smoothing with configurable moving average window to reduce fan speed oscillation
- Sensitivity threshold to avoid unnecessary fan speed changes on small temperature fluctuations
- Standby guard feature for SATA hard disk arrays organized in RAID
- Support for SATA, SAS/SCSI, and NVMe disks with automatic HWMON/smartctl fallback
- Nvidia or AMD GPU temperature monitoring via
nvidia-smiorrocm-smi - Platform abstraction for different Supermicro motherboard generations (X9, X10-X13/H10-H13) and edge cases (X10QBi)
- Remote IPMI access via
remote_parameters=for VM setups (e.g. TrueNAS on Proxmox with PCI passthrough) - Distributed as a
systemdservice, Docker image, DEB/RPM package, or PyPI package - Safe shutdown: all fans are set back to 100% speed at service termination
IPMI zone is a logical term, representing a cooling zone, where there are predefined fans having the same rotation speed. Please note that the fan assignment to an IPMI zone is predefined on the motherboard, it cannot be changed (Supermicro does not provide individual fan configuration features in IPMI, while other vendors do it). On a typical Supermicro motherboard, there are two IPMI zones:
- CPU or System zone (IPMI zone 0) with fan names: FAN1, FAN2, etc.
- Peripheral or HD zone (IPMI zone 1) with fan names: FANA, FANB, etc.
On Supermicro server boards, there could be more IPMI zones with different fan names (see issue #31).
smfc v3.8.0and earlier versions implemented a feature (called Swapped Zones) to swap IPMI zone 0 and 1. Fromsmfc v4.0.0the IPMI zones can be assigned freely to fan controllers providing more freedom and convenience for the user (seeipmi_zone=parameter for more details).
In smfc, the following fan controllers are implemented:
| Fan controller | Temperature source | Configuration | Default IPMI zone |
|---|---|---|---|
| CPU | Intel/AMD CPU(s) | CPUs are identified automatically | 0 (CPU zone) |
| HD | SATA and SCSI HDDs/SSDs | Hard disks' names must be specified in [HD] hd_names= parameter |
1 (Peripheral zone) |
| NVME | NVMe SSDs | NVMe device names must be specified in [NVME] nvme_names= parameter |
1 (Peripheral zone) |
| GPU | Nvidia/AMD GPUs | GPU indices must be specified in [GPU] gpu_device_ids= parameter |
1 (Peripheral zone) |
| CONST | None | Constant fan level can be specified in [CONST] level= parameter |
1 (Peripheral zone) |
These fan controllers can be enabled and disabled independently. They can be used in a free combination with one or more IPMI zones. Multiple fan controllers
can share the same IPMI zone -- smfc will automatically apply the highest fan level requested by any controller in that zone (see chapter 1.3 for details).
CONST fan controller is an exception here, it does not require a temperature source, it can provide a constant fan level for one or more IPMI zones.
In smfc configuration file each fan controller has an individual section.
In smfc, a temperature-driven fan controller implements the following control logic:
- it reads the temperature
- it calculates a new fan level based on the user-defined control function and the temperature value
- the service applies the fan level for the IPMI zone(s) with IPMI commands (i.e.
ipmitool)

If the temperature source has multiple instances (e.g. multiple CPUs, HDDs, NVMEs or GPUs) then the user can configure a calculation method (i.e. minimum, average, maximum) for the calculation of the final temperature value (see temp_calc= parameter).
Please note that smfc will set all fans back to 100% speed at service termination to avoid overheating!
When multiple fan controllers are assigned to the same IPMI zone, smfc detects this at startup and automatically switches to a two-phase arbitration loop for those controllers. Controllers on non-shared zones are not affected -- they apply their fan levels directly.
At startup, smfc logs the detected shared zones at INFO level:
Shared IPMI zone 1: ['HD', 'NVME', 'CONST']
For shared zones, the control loop uses a two-phase approach in each iteration:
- Compute phase: each fan controller on a shared zone reads its temperature source and calculates its desired fan level, but defers the IPMI call.
- Apply phase: the service collects all desired levels, groups them by IPMI zone, and applies the maximum level per zone. Only one IPMI command is sent per zone, and only when the level has actually changed.
Controllers on non-shared zones skip the apply phase entirely -- they execute their own IPMI calls directly during the compute phase, just like they would if no sharing existed.
This means the hottest component always wins on a shared zone. For example, if HD fan controller wants 45% on zone 1 and NVME fan controller wants 70% on the same zone, smfc will set zone 1 to 70%. When the NVME cools down below the HD temperature, the HD controller's level will take over.
The CONST fan controller also participates in the arbitration -- its constant level acts as a guaranteed minimum for its zone(s). For example, configuring [CONST] level=40 on zone 1 ensures that zone never drops below 40%, even if all temperature-driven controllers would request a lower value.
When a shared zone's level changes, the log output at INFO level shows the winning controller and lists all other controllers with their requested levels:
Shared IPMI zone [1]: new level = 70% (winner: NVME=70%/52.0C, losers: HD=45%/38.5C, CONST=40%)
For non-shared zones, only the applied level is logged:
IPMI zone [0]: new level = 60% (CPU=45.0C)
A single fan controller can only apply one temperature-to-level curve. When different IPMI zones need different curves for the same temperature source (e.g. quiet mid-plane fans vs. aggressive CPU coolers), you can create multiple instances of the same controller type by appending a colon and a number to the section name:
# Instance for zone 0 — conservative curve for noisy mid-plane fans
[CPU:0]
enabled=1
ipmi_zone=0
min_temp=55.0
max_temp=75.0
min_level=20
max_level=80

# Instance for zone 1 — aggressive curve for silent CPU coolers
[CPU:1]
enabled=1
ipmi_zone=1
min_temp=40.0
max_temp=80.0
min_level=20
max_level=100
Three naming styles are supported and can be freely mixed:
[CPU]— single instance, original format (unchanged behaviour)[CPU]+[CPU:1]— base section plus numbered extras[CPU:0]+[CPU:1]— all-numbered instances
The suffix number after : is used only for ordering and logging — it has no relationship to the ipmi_zone= value inside the section. Each instance is a complete, independent fan controller with its own full set of parameters, sharing only the physical temperature source.
Multiple instances on the same IPMI zone participate in the shared zone arbitration described in chapter 1.3.
Fan controllers use user-defined control functions that map a temperature interval to a fan rotation level interval. Two forms are supported in each temperature-driven section: a simple linear mapping (chapter 2.1) or an advanced multi-segment piecewise-linear curve (chapter 2.2). The two forms are mutually exclusive within the same section.
The simple form maps a single temperature interval [min_temp..max_temp] linearly to a single fan-level interval [min_level..max_level], divided into discrete plateaus by the steps= parameter:
     min_temp=30
     max_temp=65
     min_level=35
     max_level=100
     steps=5
The dashed blue line shows the continuous linear ideal between (min_temp, min_level) and (max_temp, max_level); the solid red staircase is the digitalized output actually applied to the fan (here with steps=5, producing 6 plateaus: one pinned at each endpoint plus four in the interior).
Sample configurations using the linear form are available in
config/samples/— for examplesmfc-sample1.conf(CPU only),smfc-sample2.conf(HD with standby guard),smfc-sample4.conf(CPU + HD hybrid), andsmfc-sample8.conf(multiple fan curves per zone).
For more precise control, the control_function= parameter (available since smfc v6.0.0) lets you define a piecewise-linear fan curve directly as a list of temperature-level pairs:
steps=5
control_function = 30-35, 50-40, 60-90, 65-100
Each pair is written as T-L where T is a temperature in °C and L is a fan level in %. At least two pairs are required, temperatures must be strictly ascending, and all values must be in the range [0..100]. When control_function= is present in a section it overrides min_temp=, max_temp=, min_level=, and max_level= — the two forms are mutually exclusive.
The steps= parameter still applies: it controls how many discrete plateaus the interior of the curve is divided into before being sent to the fan. The two endpoint temperatures are always pinned exactly to their specified levels; the steps interior plateaus together with the 2 pinned endpoints produce steps + 2 plateaus in total.

The dashed blue line shows the continuous piecewise-linear ideal described by control_function=; the solid red staircase is the digitalized output actually applied to the fan (here with steps=5, producing 7 plateaus: one pinned at each endpoint plus five in the interior).
See
smfc-sample9.conffor a complete hybrid configuration usingcontrol_function=for both the CPU and HD fan controllers.
Changing fan rotational speed is a slow physical process — depending on the fan type and the magnitude of the change it can take several seconds. Frequent or unnecessary changes also cause audible oscillation. To keep the fans steady, each temperature-driven controller combines five mechanisms that act at different stages of the control loop:
| Stage | Mechanism | Parameter | Effect |
|---|---|---|---|
| Sample | Polling interval | polling= |
Sets how often the controller reads the temperature. Larger values reduce the maximum rate of fan-level updates. |
| Smooth | Moving-average smoothing | smoothing= |
Averages the last N temperature readings before they enter the control function. Suppresses brief spikes; 1 (default) disables smoothing. |
| Filter | Sensitivity threshold | sensitivity= |
The controller does not react until the smoothed temperature has moved by at least this many °C since the last action. |
| Quantize | Discrete fan levels | steps= |
The control function produces a fixed number of plateaus (linear: steps + 1, multi-segment: steps + 2) instead of a continuous curve, so small temperature drift inside a plateau yields the same fan level. |
| Apply | Post-change delay | [Ipmi] fan_level_delay= |
After every fan-level change, the controller waits this many seconds before issuing another command, giving the fan time to reach the new speed physically. |
The mechanisms are independent and complementary: polling= and smoothing= work on the input side (how the temperature is measured), sensitivity= and steps= work on the decision side (whether and how a temperature maps to a fan level), and fan_level_delay= works on the output side (pacing the IPMI commands themselves).
For the HD fan controller, an additional optional feature was implemented, called Standby guard, with the following assumptions:
- SATA hard disks are organized into a RAID array
- the RAID array will go to standby mode recurrently
This feature monitors the power state of SATA hard disks (with the help of smartctl) and will put the whole array into standby mode if a few members have already stepped into that state. With this feature, the situation can be avoided where the array is partially in standby mode while other members are still active.
SCSI disks are not compatible with this feature.
The following table summarizes how the temperature is read for different disk types:
| Disk type | Temperature source | Kernel module | Command |
|---|---|---|---|
SATA |
Linux kernel (HWMON) | drivetemp |
- |
NVME |
Linux kernel (HWMON) | - | - |
SAS/SCSI |
smartctl |
- | smartctl |
The
smfcservice was originally designed forSATAhard drives, but fromsmfc v3.0.0, it is also compatible withNVMEandSAS/SCSIdisks.smfc v5.0.0introduced a new NVME fan controller and separated the use of SATA and SAS/SCSI HDDs/SSDs and NVME SSD disks.
Some additional notes:
- For
SATAdisks thedrivetempkernel module should be loaded. This is the fastest way to read disk temperature, and the kernel module can report the temperature while hard disks are in sleep mode! - For
SAS/SCSIdisks thesmartctlcommand will be used to read disk temperature. - If
drivetempmodule is not loaded or an HDD is not compatible withdrivetempmodule thensmfcwill usesmartctlautomatically. - Different disks types can be mixed in
hd_names=configuration parameter but the Standby guard feature will not be supported in this case. - For
NVMESSDs, no kernel driver needs to be loaded; the kernel can handle this disk type automatically - NVME SSDs can be used in [NVME] fan controller and [HD] fan controller does not accept them anymore.
Originally, this software was designed to work with Supermicro X10-X12/H10-H12 motherboards with IPMI functionality, where the BMC chip is ASPEED AST2400 or AST2500. Most motherboards in this set are compatible with the Supermicro IPMI raw commands used here and are supported out of the box.
Newer X13/H13 motherboards with AST2600 chips are also compatible with smfc (see more details in issue #33 about
an X13SAE-F motherboard). The only difference is in the implementation of thresholds: the AST2600 chip implements only the
Lower Critical threshold, so setting up thresholds is different.
Some motherboards require platform-specific IPMI raw commands for fan control. smfc implements a platform abstraction
(since smfc v5.1.0) that handles these differences. The platform is auto-detected from BMC product name, or can be overridden with the
platform_name= configuration parameter (see chapter 10.2). Currently supported platforms:
platform_name= parameter |
Platform | Notes |
|---|---|---|
auto |
automatic discovery based on BMC information | Default behaviour |
generic |
Generic X10-X13/H10-H13 Supermicro boards | Uses standard Supermicro IPMI raw commands |
genericx9 |
Generic Supermicro X9 boards | 4 fan zones (0x10-0x13), duty cycle 0-255 scale |
X10QBi |
Supermicro X10QBi motherboard | Nuvoton NCT7904D fan controller, 4 fan zones (0x10-0x13), see issue #69 and PR #97 |
With this abstraction layer, new Supermicro motherboards can also be added to smfc with a good understanding of their IPMI raw commands and fan control logic.
Some X9 motherboards are supported (since smfc v5.2.0) via the genericx9 platform, provided they support the specific IPMI raw commands used for fan control. There is
no auto-detection for X9 boards, so you must set platform_name=genericx9 in the configuration file.
For the newer X14/H14 motherboards, compatibility is still being investigated. There are some issues (#98) and discussions (#92, #106) about this to get better understanding.
The earlier X8 motherboards are NOT compatible with this software. They do not implement IPMI FULL mode, and they cannot control fan levels with IPMI raw commands.
Feel free to create a short feedback in discussion #55 on your compatibility experience.
On Supermicro X10-X11 motherboards IPMI uses six sensor thresholds to specify the safe and unsafe fan rotational speed intervals (these are RPM values rounded to the nearest hundreds, defined for each fan separately):
Lower Non-Recoverable
Lower Critical
Lower Non-Critical
Upper Non-Critical
Upper Critical
Upper Non-Recoverable
but newer Supermicro X13 motherboards (with AST2600 BMC chip) have only one sensor threshold:
Lower Critical
Originally, this chapter was created for Supermicro X10-X11 motherboards, but can be easily adapted to X13 motherboards as well (see more details in #33).
Like many other utilities (created by NAS and home server community), smfc also uses IPMI FULL mode for fan control, where all fans in the zone:
- initially configured to full speed (100%)
- then their speed can be safely configured in
[Lower Critical, Upper Critical]interval - if any fan speed oversteps either
Lower CriticalorUpper Criticalthreshold then IPMI will generate an assertion event and will set all fan speeds back to 100% in the zone
Please also consider the fact that fans are mechanical devices, their rotational speed is not stable (it could be fluctuating). To avoid IPMI's assertion mechanism described here please follow the next steps:
- Per fan: check the minimum and maximum rotational speeds of your fan on its vendor website
- Per fan: configure proper IPMI sensor thresholds adjusted to the fan speed interval
- Per zone: define safe
min_level/max_levelvalues forsmfcrespecting the variance of all fans in the IPMI zone (it could take several iterations and adjustments)

Here is a real-life example for a Noctua NF-F12 PWM fan:
Upper Non-Recoverable = 1800 rpm
Upper Critical = 1700 rpm
Upper Non-Critical = 1600 rpm
Lower Non-Critical = 200 rpm
Lower Critical = 100 rpm
Lower Non-Recoverable = 0 rpm
Max RPM = 1500 rpm
Min RPM = 300 rpm
max_level = 100 (i.e. 1500 rpm)
min_level = 35 (i.e. 500 rpm)
Notes:
-
Use the following
ipmitoolcommand to display the current IPMI sensor thresholds for fans:root@home:~# ipmitool sensor|grep FAN FAN1 | 500.000 | RPM | ok | 0.000 | 100.000 | 200.000 | 1600.000 | 1700.000 | 1800.000 FAN2 | 500.000 | RPM | ok | 0.000 | 100.000 | 200.000 | 1600.000 | 1700.000 | 1800.000 FAN3 | na | | na | na | na | na | na | na | na FAN4 | 400.000 | RPM | ok | 0.000 | 100.000 | 200.000 | 1600.000 | 1700.000 | 1800.000 FANA | 500.000 | RPM | ok | 0.000 | 100.000 | 200.000 | 1600.000 | 1700.000 | 1800.000 FANB | 500.000 | RPM | ok | 0.000 | 100.000 | 200.000 | 1600.000 | 1700.000 | 1800.000 -
Use the following
ipmitoolcommand to list assertion events:root@home:~# ipmitool sel list 1 | 10/19/2023 | 05:15:35 PM CEST | Fan #0x46 | Lower Critical going low | Asserted 2 | 10/19/2023 | 05:15:35 PM CEST | Fan #0x46 | Lower Non-recoverable going low | Asserted 3 | 10/19/2023 | 05:15:38 PM CEST | Fan #0x46 | Lower Non-recoverable going low | Deasserted 4 | 10/19/2023 | 05:15:38 PM CEST | Fan #0x46 | Lower Critical going low | Deasserted 5 | 10/19/2023 | 05:20:59 PM CEST | Fan #0x46 | Lower Critical going low | Asserted -
Use the following
ipmitoolcommands to specify all six sensor thresholds for FAN1:root@home:~# ipmitool sensor thresh FAN1 lower 0 100 200 root@home:~# ipmitool sensor thresh FAN1 upper 1600 1700 1800 -
You can also edit and run
ipmi/set_ipmi_threshold.shto configure all IPMI sensor thresholds -
If you install new BMC firmware on your Supermicro motherboard, you have to configure IPMI thresholds again
-
If you do not see fans when executing
ipmitool sensors, you may want to reset the BMC to factory default using the Web UI or usingipmitool mc reset cold -
Noctua specifies the variance of minimum and maximum fan rotational speeds (e.g. see the specification of Noctua NF-F12 PWM). For example:
Rotational speed (+/- 10%) 1500 RPM: 1350-1650 RPM intervalMin. rotational speed @ 20% PWM (+/-20%) 300 RPM: 240-360 RPM interval
Please note that LNA/ULNA cables or Y-cables can modify the rotational speed calculations here and the required IPMI sensor thresholds too.
You can read more about:
- IPMI fan control: STH Forums and TrueNAS Forums
- Change IPMI sensors thresholds: TrueNAS Forums
If low noise and low heat generation are important attributes of your Linux box, then you may consider the following chapters.
Most modern CPUs have multiple energy-saving features. You can check your BIOS and enable them to minimize the heat generation.
Intel(R) CPUs:
- Intel(R) Speed Shift Technology
- Intel(R) SpeedStep
- C-states
- Boot performance mode
AMD(R) CPUs:
- PowerNow!
- Cool`n`quiet
- Turbo Core
With this setup the CPU will change its base frequency and power consumption dynamically based on the load.
In case of SATA hard disks, you may enable:
- advanced power management
- spin down timer
With the help of command hdparm you can enable advanced power management and specify a spin down timer (read more here):
hdparm -B 127 /dev/sda
hdparm -S 240 /dev/sda
In file /etc/hdparm.conf you can specify all parameters persistently:
quiet
/dev/sda {
apm = 127
spindown_time = 240
}
/dev/sdb {
apm = 127
spindown_time = 240
}
...
Important notes:
- If you plan to spin down your hard disks or RAID array (i.e. put them to standby mode) you have to set up the configuration parameter
[HD] polling=to at least twice as big as thespindown_timespecified here. - In file
/etc/hdparm.confyou must define HD names in/dev/disk/by-id/...form to avoid inconsistency.
One or more of the following Linux kernel modules need to be loaded for smfc:
coretemp: temperature report for Intel(R) CPUsk10temp: temperature report for AMD(R) CPUsdrivetemp: temperature report for SATA hard disks (available from kernel 5.6+ version)
Use /etc/modules file for persistent loading of these modules.
Notes:
- Reading
drivetempmodule is the fastest way to get the temperature of the hard disks, and it can read temperature of the SATA hard disks even if they are in standby mode.
For the installation and uninstallation, you need root privileges. There are several ways to install and uninstall smfc, this chapter will show them.
Pre-built .deb packages are available from the smfc-deb APT repository, hosted on GitHub Pages and signed with a dedicated GPG key.
Add the repository and install:
curl -fsSL https://petersulyok.github.io/smfc-deb/smfc-repo.gpg \
| sudo gpg --dearmor -o /etc/apt/keyrings/smfc-repo.gpg
echo "deb [signed-by=/etc/apt/keyrings/smfc-repo.gpg] https://petersulyok.github.io/smfc-deb stable main" \
| sudo tee /etc/apt/sources.list.d/smfc.list
sudo apt update && sudo apt install smfcTo update: sudo apt update && sudo apt upgrade smfc.
To remove:
sudo apt remove smfc
sudo rm /etc/apt/sources.list.d/smfc.list /etc/apt/keyrings/smfc-repo.gpgCompatible with Debian 12+, Ubuntu 22.04+. See the smfc-deb README for the full distribution list. The package installs the same files as the manual installation (service unit, configuration, man page, sample configs). Configuration files under /etc/ are preserved on upgrade. See PACKAGES.md for build-from-source instructions.
Pre-built .rpm packages are available from the smfc-rpm DNF repository, hosted on GitHub Pages and signed with a dedicated GPG key.
Add the repository and install:
sudo dnf config-manager addrepo --from-repofile=https://petersulyok.github.io/smfc-rpm/smfc.repo
sudo dnf install smfc(On older dnf versions: sudo dnf config-manager --add-repo=https://petersulyok.github.io/smfc-rpm/smfc.repo.)
To update: sudo dnf upgrade smfc.
To remove:
sudo dnf remove smfc
sudo rm /etc/yum.repos.d/smfc.repoCompatible with Fedora 39+, RHEL/Rocky/AlmaLinux 9+ (with EPEL), CentOS Stream 9+, openSUSE Leap 15.5+. See the smfc-rpm README for the full distribution list. The package installs the same files as the manual installation. Configuration files are preserved on upgrade. See PACKAGES.md for build-from-source instructions.
smfc is also available as a docker image, see more details in Docker.md. In this case, your job is only to provide your configuration file on the host computer, smfc will be executed automatically when the container is starting.
There is an installation script (bin/install.sh) which can install smfc in two different ways:
- remotely from the GitHub repository (no cloning required)
- locally from a git repository (GitHub repository needs to be cloned)
The installation script requires curl, pip, gzip, and mandb commands, and it has the following
command line parameters:
user@host:~$ ./install.sh --help
usage: install.sh [-h|--help] [-k|--keep-config] [-l|--local] [-v|--verbose]
-h, --help help text
-k, --keep-config keep original configuration file
-l, --local installation from a local git repository
-v, --verbose verbose output
The default location of the installed files:
| Files | Installation folder | Description |
|---|---|---|
smfc.service |
/etc/systemd/system |
systemd service definition file |
smfc |
/etc/default |
service command line options |
smfc.conf |
/etc/smfc |
service configuration file |
smfc.1.gz |
/usr/local/share/man/man1 |
smfc manual page |
smfc |
/usr/local/bin or /usr/bin |
smfc command |
smfc service |
/usr/local/lib/python3.xx or /usr/lib/python3.xx |
smfc python package |
Notes for the script:
- Different Linux distros install the Python package to different folders (tested on Ubuntu 24.04, Debian 13, SUSE Leap 15, Proxmox 9, and Arch Linux)
- The installation process stops on any error
- Remote installation is the default method
- The
--localparameter installs from the current folder (the GitHub repository must be cloned first) - The default action is the following:
- the existing configuration file is renamed
- a new configuration file is installed
- the
hd_names=configuration parameter is pre-filled with the list of existing hard disks for the user's convenience (please check/edit this parameter!)
- With the
--keep-configparameter, the original configuration file is preserved - With the
--verboseparameter, the installation phases are displayed
For remote installation the script can be executed (as root user) this way:
curl --silent https://raw.githubusercontent.com/petersulyok/smfc/refs/heads/main/bin/install.sh|bash /dev/stdin --verbose
or if you want to preserve your existing configuration file:
curl --silent https://raw.githubusercontent.com/petersulyok/smfc/refs/heads/main/bin/install.sh|bash /dev/stdin --verbose --keep-config
For local installation, follow these steps (the uv command is also required):
git clone https://github.com/petersulyok/smfc.git
cd smfc
uv sync
uv build
./bin/install.sh --local --verbose --keep-config
This clones the GitHub repository and builds the smfc package locally before installation.
There is also an uninstallation script (bin/uninstall.sh) for removing smfc.
It has the following command line parameters:
user@host:~$ ./uninstall.sh --help
usage: uninstall.sh [-h|--help] [-k|--keep-config] [-v|--verbose]
-h, --help help text
-k, --keep-config keep original configuration file
-v, --verbose verbose output
It can be executed locally or remotely, just like the installation script. Example of remote execution:
curl --silent https://raw.githubusercontent.com/petersulyok/smfc/refs/heads/main/bin/uninstall.sh|bash /dev/stdin --verbose
The script removes the installed smfc files and the Python package.
After successful installation, create/edit your new configuration file. If you just upgraded to a new smfc version, you can preserve the existing one.
You have to think over and answer the following questions:
- What are the most important heat sources in your machine? Typically, these could be CPU(s), hard disks, or GPUs.
- Which fan controller would you like to use and configure in
smfc? - What is the expected temperature interval (minimum/maximum C degree) for the selected temperature source(s)? Use some test tools to measure it (e.g.
s-tui,fio,iozone) if you don't have their track records. - Which IPMI zone(s) will be connected to these fan controllers/temperature sources)? Check how many IPMI zones you have, how the fans are connected on your motherboard, and how they are cooling the selected temperature source(s). Multiple controllers can share the same zone -- the highest requested level will be applied automatically.
- What is the stable level interval for fans in the selected IPMI zone(s)? Probably this part requires the most patience! You have assumptions here that need to be verified. If you experience IPMI assertions and your fans are spinning up then you have to refine the level interval or threshold configuration and try again. You will have several cycles here, this is normal.
The configuration file contains sections. The first one for IPMI configuration, the rest for fan controllers.
Edit /etc/smfc/smfc.conf and specify your configuration parameters here:
#
# smfc.conf (C) 2020-2026, Peter Sulyok
# smfc 6.x service configuration parameters
#
# Please read the documentation here: https://github.com/petersulyok/smfc
#
# Ipmi specific parameters.
[Ipmi]
# Path for ipmitool (str, default=/usr/bin/ipmitool)
command=/usr/bin/ipmitool
# Delay time after changing IPMI fan mode (int, seconds, default=10)
fan_mode_delay=10
# Delay time after changing IPMI fan level (int, seconds, default=2)
fan_level_delay=2
# IPMI parameters for remote access (string, default='')
#remote_parameters=-U USERNAME -P PASSWORD -H HOST
# Supermicro platform (string, default='auto')
# Potential values:
# auto - automatic discovery based on BMC information
# generic - Generic Supermicro X10-X13/H10-H13 platform
# genericx9 - Generic Supermicro X9 platform
# X10QBi - Supermicro X10QBi platform
platform_name=auto
# CPU fan controller: works based on CPU(s) temperature.
[CPU]
# Fan controller enabled (bool, default=0)
enabled=1
# IPMI zone(s) (comma- or space-separated list of int, default=0))
ipmi_zone=0
# Calculation method for CPU temperatures (int, [0-minimum, 1-average, 2-maximum], default=1)
temp_calc=1
# Discrete steps in mapping of temperatures to fan level (int, default=6)
steps=6
# Threshold in temperature change before the fan controller reacts (float, C, default=3.0)
sensitivity=3.0
# Polling time interval for reading temperature (int, sec, default=2)
polling=2
# Minimum CPU temperature (float, C, default=30.0)
min_temp=30.0
# Maximum CPU temperature (float, C, default=60.0)
max_temp=60.0
# Minimum CPU fan level (int, %, default=35)
min_level=35
# Maximum CPU fan level (int, %, default=100)
max_level=100
# User-defined control function (comma- or space-separated list of temp-level value pairs, default=empty)
# Temp in °C, level in %; at least 2 pairs, temps strictly ascending
# If this parameter specified then min_temp/max_temp/min_level/max_level parameters are skipped
# Example: control_function=30-35, 50-55, 60-90, 65-100
control_function=
# Moving average window size for temperature smoothing (int, default=1, 1=disabled)
smoothing=1
# HD fan controller: works based on SATA or SAS HDDs/SSDs temperature.
[HD]
# Fan controller enabled (bool, default=0)
enabled=1
# IPMI zone(s) (comma- or space-separated list of int, default=1))
ipmi_zone=1
# Calculation of HD temperatures (int, [0-minimum, 1-average, 2-maximum], default=1)
temp_calc=1
# Discrete steps in mapping of temperatures to fan level (int, default=4)
steps=4
# Threshold in temperature change before the fan controller reacts (float, C, default=2.0)
sensitivity=2.0
# Polling interval for reading temperature (int, sec, default=10)
polling=10
# Minimum HD temperature (float, C, default=32.0)
min_temp=32.0
# Maximum HD temperature (float, C, default=46.0)
max_temp=46.0
# Minimum HD fan level (int, %, default=35)
min_level=35
# Maximum HD fan level (int, %, default=100)
max_level=100
# User-defined control function (comma- or space-separated list of temp-level value pairs, default=empty)
# Temp in °C, level in %; at least 2 pairs, temps strictly ascending
# If this parameter specified then min_temp/max_temp/min_level/max_level parameters are skipped
# Example: control_function=30-35, 50-55, 60-90, 65-100
control_function=
# Moving average window size for temperature smoothing (int, default=1, 1=disabled)
smoothing=1
# Names of the HDs (str multi-line list, default=)
# MUST BE specified in '/dev/disk/by-id/...' form, for example:
# hd_names=/dev/disk/by-id/ata-WDC_WD100EFAX-68LHPN0_8CH7T91E
# /dev/disk/by-id/ata-WDC_WD100EFAX-68LHPN0_8CH7T813
# /dev/disk/by-id/ata-WDC_WD100EFAX-68LHPN0_8CHUFFRE
hd_names=
# Path for 'smartctl' command (str, default=/usr/sbin/smartctl).
smartctl_path=/usr/sbin/smartctl
# Standby guard feature for RAID arrays (bool, default=0)
standby_guard_enabled=0
# Number of HDs already in STANDBY state before the full RAID array will be forced to it (int, default=1)
standby_hd_limit=1
# NVME fan controller: works based on NVMe SSD(s) temperature.
[NVME]
# Fan controller enabled (bool, default=0)
enabled=0
# IPMI zone(s) (comma- or space-separated list of int, default=1))
ipmi_zone=1
# Calculation of NVMe temperatures (int, [0-minimum, 1-average, 2-maximum], default=1)
temp_calc=1
# Discrete steps in mapping of temperatures to fan level (int, default=4)
steps=4
# Threshold in temperature change before the fan controller reacts (float, C, default=2.0)
sensitivity=2.0
# Polling interval for reading temperature (int, sec, default=2)
polling=2
# Minimum NVMe temperature (float, C, default=35.0)
min_temp=35.0
# Maximum NVMe temperature (float, C, default=70.0)
max_temp=70.0
# Minimum NVMe fan level (int, %, default=35)
min_level=35
# Maximum NVMe fan level (int, %, default=100)
max_level=100
# User-defined control function (comma- or space-separated list of temp-level value pairs, default=empty)
# Temp in °C, level in %; at least 2 pairs, temps strictly ascending
# If this parameter specified then min_temp/max_temp/min_level/max_level parameters are skipped
# Example: control_function=30-35, 50-55, 60-90, 65-100
control_function=
# Moving average window size for temperature smoothing (int, default=1, 1=disabled)
smoothing=1
# Names of the NVMe devices (str multi-line list, default=)
# MUST BE specified in '/dev/disk/by-id/...' form, for example:
# nvme_names=/dev/disk/by-id/nvme-ADATA_LEGEND_650_2OFF29AO8DKR
# /dev/disk/by-id/nvme-CT4000P3PSSD7_2446E89408FA
nvme_names=
# GPU fan controller: works based on Nvidia or AMD GPU(s) temperature.
[GPU]
# Fan controller enabled (bool, default=0)
enabled=0
# IPMI zone(s) (comma- or space-separated list of int, default=1))
ipmi_zone=1
# GPU type (str, ['nvidia', 'amd'], default=nvidia)
gpu_type=nvidia
# AMD GPU temperature sensor (int, 0-junction, 1-edge, 2-memory, default=0)
amd_temp_sensor=0
# Calculation of GPU temperatures (int, [0-minimum, 1-average, 2-maximum], default=1)
temp_calc=1
# Discrete steps in mapping of temperatures to fan level (int, default=5)
steps=5
# Threshold in temperature change before the fan controller reacts (float, C, default=2.0)
sensitivity=2.0
# Polling interval for reading temperature (int, sec, default=2)
polling=2
# Minimum GPU temperature (float, C, default=40.0)
min_temp=40.0
# Maximum GPU temperature (float, C, default=70.0)
max_temp=70.0
# Minimum GPU fan level (int, %, default=35)
min_level=35
# Maximum GPU fan level (int, %, default=100)
max_level=100
# User-defined control function (comma- or space-separated list of temp-level value pairs, default=empty)
# Temp in °C, level in %; at least 2 pairs, temps strictly ascending
# If this parameter specified then min_temp/max_temp/min_level/max_level parameters are skipped
# Example: control_function=30-35, 50-55, 60-90, 65-100
control_function=
# Moving average window size for temperature smoothing (int, default=1, 1=disabled)
smoothing=1
# GPU device IDs (comma- or space-separated list of int, default=0)
# These are indices in nvidia-smi temperature report.
gpu_device_ids=0
# Path for 'nvidia-smi' command (str, default=/usr/bin/nvidia-smi).
nvidia_smi_path=/usr/bin/nvidia-smi
# Path for 'rocm-smi' command (str, default=/usr/bin/rocm-smi)
rocm_smi_path=/usr/bin/rocm-smi
# CONST fan controller: sets constant fan level (without any heat source) for IPMI zones(s).
[CONST]
# Fan controller enabled (bool, default=0)
enabled=0
# IPMI zone(s) (comma- or space-separated list of int, default=1))
ipmi_zone=1
# Polling interval for checking/resetting level if needed (int, sec, default=30)
polling=30
# Constant fan level (int, %, default=50)
level=50Important notes:
[Ipmi] remote_parameters=-U USERNAME -P PASSWORD -H HOSTparameter can be used for remote access for the IPMI interface. It could be useful for a VM setup where the hard disks are configured with PCI passthrough (e.g. a TrueNAS running in a VM on Proxmox), but IPMI needs to be accessed "remotely". Please note that the HOST is the BMC network address (not the VM host address).[HD] hd_names=is a compulsory parameter for HD fan controller, and it must be specified in/dev/disk/by-id/...form. Please note that the/dev/sdaform is not persistent and could change after a reboot![NVME] nvme_names=is a compulsory parameter for NVME fan controller, and it must be specified in/dev/disk/by-id/...form. Please note that the/dev/nvme0n1form is not persistent and could change after a reboot![CPU] / [HD] / [NVME] min_level= / max_level=should be configured in alignment with threshold configuration (see more details in this chapter). Be patient, several refinement cycles could happen.[CPU] / [HD] / [NVME] / [GPU] control_function=defines an advanced multi-segment user-defined control function as a list oftemp-levelvalue pairs (at least 2 pairs, temperatures strictly ascending). When specified, it overrides the linearmin_temp/max_temp/min_level/max_levelform. See chapter 2.2 for details.- Multiple instances of the same fan controller can be created using numbered section names (e.g.
[CPU:0],[CPU:1]). Each instance has its own full set of parameters and can be assigned to a different IPMI zone with a different fan curve. Two enabled instances of the same type must not share the same IPMI zone. See chapter 1.4 for details. - Several sample configuration files are provided in
./config/samplesfolder. - Save/backup your configuration file when you've got the final version. Avoid overwriting if you upgrade to a new version of
smfc.
After manual installation, smfc can be started and stopped as a standard systemd service. Remember to reload systemd configuration after a new installation or if you changed the service definition file:
systemctl daemon-reload
systemctl start smfc.service
systemctl stop smfc.service
systemctl restart smfc.service
systemctl status smfc.service
● smfc.service - Supermicro Fan Control
Loaded: loaded (/etc/systemd/system/smfc.service; enabled; preset: enabled)
Active: active (running) since Tue 2026-03-03 21:32:22 CET; 7min ago
Invocation: b613d841e1cf43f4ace80d472623ed4c
Main PID: 82521 (smfc)
Tasks: 1 (limit: 154231)
Memory: 12M (peak: 19.5M)
CPU: 1.271s
CGroup: /system.slice/smfc.service
└─82521 /usr/bin/python3 /usr/local/bin/smfc -c /etc/smfc/smfc.conf -l 3
Mar 03 21:37:27 nas smfc.service[82521]: Shared IPMI zone [0]: new level = 67% (winner: CPU=67%/51.0C, losers: NVME=35%/37.9C)
Mar 03 21:37:30 nas smfc.service[82521]: Shared IPMI zone [0]: new level = 35% (winner: CPU=35%/31.0C, losers: NVME=35%/37.9C)
Mar 03 21:38:46 nas smfc.service[82521]: Shared IPMI zone [0]: new level = 67% (winner: CPU=67%/49.0C, losers: NVME=35%/37.9C)
Mar 03 21:38:49 nas smfc.service[82521]: Shared IPMI zone [0]: new level = 35% (winner: CPU=35%/31.0C, losers: NVME=35%/37.9C)
The smfc program has the following parameters:
root@nas$ smfc --help
usage: smfc [-h] [-c CONFIG_FILE] [-v] [-l {0,1,2,3,4}] [-o {0,1,2}] [-nd] [-s] [-ne]
options:
-h, --help show this help message and exit
-c CONFIG_FILE configuration file (default is /etc/smfc/smfc.conf)
-v, --version show program's version number and exit
-l {0,1,2,3,4} set log level: 0-NONE, 1-ERROR(default), 2-CONFIG, 3-INFO, 4-DEBUG
-o {0,1,2} set log output: 0-stdout, 1-stderr, 2-syslog(default)
-nd no dependency checking at start
-s use sudo command
-ne no fan speed recovery at exit
smfc command-line options can be specified in /etc/default/smfc file if you run smfc as a systemd service.
If you are testing your configuration, you can start smfc directly in a terminal (logging to the standard output on debug log level):
smfc -o 0 -l 3
In case of Docker installation, smfc will be executed automatically when the container is started. Its command-line parameters can be specified in the docker-compose file.
All messages will be logged to the specific output and the specific level.
With the help of command journalctl you can check logs easily. For example:
-
listing service logs of the last two hours:
journalctl -u smfc --since "2 hours ago" -
listing service logs from the last boot:
journalctl -b -u smfc
Most probably, there was an assertion (i.e., the rotational speed of a fan went above or below an IPMI threshold) and IPMI switched back that zone to full rotational speed. You can check the current fan rotational speeds:
ipmitool sdr
and you can also check IPMI event log and list assertion events:
root@home:~# ipmitool sel list
   1 | 10/19/2023 | 05:15:35 PM CEST | Fan #0x46 | Lower Critical going low  | Asserted
   2 | 10/19/2023 | 05:15:35 PM CEST | Fan #0x46 | Lower Non-recoverable going low  | Asserted
   3 | 10/19/2023 | 05:15:38 PM CEST | Fan #0x46 | Lower Non-recoverable going low  | Deasserted
   4 | 10/19/2023 | 05:15:38 PM CEST | Fan #0x46 | Lower Critical going low  | Deasserted
   5 | 10/19/2023 | 05:20:59 PM CEST | Fan #0x46 | Lower Critical going low  | Asserted
If the problematic fan (causing the alert) is identified, then you must adjust its threshold. This process could take several adjustment cycles. Be patient :) You may read this chapter for more details.
The configuration is the following:
-
128 GB ECC DDR4-2666MHz RAM
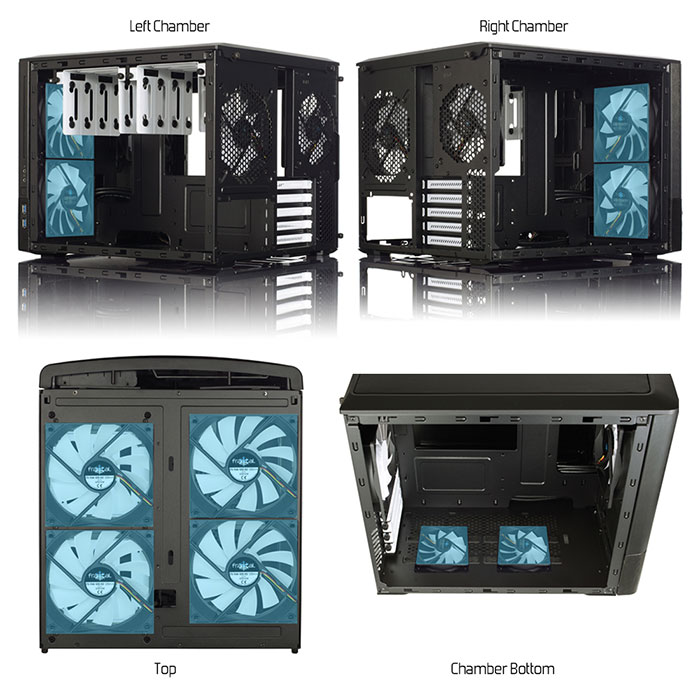
-
Fractal Design Node 804 case, with separate chambers for the motherboard and the hard disks:
-
Proxmox 9
-
8 x WD Red 12TB (WD120EFAX) hard disks in ZFS RAID
-
4 x Noctua NF-F12 PWM fans (FAN1, FAN2, FAN3, FAN4) in IPMI CPU zone
-
2 x Noctua NF-F12 PWM on an Y-adapter + Noctua NF-A14 PWM fans (FANA, FANB) in IPMI HD zone
Further readings:
- BMC IPMI User's Guide 1.1b (X10/X11/H11)
- X9 SMM IPMI User's Guide
- Supermicro Management Software download
- IPMI utilities overiew
- IPMICFG User's Guide (1.18)
- [STH forums] Reference Material: Supermicro X9/X10/X11 Fan Speed Control
- [TrueNAS forums] How To: Change IPMI Sensor Thresholds using ipmitool
- [TrueNAS forums] Script to control fan speed in response to hard drive temperatures
- [Pcfe's blog] Set fan thresholds on my Supermicro H11DSi-NT
- IPMI v2.0 specification by Intel
- ipmitool — CLI for managing IPMI-enabled devices
- smartmontools — S.M.A.R.T. monitoring tools for hard disks (
smartctl) - nvidia-smi — NVIDIA System Management Interface for GPU monitoring
- rocm-smi — AMD ROCm System Management Interface for GPU monitoring
- hwmon subsystem — hardware monitoring framework used for temperature readings
- coretemp — Intel CPU temperature monitoring
- k10temp — AMD CPU temperature monitoring
- drivetemp — SATA disk temperature monitoring, and its GitHub repository
- [GitHub] Kevin Horton's nas_fan_control
- [GitHub] sretalla's fork nas_fan control
- [GitHub] supermicro-fancontrol by jvdillion
- [GitHub] PureCypher's supermicro-fans
- [GitHub] luckylinux's supermicro-fan-control
- [GitHub] mrstux's hybrid_fan_control
Written with StackEdit.