Original Repo : https://github.com/remybar/alchemy-week1
Link next is the source (Alchemy University - Blockchain Developer bootcamp) Translated in kr by BigTide.Ludium https://www.loom.com/share/0d3c74890b8e44a5918c4cacb3f646c4
- 간단한 프론트엔드(클라이언트 리포에 포함)를 통한 상호 작용 체험
- 서버 / 클라이언트 설치
- ECDSA로 public key 통신
- making address - to give control over someone (optional)
- private key
- signature
- 웹을 안 해봤거나, react에 익숙하지 않다면 어려울 수 있습니다.
- VScode로 진행되나, 다른 IDE를 써도 상관없습니다
- 우리는 서버와 클라이언트를 동시에 실행시킬 거에요.
- 터미널 두개를 켠 다음, 하나에서는 클라이언트를, 다른 하나에서는 서버를 돌릴 겁니다.
- VScode 오른쪽 하단을 우클릭해서 new terminal을 클릭하고
- terminal을 우클릭해서 split terminal을 눌러주세요.

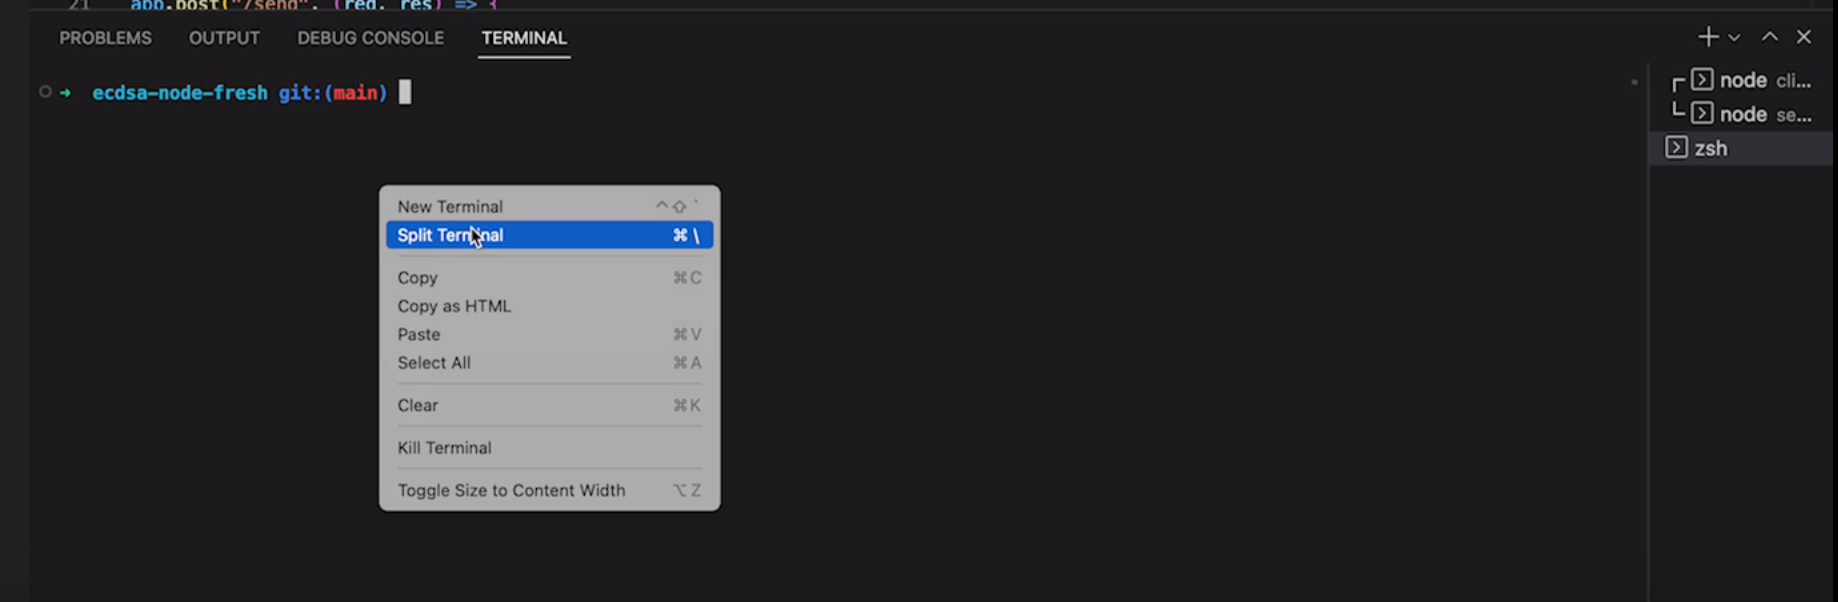
- 아래처럼 되면 성공입니다.
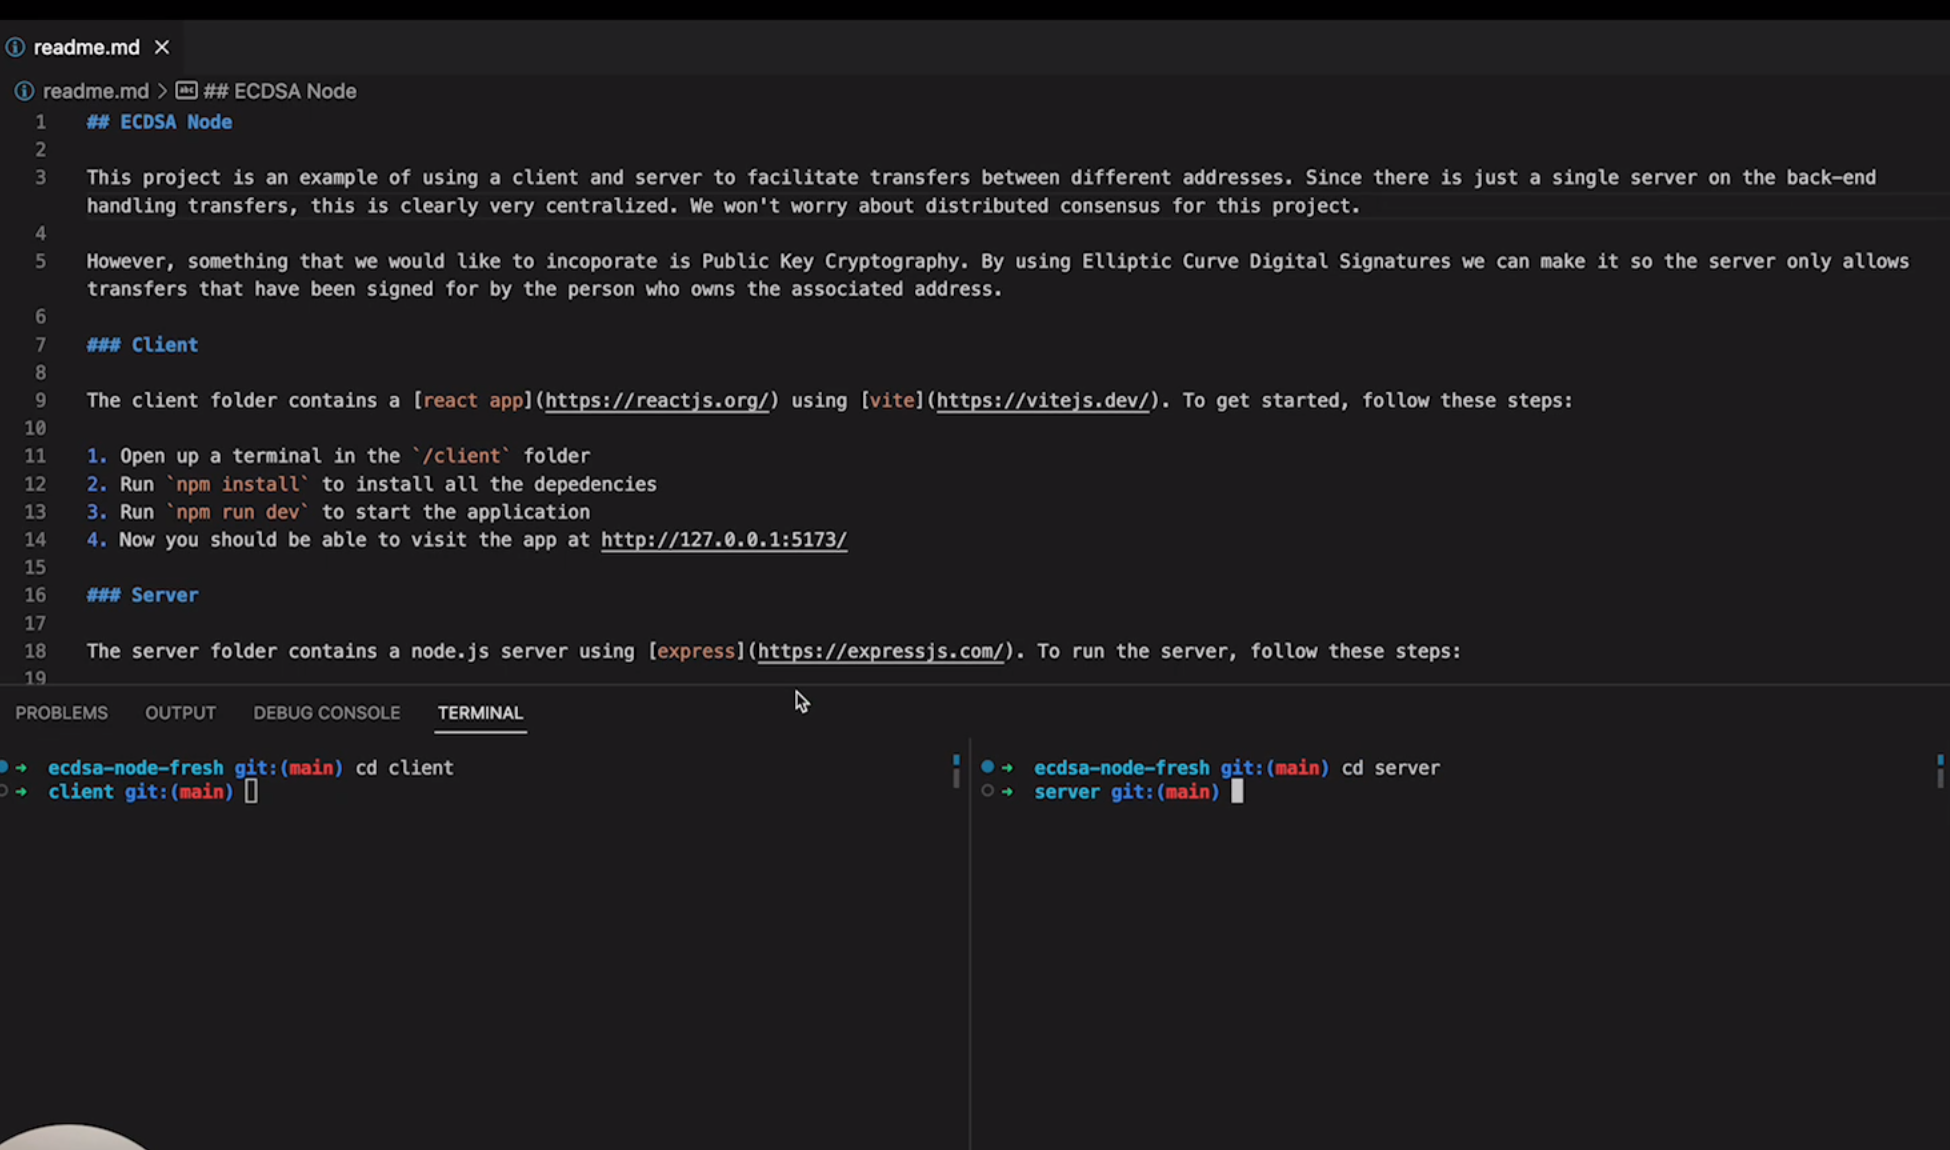
클라이언트 폴더는 vite를 사용해서 react app 을 켤 겁니다. 아래의 스텝을 시작해주세요.
/client폴더로 들어가서, vs code 터미널을 열어주세요 (이미 함)npm install을 터미널에 입력하여 디펜던시를 설치합니다npm run dev를 입력해서 실행하세요- http://127.0.0.1:5173/ 로 들어가서 실행되는지 확인합니다.
서버 폴더는 express를 사용한 node.js 서버입니다. 다음 단계로 서버를 실행하세요:
/server폴더에서 터미널 실행npm install을 터미널에 입력하여 디펜던시를 설치합니다node index를 입력해서 서버를 실행하세요.- Hint - nodemon 을 사용하면 서버에 변경이 있을 때 마다 자동으로 변경해 줍니다. instead of
nodeto automatically restart the server on any changes. - 기본값 서버 포트인 3042로
- Hint - nodemon 을 사용하면 서버에 변경이 있을 때 마다 자동으로 변경해 줍니다. instead of

-
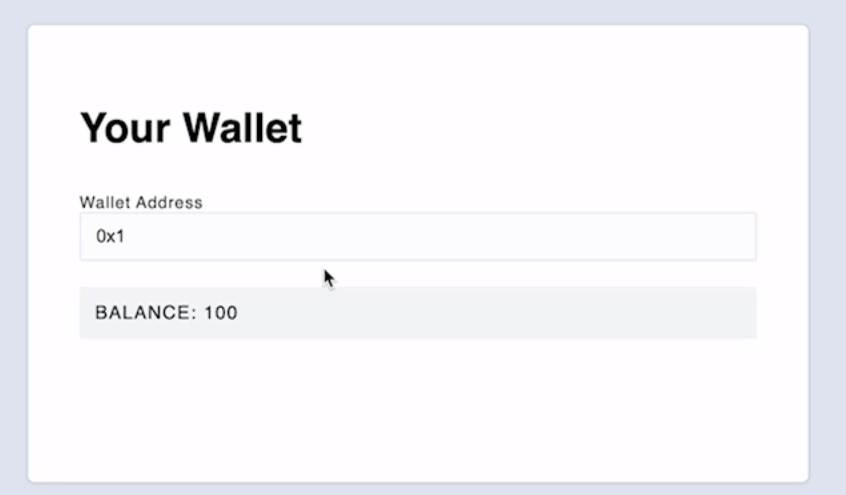
왼쪽에는 지갑 주소Wallet address를 입력할 수 있습니다.
- 지갑 주소 예시 (0x1)를 입력하여 계좌별 잔액을 확인해 보세요
-
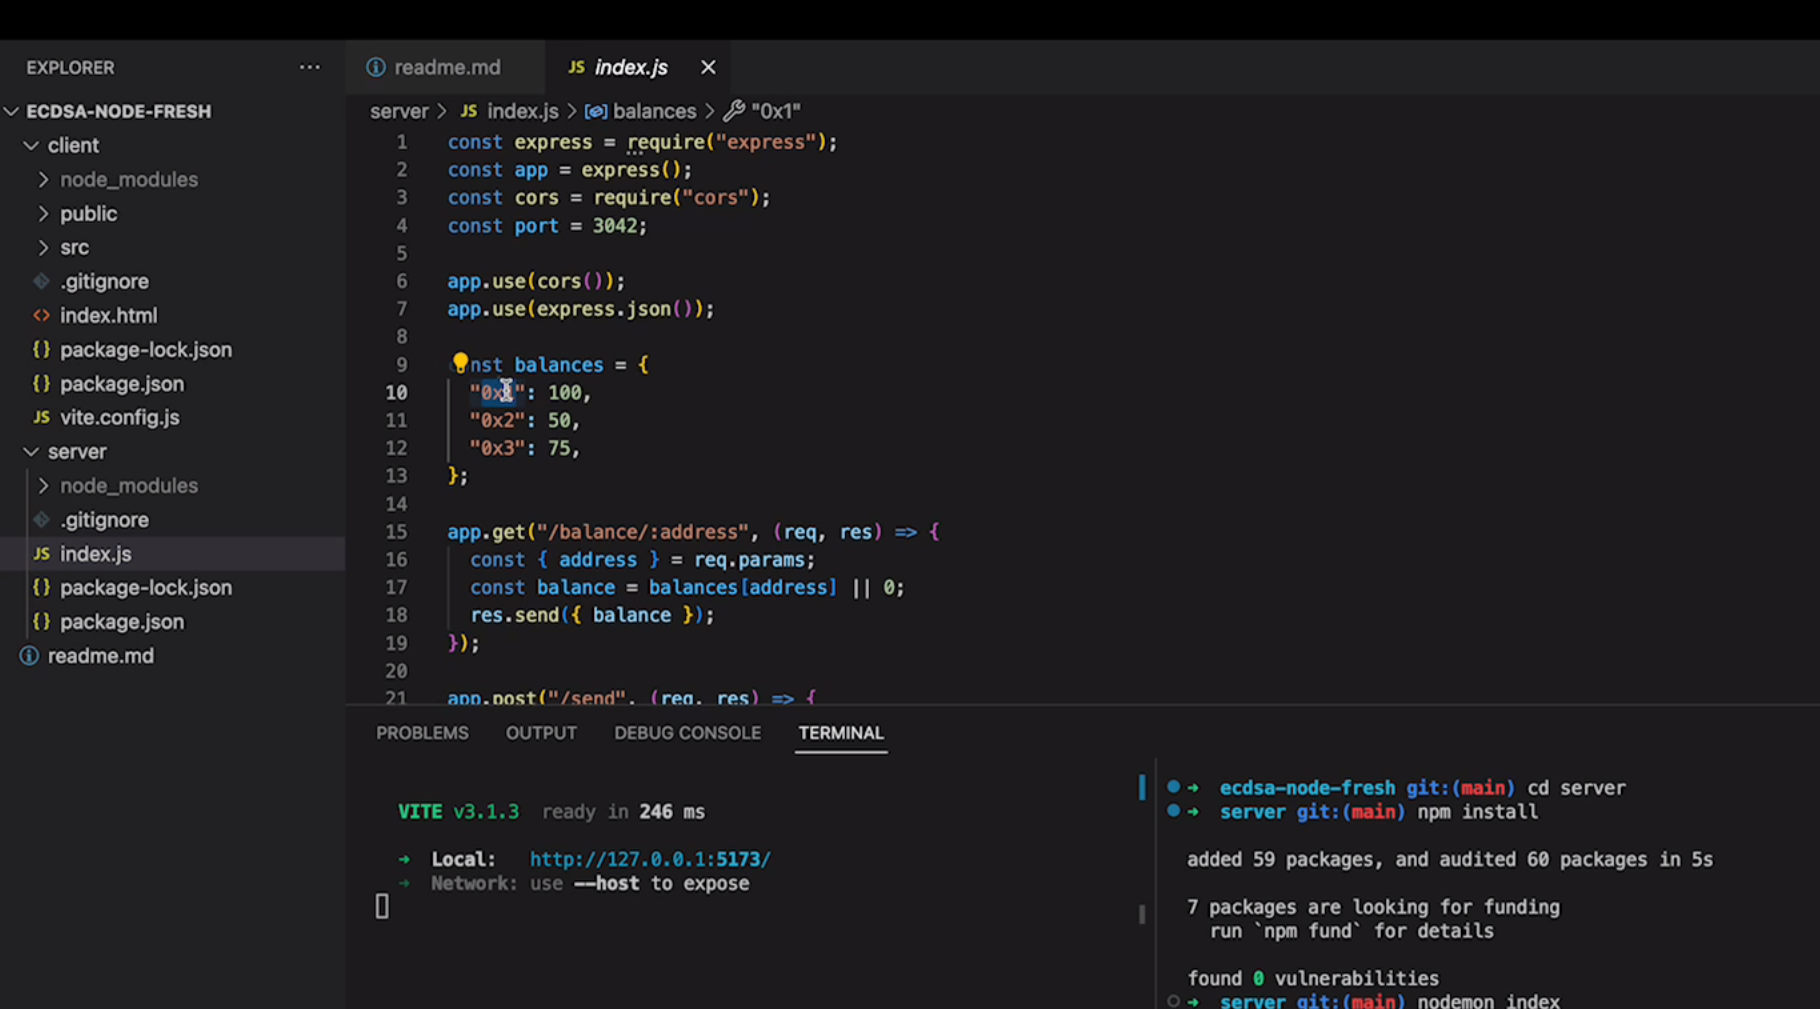
서버의 index.js 파일로 이동하면 0x1, 0x2, 0x3 총 3개의 지갑 주소가 미리 정의되어 있습니다.
-
지갑 주소 칸에 0x1을 치면, 주소의 잔액이 아래처럼 나오는걸 확인할 수 있습니다.
-
- 지갑 주소 예시 (0x1)를 입력하여 계좌별 잔액을 확인해 보세요
-
왼쪽에 지갑 주소를 입력한 상태에서 오른쪽에서 송금할 수 있습니다.
-
0x3 지갑에서, 0xabc로 20을 보내고 각각 계좌의 잔액을 확인해 보세요.
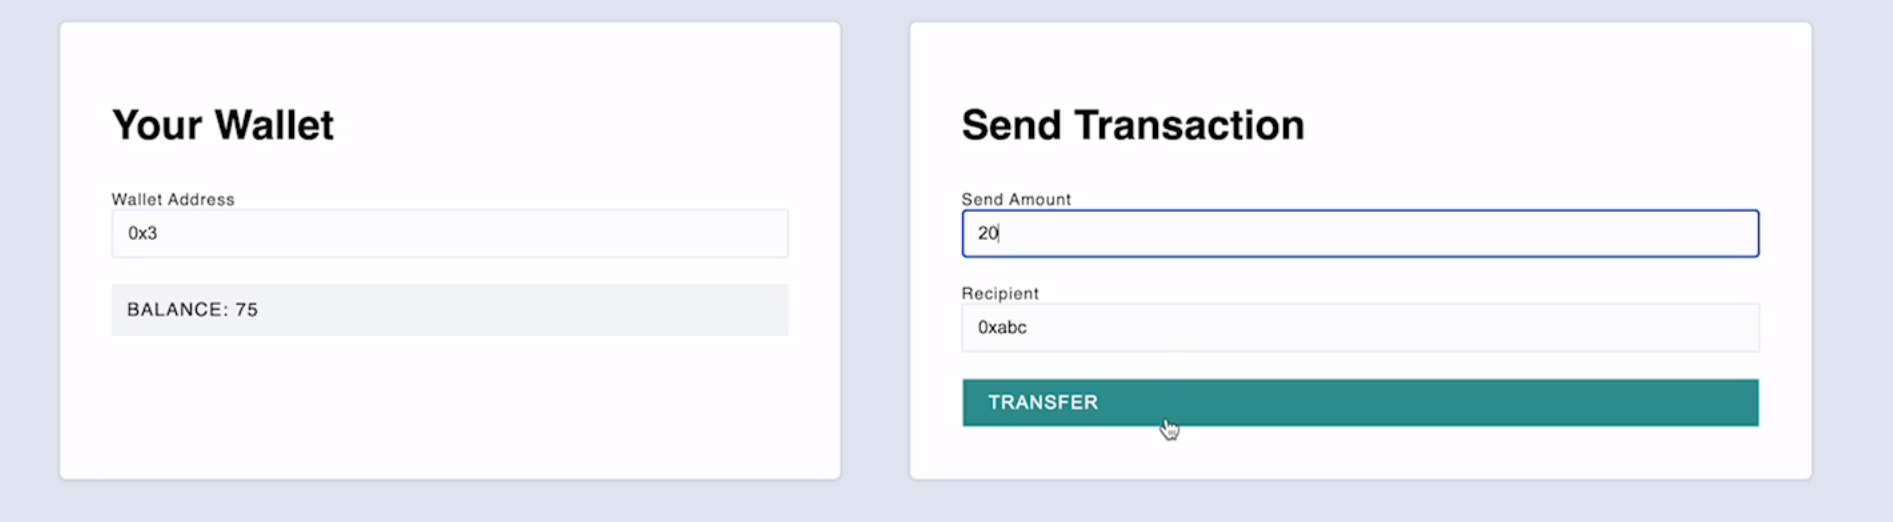
- 왼쪽에 지갑 주소 0x3을 입력합니다
- 오른쪽에 금액 20을 입력한 다음, transfer를 누릅니다.
-
- 잔액의 변화는 서버를 리스타트 하면 초기화됩니다
-
-
현재 상태의 문제는, 누구든지 아무 지갑에 접속해서 송금하는게 가능하다는 점입니다.
-
지갑의 소유자를 구분해서, 자기 지갑에서만 송금하게끔 권한을 제한해야 합니다.
-
public key cryptography를 이용해, 유저에게 소유권을 줄 수 있습니다.
- 유저에게 private key를 주고, 그 키를 통해서 송금할 수 있게 합니다.
That's the goal of this project, is to get it to a point where use public key cryptography so we can give out addresses to specific users and only they can move funds by telling the server that they would like to.
-
사용하는 라이브러리
- noble-secp256K1 로 private key를 recover하는 방법을 사용할 것
- ethereum-cryptography/keccak 도 사용할 것
-
서버와 클라이언트 양 쪽에, 이더리움 ECDSA 라이브러리를 설치합니다.
- 새로운 터미널 2개를 엽니다. 기존의 터미널 2개는 유지해둔 채로

-
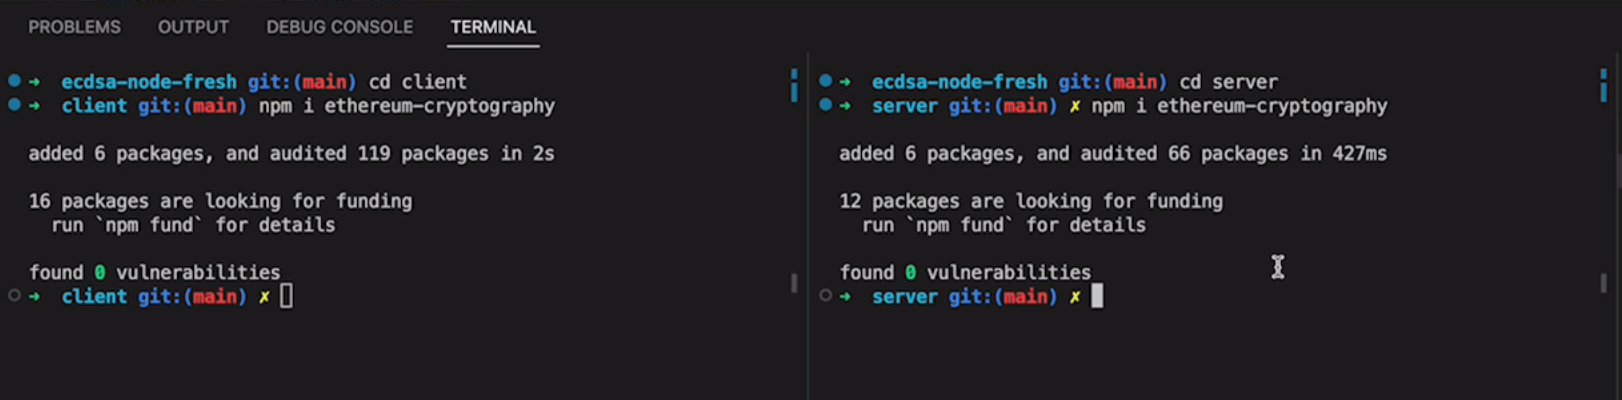
클라이언트와 서버 양쪽에 cryptography 라이브러리를 설치합니다
-
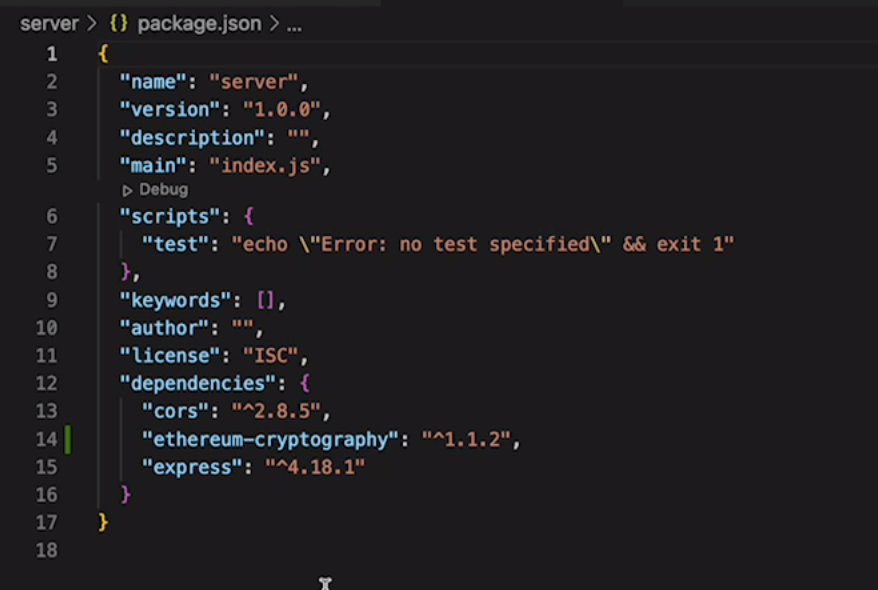
package.json이 업데이트가 되면 잘 된 것입니다.
-
권한 문제를 해결하기 위한 방법 하나는, 유저에게 private key를 요청한 다음 그걸로 메시지를 사인해서 서버로 전송하는 것입니다.
-
이건 잘못된 방법입니다. 그 이유를 생각해 보세요.
유저가 웹 어플리케이션에 프라이빗 키를 보내버리면, 그러면 그 계좌는 이제 그 사람들이 자기 마음대로 쓸 수 있습니다!
-
- 서버 폴더에 새 script를 폴더로 이동하면 generate.js라는 파일을 엽니다.
- 실행하면 private key가 하나 랜덤하게 생성되는 스크립트입니다.
- 이 generate 스크립트는 1회만 실행하면 됩니다.
node generate.js로 실행시키세요
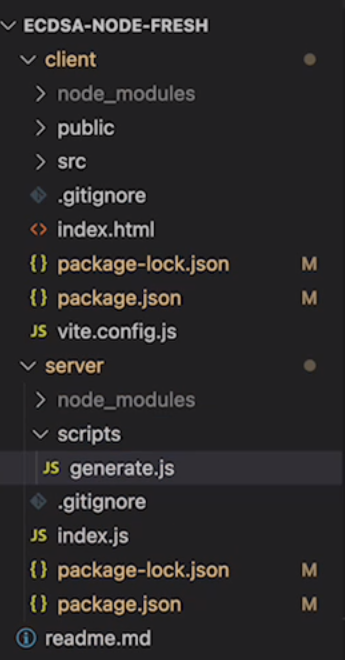
스크립트 내 코드입니다 (깃헙 리포)
/**
 * This script is used to generate private/public key pairs,
 * in order to initialize user wallets on the client side and
 * user address on the server side.
 */

/*
secp는 ethereum-cryptography/secp256k1 암호화 모듈입니다.
ethereum-cryptography/utils 의 toHex 메서드입니다.
byte array로 넘어온 정보를 16진수(hexadecimal)로 변환해서 보여줍니다.
우리가 일반적으로 보는 private key 모습입니다.
*/
const secp = require("ethereum-cryptography/secp256k1");
const { toHex } = require("ethereum-cryptography/utils");

const privateKey = secp.utils.randomPrivateKey();
const publicKey = secp.getPublicKey(privateKey);

console.log("private key : ", toHex(privateKey));
console.log("public key : ", toHex(publicKey));-
스크립트를 실행하면, 다음과 같이 private key가 랜덤하게 생성됩니다.
-
public key도 필요합니다.
- private key가 비밀번호처럼 본인만 아는 주소라면, public key는 이에 대응하는 ID와 같습니다.
- private key는 비공개지만, public key는 공개되어서 그 주소로 송금을 받거나 할 수 있습니다.
- private key가 있는 사람만이 그에 대응하는 public key를 제어할 수 있습니다.
-
Ethereum에서 주소를 만드는 방식은, public key에 keccak hash를 적용시킨 다음, 끝의 20자리를 가져오는 겁니다.
-
이 튜토리얼에서는 원하는 대로 하시면 됩니다. 끝의 20자리를 써도 되고, public key 전체를 사용해도 됩니다.
-
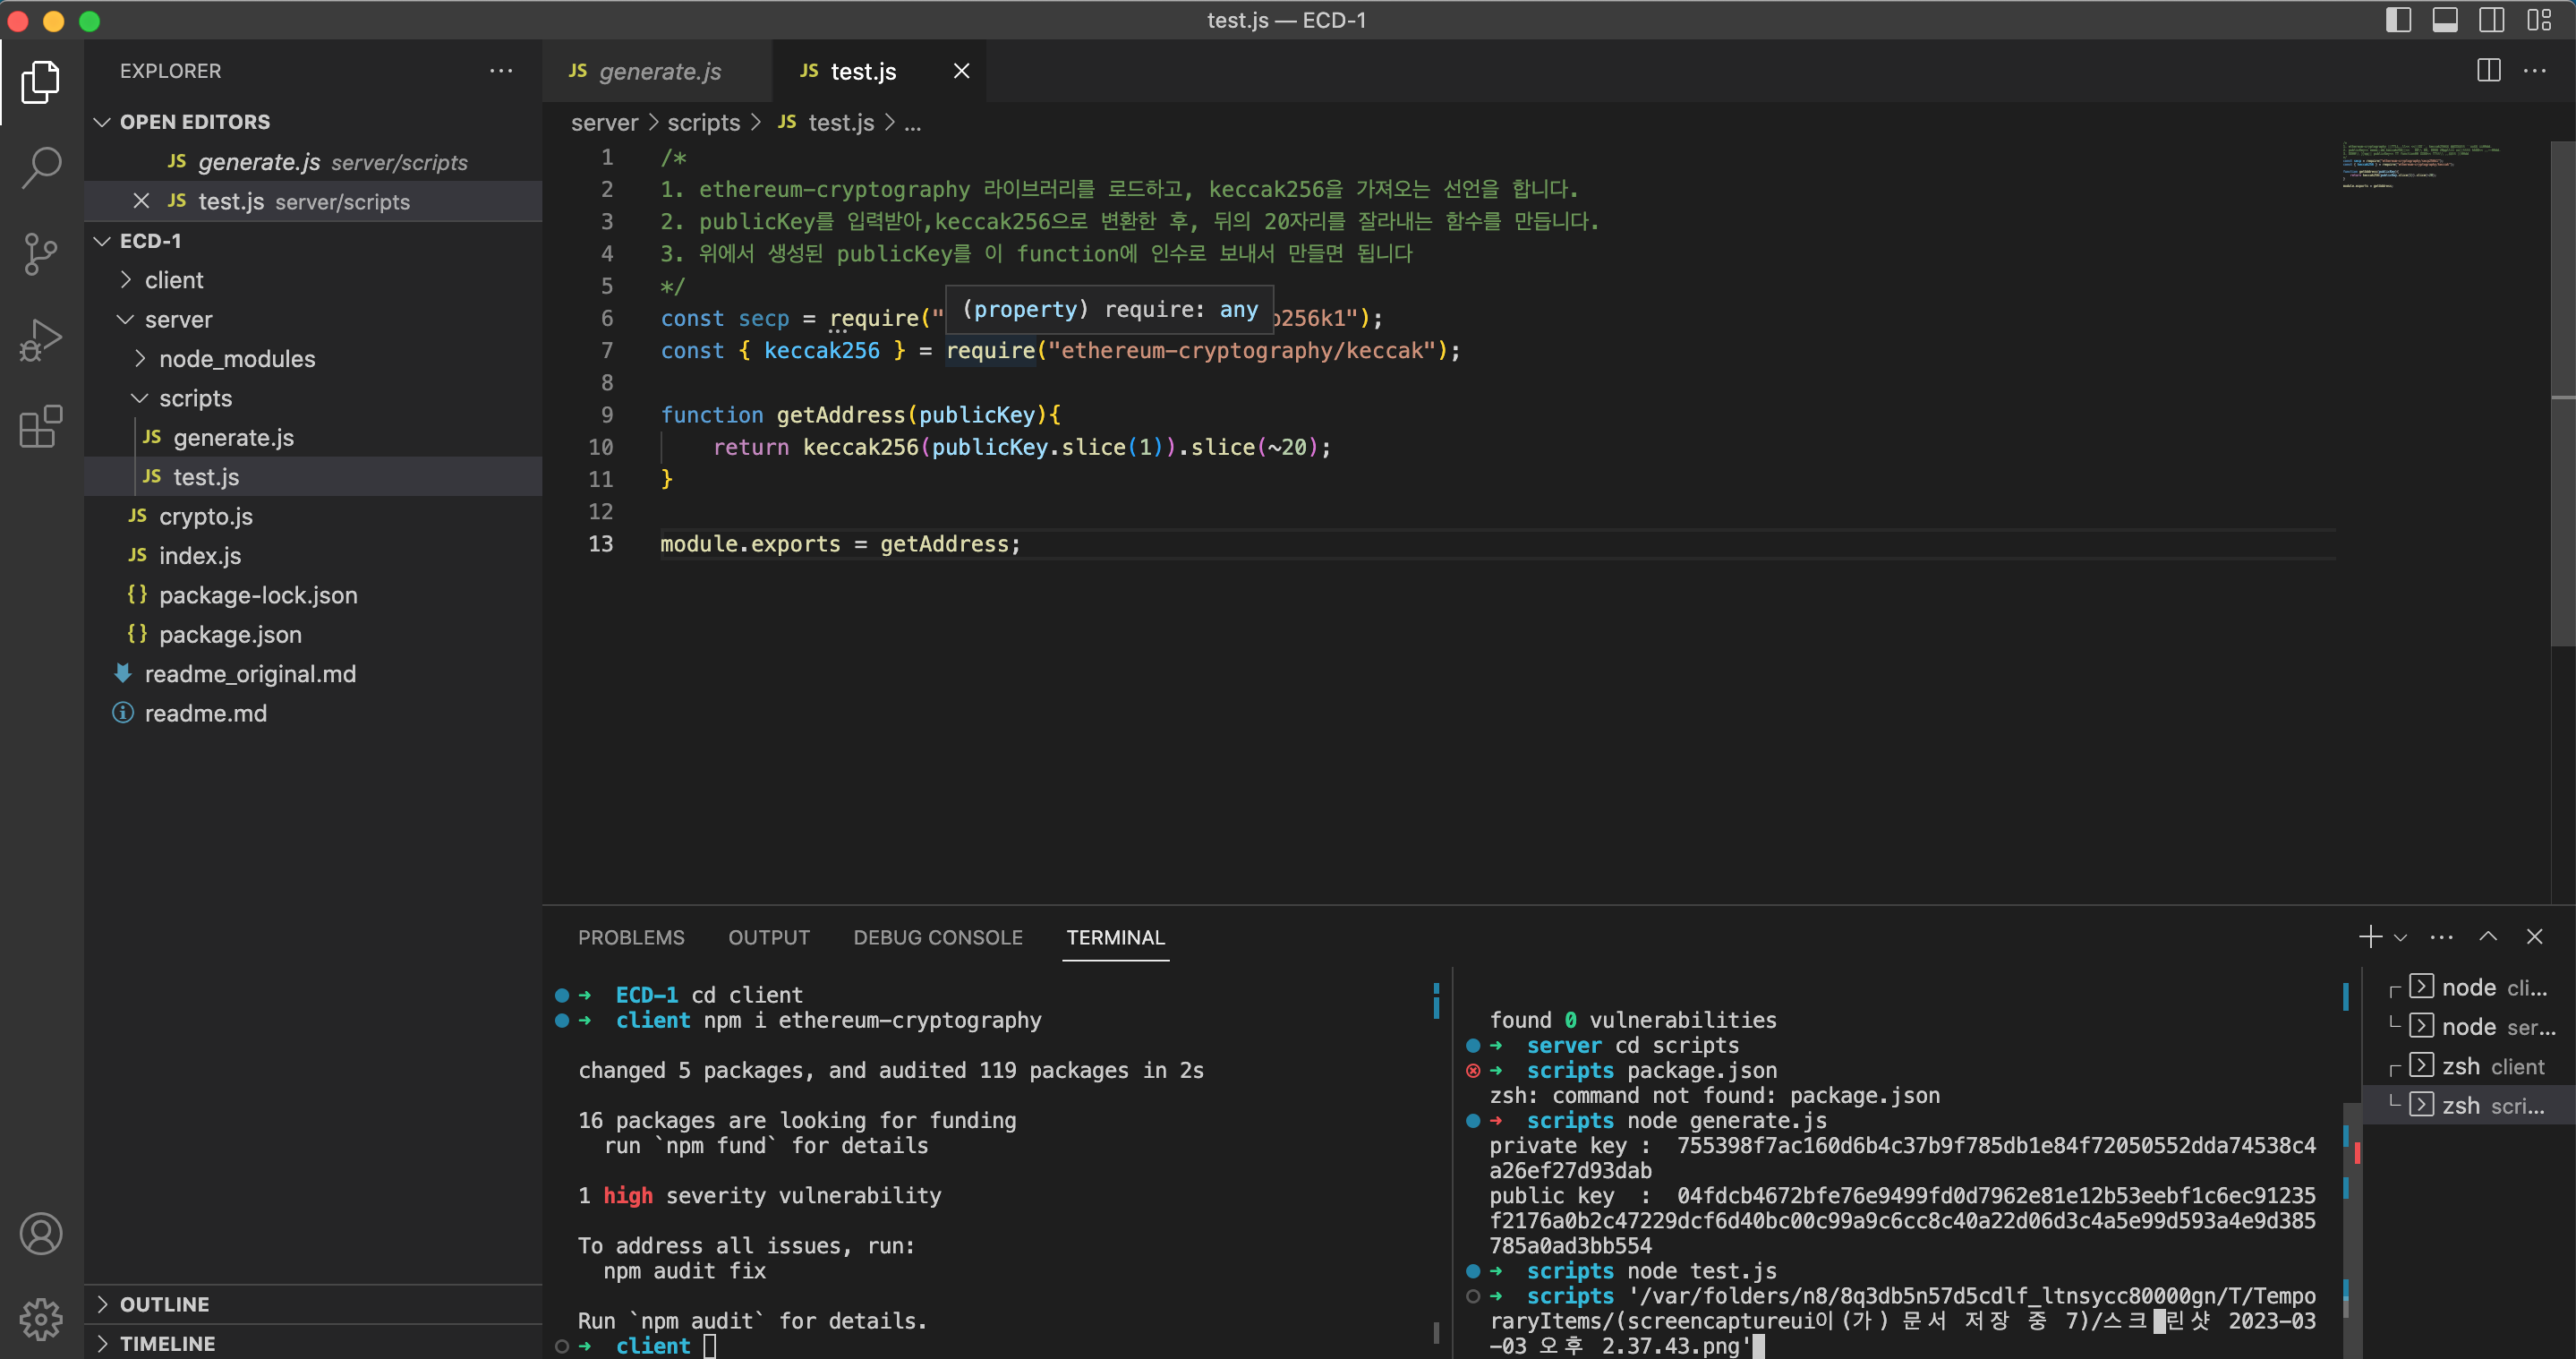
Q. public key에 keccak hash를 적용한 다음, 20자리를 잘라서 주소로 만들어 보세요.
/*
1. ethereum-cryptography 라이브러리를 로드하고, keccak256을 가져오는 선언을 합니다.
2. publicKey를 입력받아,keccak256으로 변환한 후, 뒤의 20자리를 잘라내는 함수를 만듭니다.
3. 위에서 생성된 publicKey를 이 function에 인수로 보내서 만들면 됩니다
*/
const secp = require("ethereum-cryptography/secp256k1");
const { keccak256 } = require("ethereum-cryptography/keccak");

function getAddress(publicKey){
	return keccak256(publicKey.slice(1)).slice(~20);
}
-
-
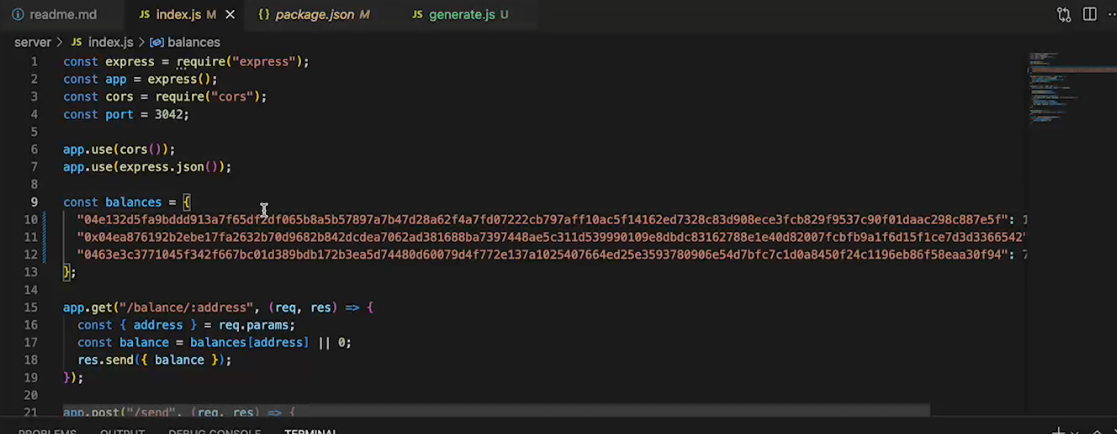
3개의 public key를 만들었으니, 서버 파일에서 처음 준 주소 0x1 등을 이 키로 바꿔줍시다.
-
node generate.js를 두번 더 실행해서, public key를 두개를 더 만듭니다.
-
그 public key를 복사합니다
-
const balances의 string에다가 그 public key를 복사 붙여넣기 합니다.
-
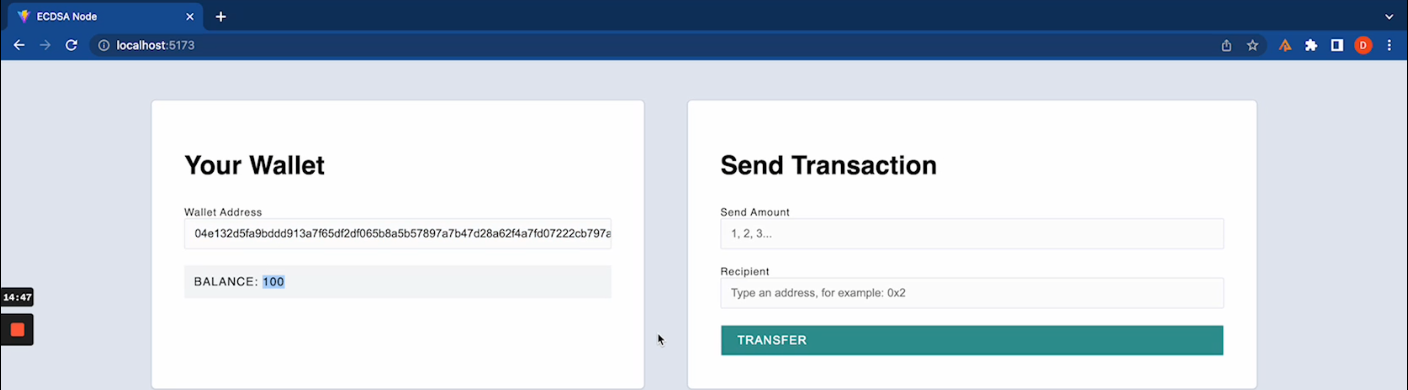
클라이언트에서 새로고침을 하면, 키가 바뀌어 있는것을 알 수 있습니다.
-
(nodemon을 안 썼을 경우에는, 서버를 한번 껐다 켜야됩니다)
-
Public Key는 성공적으로 만들었지만, 아직 그것을 활용하지는 않은 상태입니다.
-
여전히 우리 앱에서는 지갑 주소를 알기만 하면 돈을 주고 받을 수 있죠.
- 즉, security 문제가 해결되지 않은 상태입니다.
-
앱이 거래transaction마다 사용자의 의도intention을 확인하고, 그것을 sign으로 명시하게끔 해서 권한 제어를 이룰 수 있습니다.
then the server can say, oh, okay, this is the only person who could have possibly sent this message and so therefore I know it's authorized, right?
-
시작으로는 (잘못된 방법이지만, 교육을 위해) private key를 입력해서 권한을 승인하는 방법을 보겠습니다.
- 앞으로 절대로 private key를 요청하거나 알려주면 안됩니다!
-
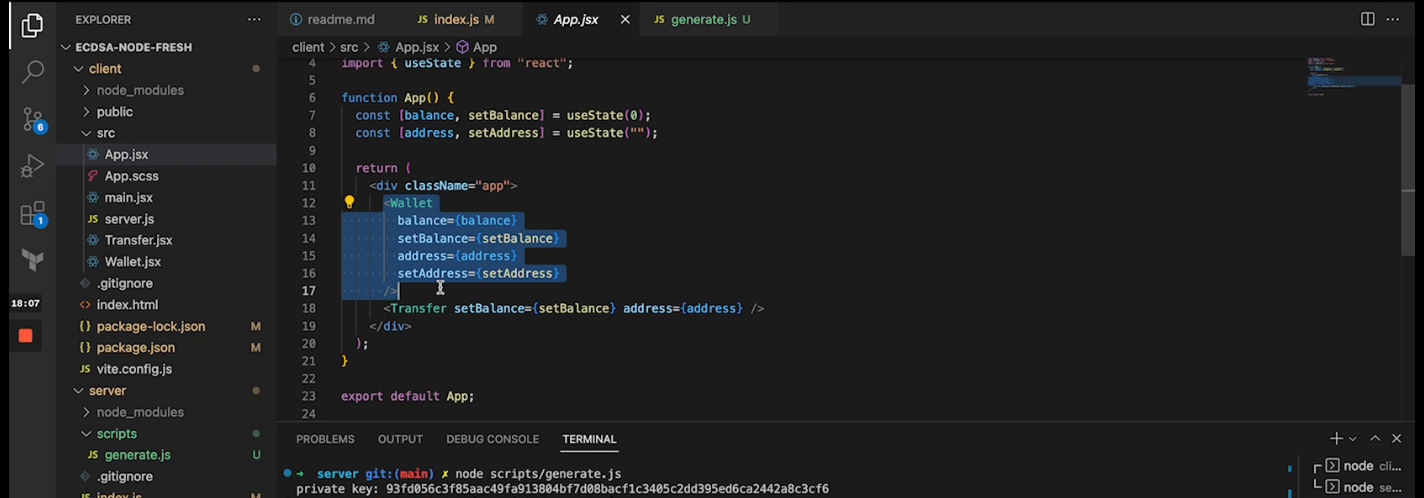
/client/src/app.jx를 확인해 봅시다.
import Wallet from "./Wallet";
import Transfer from "./Transfer";
import "./App.scss";
import { useState } from "react";

function App() {
  const [balance, setBalance] = useState(0);
  const [user, setUser] = useState("");

  return (
    <div className="app">
      <Wallet
        balance={balance}
        setBalance={setBalance}
        user={user}
        setUser={setUser}
      />
      <Transfer setBalance={setBalance} user={user} />
    </div>
  );
}

export default App;
-
여기에서 wallet과 transfer는 각각 화면의 왼쪽, 오른쪽 콤포넌트를 담당하고 있습니다. 하나를 지우고 새로고침을 해 보면 화면 왼쪽/오른쪽이 사라지는걸 볼수 있습니다.
-
이 둘은 상태state를 공유합니다.
-
상태란, address가 Wallet쪽에 입력되면, 오른쪽의 Transfer 콤포넌트도 그 상태를 공유받아야 합니다. 그래야 그 주소로 돈을 보낼 수 있으니까요.
-
이때 공유되는 address와 balance 등의 정보를 react 프레임워크에서는 상태state라고 하고, 최상단의 app이 이 상태를 가지고 있으며, 하위 콤포넌트인 wallet과 transfer에 이 정보를 알려줍니다 (=상태를 공유합니다)
-
우리가 할 일은, 우리의 public key도 상태 공유에 포함시키는 것입니다.
-
Q. app.jsx와 wallet.jsx 코드에 private key 상태 공유를 추가해 봅니다
//app.jsx
import Wallet from "./Wallet";
import Transfer from "./Transfer";
import "./App.scss";
import { useState } from "react";

function App() {
  const [balance, setBalance] = useState(0);
  const [user, setUser] = useState("");

  return (
    <div className="app">
      <Wallet
        balance={balance}
				privateKey = {privateKey}
				setPrivateKey = {setPrivatekey}
        setBalance={setBalance}
        user={user}
        setUser={setUser}
      />
      <Transfer setBalance={setBalance} user={user} privateKey = {privateKey} />
    </div>
  );
}

export default App;
//wallet.jsx
//bold 된 것이 github과 다른 부분
import server from "./server";
import localWallet from "./LocalWallet";

**import * as secp from "ethereum-cryptography/secp256k1"
import * as { toHex } from "ethereum-cryptography/utils";**

function Wallet({ user, setUser, balance, setBalance, **privateKey, setPrivateKey** }) {
  async function **onChange**(evt) {
    const privateKey = evt.target.value;
    **setPrivateKey**(privateKey);
		**const address = toHex{secp.getPublicKey(privateKey)}
		setAddress(address);**
    if (address) {
      const {
        data: { balance },
      } = await server.get(`balance/${address}`);
      setBalance(balance);
    } else {
      setBalance(0);
    }
  }

  return (
    <div className="container wallet">
      <h1>Your Wallet</h1>
      <label>
        **Private Key
				<input placeholder = "Type in a private key" value = {privateKey} onchange = {onchange}></input>**
      </label>
      <div className="balance">Balance: {balance}</div>
			<div className="balance">Address: {address.slice(0,10)}</div>
    </div>
  );
}

export default Wallet;
-
wallet.jsx의 다음 부분을 바꾸면 address 대신 public key를 물어보게 바꿀 수 있습니다.
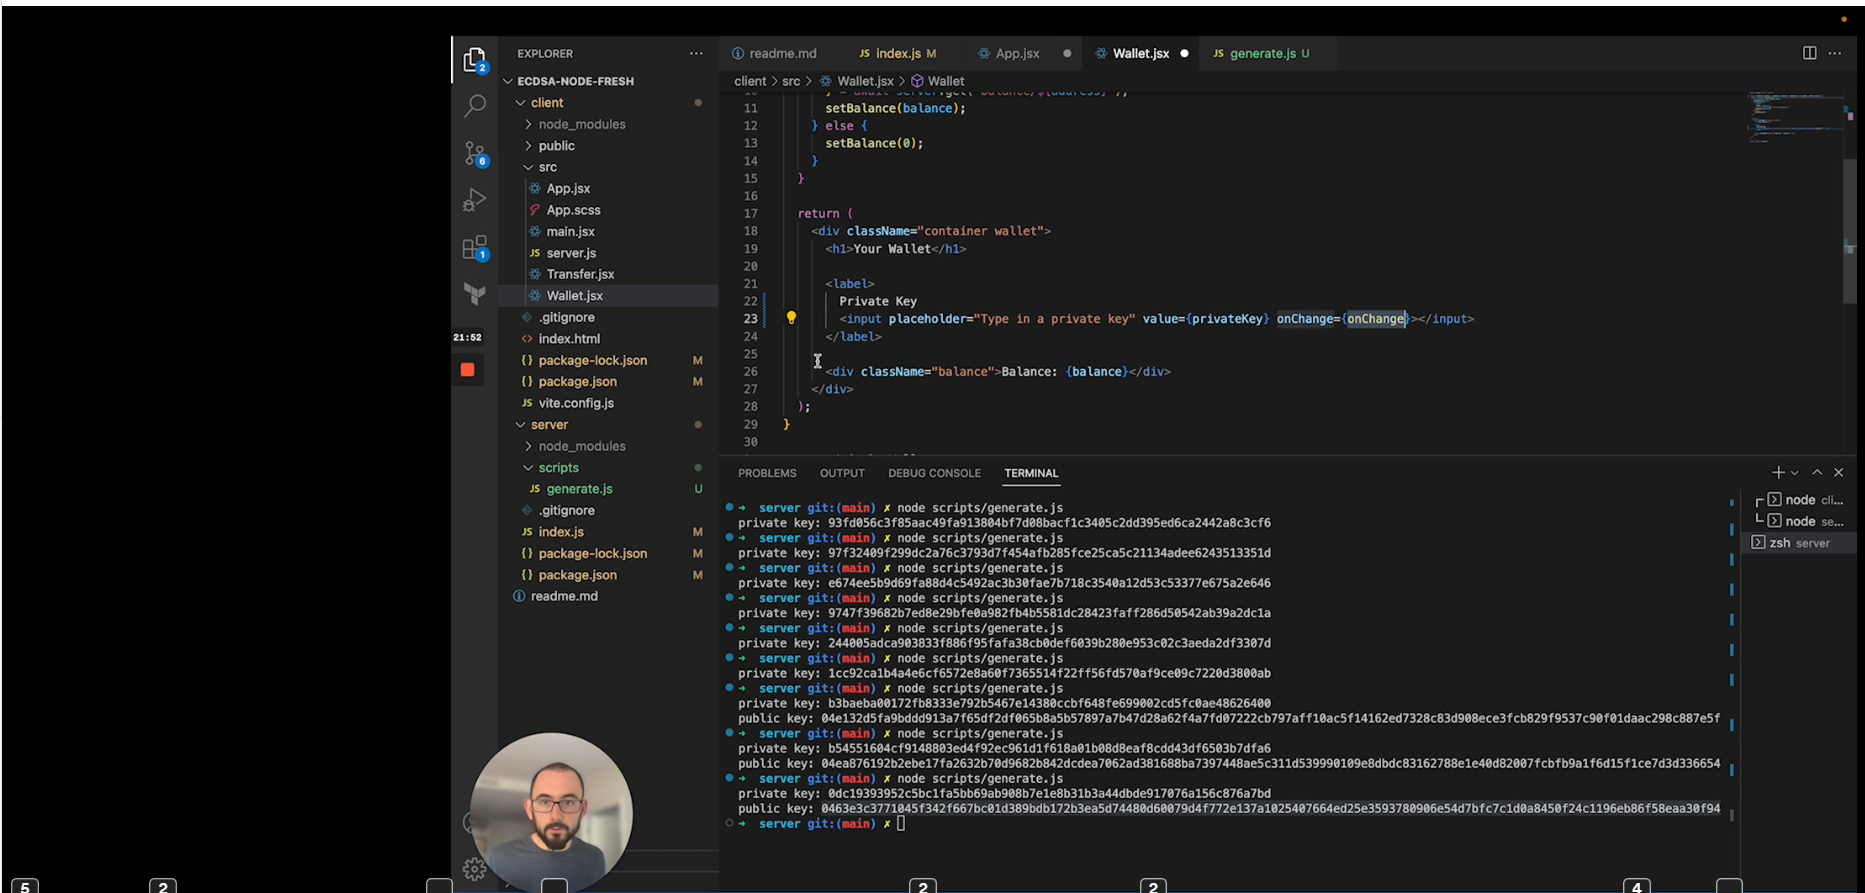
-
-
- Q. 업로드된 코드를 읽어본 후, 옵션 1의 결과와 어떻게 다른지 대조해 보세요.