


This is a custom component for Home Assistant to integrate Philips Bluetooth-enabled shavers.
The integration connects to your shaver via Bluetooth Low Energy (BLE) to provide status, usage, and advanced telemetry data. It automatically detects the capabilities of your specific model during setup to only show relevant entities.

Two connection methods are supported:
- Direct Bluetooth — connects from the HA host's Bluetooth adapter. Event-driven: detects when the shaver wakes up via BLE advertisements, then establishes a persistent live connection.
- ESP32 BLE Bridge — an ESP32 running ESPHome acts as a wireless BLE relay. Ideal when the shaver is out of Bluetooth range of the HA host.
Note
The standard ESPHome bluetooth_proxy is not currently supported — it does not handle the shaver's LE Secure Connections pairing. Use the dedicated ESP32 BLE Bridge component (Option B) instead, which can run a bluetooth_proxy for other BLE devices alongside it.
See Configuration for setup instructions.
- Tested Models
- Lovelace Card
- Community
- Supported Languages
- Features
- Prerequisites
- Installation
- Configuration
- Example Automations
- Troubleshooting & Caveats
- BLE Protocol
- Screenshots
| Model | Direct BLE | ESP32 Bridge | Tested by |
|---|---|---|---|
| Shaver Series 7000 | |||
| S7886 | ✅ | Community (#5) | |
| S7887 | ✅ | Community (forum) | |
| S7788 | ✅ | Community (#13) | |
| Shaver Series 9000 | |||
| S9986 | ✅ | Community (#7) | |
| S9987 | ✅ | Community (#9) | |
| Shaver Series 9000 Prestige (i9000) | |||
| XP9201 | ✅ | ✅ | Maintainer |
| XP9202 | ✅ | Community (#11) | |
| XP9400 | ✅ | ✅ | Community (#1, #3) |
| XP9402 | ✅ | Community (#11) | |
| XP9405 | ✅ | Community (forum) | |
| OneBlade 360 | |||
| QP4530 | ✅ | ✅ | Maintainer |
Other BLE-enabled Philips shavers and groomers using the same GATT services may also work. The integration auto-detects available services and capabilities during setup — entities are only created for features your device supports. If your model works, please let me know so I can add it to the list!
A dedicated dashboard card — the Philips Shaver Card — ships with this integration. No separate installation and no dashboard resource setup needed: the integration registers the card automatically (you'll see one entry under Settings → Dashboards → Resources, which it keeps up to date). Add it via the dashboard card picker or in YAML:
type: custom:philips-shaver-card
device_id: <your-device-id>
title: My Shaver   # optional, defaults to the device's name
show_model: true   # optional, show model number as subtitle (default: true)
The card automatically switches between standby, shaving, charging, and cleaning modes with live pressure gauge, battery status, and session stats.
Note
Upgrading from the standalone card? The card was previously distributed separately as philips_shaver_card. If that copy is still installed, remove it — in HACS uninstall Philips Shaver Card (this also removes the dashboard resource), or delete the manually added resource under Settings → Dashboards → Resources. A leftover standalone copy can shadow the bundled, up-to-date card; the integration raises a repair issue if it detects one. Your dashboards keep working unchanged — the card type stays custom:philips-shaver-card. Card development continues in that repository; releases ship here.
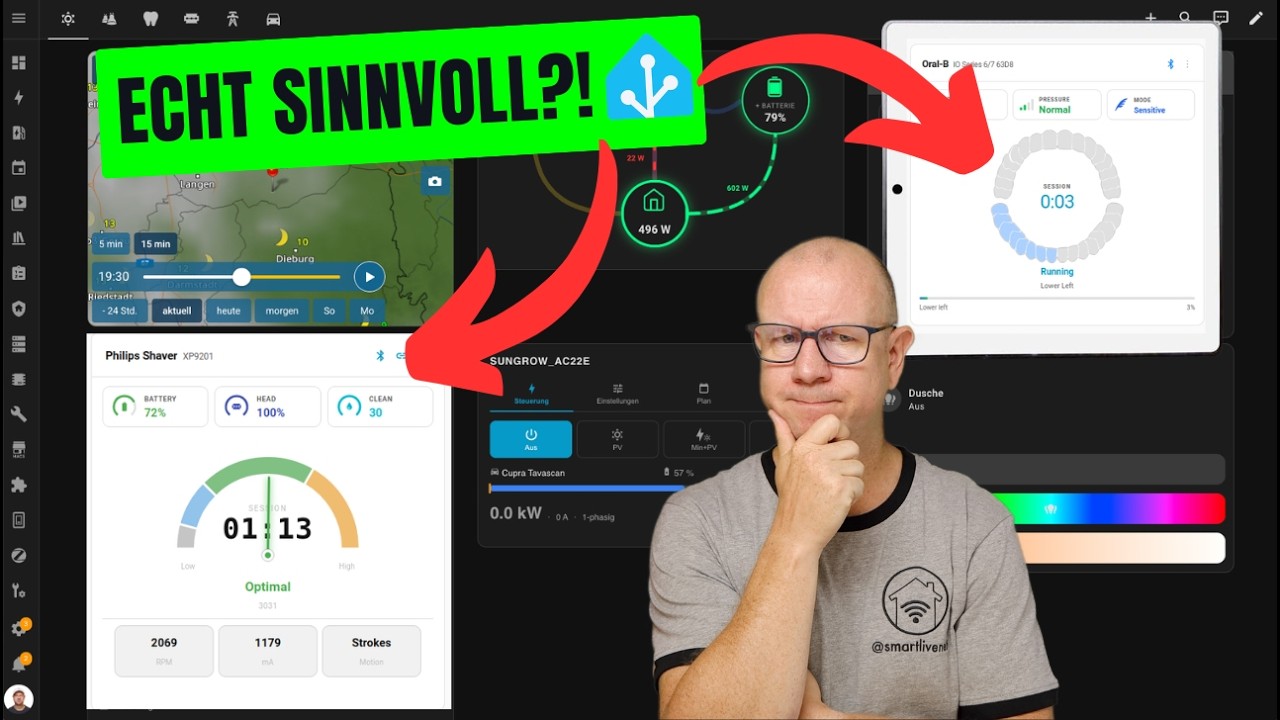
Smartes Badezimmer? So hilft dir ein Shelly Wall Display beim Zähneputzen & Rasieren! — Video by @smartmatic showing the integration and card on a Shelly Wall Display with XP9405 and ESP32 Bridge (German)
| Language | Code | Comment |
|---|---|---|
| English | en | |
| Deutsch | de |
Setup dialogs, entity names and entity states all follow the language configured in your Home Assistant instance (per-user profile setting). This includes binary sensor states, which otherwise fall back to English. If your language is not yet supported, it falls back to English. Contributions for additional languages are welcome — copy custom_components/philips_shaver/translations/en.json, translate the values and open a pull request.
This integration creates a new device for your shaver and provides the following entities based on your device's hardware:
| Entity | Type | Description |
|---|---|---|
| Activity | Sensor | Current detailed status (Off, Shaving, Charging, Cleaning, Locked). |
| Shaving Mode | Select | Change the shaving intensity (e.g., Sensitive, Normal, Intense, Custom, Foam). |
| Battery Level | Sensor | The current battery charge level (%). |
| Travel Lock | Binary Sensor | Indicates if the travel lock is active. |
| Charging | Binary Sensor | Indicates if the shaver is currently charging. |
| Light Ring | Switch | Enable or disable the pressure coaching light ring. |
| Handle Load Type | Sensor | Detected head attachment (Shaving Heads, Trimmer, Styler, Brush, etc.). |
| Motion | Sensor | Live motion feedback (No Motion, Small Circles, Large Strokes). |
| Entity | Type | Description |
|---|---|---|
| Pressure Value | Sensor | Live pressure data from the sensor. |
| Pressure State | Sensor | Categorized feedback (Too Low, Optimal, Too High). |
| Pressure Light Ring | Light | Configure the LED ring colors for various pressure states. |
| Light Ring Brightness | Select | Adjust the pressure light ring brightness (High, Medium, Low). |
| Motor Speed | Sensor | Current motor speed in RPM (e.g., ~2200 RPM). |
| Motor Current | Sensor | Current motor power consumption in mA. |
| Entity | Type | Description |
|---|---|---|
| Speed | Sensor | Live grooming speed (0–200 raw). |
| Speed Verdict | Sensor | Real-time feedback (Optimal, Too Slow, Too Fast). Computed locally from speed and zone thresholds. |
| Entity | Type | Description |
|---|---|---|
| Last Session Duration | Sensor | Duration of the last shaving session in seconds. |
| Total Motor Runtime | Sensor | Cumulative motor runtime in minutes. |
| Device Age | Sensor | Firmware-reported device age in seconds. Static on most models (disabled by default). |
| Days Since Last Used | Sensor | Days elapsed since the last use. |
| Charge Cycles | Sensor | Total number of charge cycles. |
| Remaining Shaves | Sensor | Estimated number of shaves remaining based on battery level and usage history. |
| Number of Uses | Sensor | Total number of operational uses. |
| Head Remaining | Sensor | The remaining life of the shaver head (%). |
| Blade Replacement | Button | Confirm a blade replacement — resets the head remaining counter to 100%. |
| Cleaning Progress | Sensor | Progress of the cleaning cycle in % (if applicable). |
| Cleaning Cycles | Sensor | Total number of cleaning cycles. |
| Cleaning Cartridge Remaining | Sensor | Estimated remaining cleaning cartridge uses (accounts for fluid evaporation). |
| Reset Cleaning Cartridge | Button | Reset the cleaning cartridge counter after inserting a new cartridge. |
| Entity | Type | Description |
|---|---|---|
| Last Seen | Sensor | Time in minutes since the device was last reachable. |
| Signal Strength | Sensor | Bluetooth signal strength (dBm, direct BLE only). |
| Adapter | Sensor | Bluetooth adapter currently carrying the connection (e.g. hci0, <esp_name>). |
| Adapter Type | Sensor | Classification of the active transport: direct_ble / esp_bridge / stock_proxy / unknown. |
| BLE Status | Binary Sensor | BLE connection status to the shaver. |
| Bridge Status | Binary Sensor | ESP32 bridge online status (ESP bridge only). |
| Bridge Version | Sensor | ESP bridge firmware version (ESP bridge only). |
| Bridge Firmware | Update | Passive notification when newer ESP bridge firmware is available, with cumulative release notes. Informational only — there's no install button; reflash via ESPHome (ESP bridge only). |
| Bridge Last Boot | Sensor | Timestamp of the ESP bridge's last boot — useful to detect ESP reboots (ESP bridge only). |
| Firmware | Sensor | Installed firmware version (disabled by default). |
| Model Number | Sensor | Device model number (disabled by default). |
- A compatible Philips Shaver (see Tested Models above).
- Either a Home Assistant instance with the Bluetooth integration enabled and a working Bluetooth adapter, or an ESP32 running the BLE bridge component.
- The shaver supports only one active connection at a time — it must be unpaired from your phone, any manufacturer app (GroomTribe / OneBlade), and from the device itself before Home Assistant can connect.
This integration is available in the default HACS store — just click the button below, or search HACS for "Philips Shaver".

Then restart Home Assistant.
Don't have HACS yet? Follow the HACS installation guide first.
Manual installation
- Copy the
custom_components/philips_shaverdirectory from this repository into your Home Assistantconfig/custom_components/folder. - Restart Home Assistant.
The integration supports two connection methods:
| Method | Best for | |
|---|---|---|
| Option A | Direct Bluetooth | HA host is within Bluetooth range of the shaver (typically 5–10 m / 15–30 ft, less through walls) |
| Option B | ESP32 BLE Bridge | Shaver is out of range — a small ESP32 device placed near the shaver relays data over WiFi |
| ❌ | bluetooth_proxy |
Not currently supported — the standard ESPHome Bluetooth Proxy does not handle the shaver's LE Secure Connections pairing. Use Option B (the dedicated bridge component) instead, which can run a bluetooth_proxy for other BLE devices alongside it. |
Important
The shaver must be fully unpaired (from your phone and the device itself) before connecting to Home Assistant. Follow the Unpairing Guide for step-by-step instructions.
Tip
Want to see the setup dialogs before you start? The interactive config-flow walkthrough lets you click through every screen of the setup — normal path, conditional branches, errors and aborts — with example data (HTML source).
- Ensure the shaver is turned on.
- Navigate to Settings > Devices & Services.
- The shaver should appear under Discovered — click Configure.
- If not discovered automatically, click + Add Integration, search for "Philips Shaver", and enter the MAC address manually.
- Click Submit. The integration connects and pairs automatically.
Tip
Automatic pairing works out of the box on Home Assistant OS and any Linux system with BlueZ. Pairing, trusting, and stale bond removal are handled automatically via D-Bus — no terminal commands needed. If pairing times out repeatedly on a cheap USB dongle, see Known Issues.
Manual Pairing (Fallback for Docker, macOS, etc.)
On systems without D-Bus, the integration will show instructions for manual pairing via terminal instead. You have two options:
bash /config/custom_components/philips_shaver/scripts/pair.shThe script scans for nearby Philips devices, lets you choose which one to pair, and handles the bluetoothctl agent setup required for LE Secure Connections.
You can also pair a specific device directly:
bash /config/custom_components/philips_shaver/scripts/pair.sh AA:BB:CC:11:22:33-
Start the Bluetooth control tool:
bluetoothctl
-
Register the pairing agent (required for LE Secure Connections):
agent KeyboardDisplay
default-agent
-
Start scanning to find your shaver. It will appear as "Philips XP9201" or similar. Note down its MAC Address (e.g.,
AA:BB:CC:11:22:33).scan on # ... Wait for the shaver to appear and note the address. scan off -
Pair and trust the device:
pair AA:BB:CC:11:22:33
trust AA:BB:CC:11:22:33
exit
After manual pairing, return to the integration setup dialog and click Submit to retry.
If your Home Assistant host is too far from the shaver for a direct Bluetooth connection, you can use an ESP32 as a wireless BLE bridge. The ESP32 connects to the shaver and relays data to HA over WiFi.
This is not a standard ESPHome Bluetooth Proxy — it is a custom component that handles the shaver's LE Secure Connections pairing and provides full read/write/subscribe access to all GATT characteristics.
A single ESP32 can bridge multiple devices (e.g. a shaver and an OneBlade simultaneously).
Note: This option requires basic ESPHome knowledge (flashing firmware, editing YAML configs). If you're new to ESPHome, check out Getting Started with ESPHome first.
The bridge supports two pairing modes per philips_shaver: entry:
- Mode A — Fixed MAC (
ble_client_id:references able_client:block with the shaver's MAC). Pairing happens once, manually viapair.shfrom the host. Deterministic slot-to-shaver mapping; ideal when you already know the MAC. - Mode B — Auto-Discovery (no
ble_client_id:, nomac_address:). The bridge scans for the universal Philips Shaver Platform Service UUID, bonds to the first match via the HA setup dialog's pair-mode flow, and persists the bonded MAC in NVS. No terminal access needed; ideal for Bluetooth-Proxy-only setups or when you want to swap shavers without re-flashing.
For the complete setup guide and Mode A vs Mode B comparison, see ESP Bridge Setup Guide and esphome/README.md.
See AUTOMATIONS.md for ready-to-use automation examples, including low battery alerts, smart plug charging, usage reminders, and maintenance notifications.
- Pairing fails: The shaver must be unpaired from both your phone's Bluetooth settings and from the device itself. Unpairing in the app alone is not enough — see the unpairing instructions for your model. This is the most common cause of pairing failures.
- Shaver ignores all pairing requests: If the shaver no longer pairs with anything — not even the official Philips app — a 30-second factory reset usually recovers it. See the Unpairing Guide.
- Pairing times out on one adapter but works on another: Some cheap USB Bluetooth dongles cannot complete the SMP bonding handshake at all — see Known Issues.
- Connection Conflict: If the integration fails to set up, ensure no smartphone is currently connected to the shaver.
- ESPHome Bluetooth Proxy: The standard ESPHome Bluetooth Proxy does not work with this shaver because it requires LE Secure Connections pairing (details). Use the dedicated ESP32 BLE Bridge instead.
- Stability: Bluetooth signals are weak. Ensure your HA host or ESP32 bridge is placed as close to the shaver's location as possible.
The integration communicates directly via BLE — no cloud, no app required. All communication is fully local.
The shaver exposes multiple GATT services with individual characteristics for each data point (battery, motor, pressure, light ring, etc.). Data is read directly from these characteristics and live updates are received via GATT notifications.
For a detailed technical description of the BLE protocol including service UUIDs, characteristic reference, data formats, and capability flags, see BLE_PROTOCOL.md.
For debug service actions (reading arbitrary BLE characteristics via Developer Tools), see ADVANCED.md.
| Discovery | Capabilities | Device | Diagnostics | Connection |
|---|---|---|---|---|
 |
 |
|
 |
 |
This is an independent community project and is not affiliated with, endorsed by, or sponsored by Philips. All product names, trademarks, and registered trademarks are property of their respective owners.