In this project, you will build a GUI application using the popular library Qt (pronounced "cute"). The lab computers already have Qt installed; however, if you are working on a personal computer, you will need to follow the instructions below to install it for your operating system. It is advisable to do so as soon as possible and to contact your instructors if you encounter any problems. Failure to complete the setup in time may prevent you from finishing and submitting the project by its deadline. Please be aware that no extensions will be granted, and not having the library set up will result in a zero for the project.
- Download the following archive and extract it to the
C:drive. Ensure that after extraction there is a directory namedQt(C:\Qt), and inside it, a directory named6.10.2(C:\Qt\6.10.2). If you do not trust our package, you can install Qt 6 yourself using the official online installer. Select version6.10.2; install Qt Creator too, do not install any additional components, as the full installation requires significant disk space. - Run PowerShell as an administrator. Once open, execute the code below to set global OS variables that will help build tools locate your Qt 6 installation:
[System.Environment]::SetEnvironmentVariable("Qt6_DIR", "C:\Qt\6.10.2\mingw_64", "Machine")

$currentPath = [System.Environment]::GetEnvironmentVariable("Path", "Machine")
$newDir = "C:\Qt\6.10.2\mingw_64\bin"
if ($currentPath -notlike "*$newDir*") {
    $updatedPath = "$currentPath;$newDir"
    [System.Environment]::SetEnvironmentVariable("Path", $updatedPath, "Machine")
}- Install or update the Homebrew package manager.
- Install Qt 6 libraries with Homebrew by running
brew install qt6in the Terminal application. - Install Qt 6 Creator IDE with Homebrew by running
brew install --cask qt-creatorin the Terminal application.
- Install Qt 6 with the system package manager by running
sudo apt install qt6-base-dev libqt6svg6in the Terminal application. - Install Qt Creator IDE by running
sudo apt install qtcreatorin the Terminal application.
The project will be graded during a live demo. You will walk the instructor through your implementation, explain design decisions, and answer questions about your code.
Ensure your code style is consistent: indent code properly, separate logical blocks with a blank line, and use variable names that follow a consistent naming style and concisely describe the data they store. The code style for all files must conform to the configuration in .clang-format. By default, .clang-format is set to the WebKit style; see the WebKit Code Style Guidelines for details. If you prefer a different style, update .clang-format accordingly. Ensure that your source files adhere to the selected style. Format your source code manually or use CLion's autoformatting tools. However, we recommend starting with manual formatting to build good programming habits. The project is graded during a live demo, so style is reviewed by the instructor rather than enforced by an automated check.
Your files and directories must be named according to the requirements outlined at the bottom of this page. Moreover, your repository must not contain extraneous files or unrelated code, especially within the folder designated for project tasks.
If you are instructed to use a particular function, you must base your solution on that function, even if a better solution exists without it. Use only language facilities that have been discussed during class.
Remember that this requirements document, the grader file, and any requirements mentioned informally by the instructors during lectures or labs are all considered official and must be followed. Failure to do so may result in lost points. Do not assume that the document below is the only set of rules to follow.
To ensure you are aware of all requirements, attend classes regularly and actively engage with your instructors. If you are unsure about the correct approach, visit office hours to clarify expectations and avoid losing points. If you cannot attend office hours, do not hesitate to reach out to your instructors through other means, such as email.
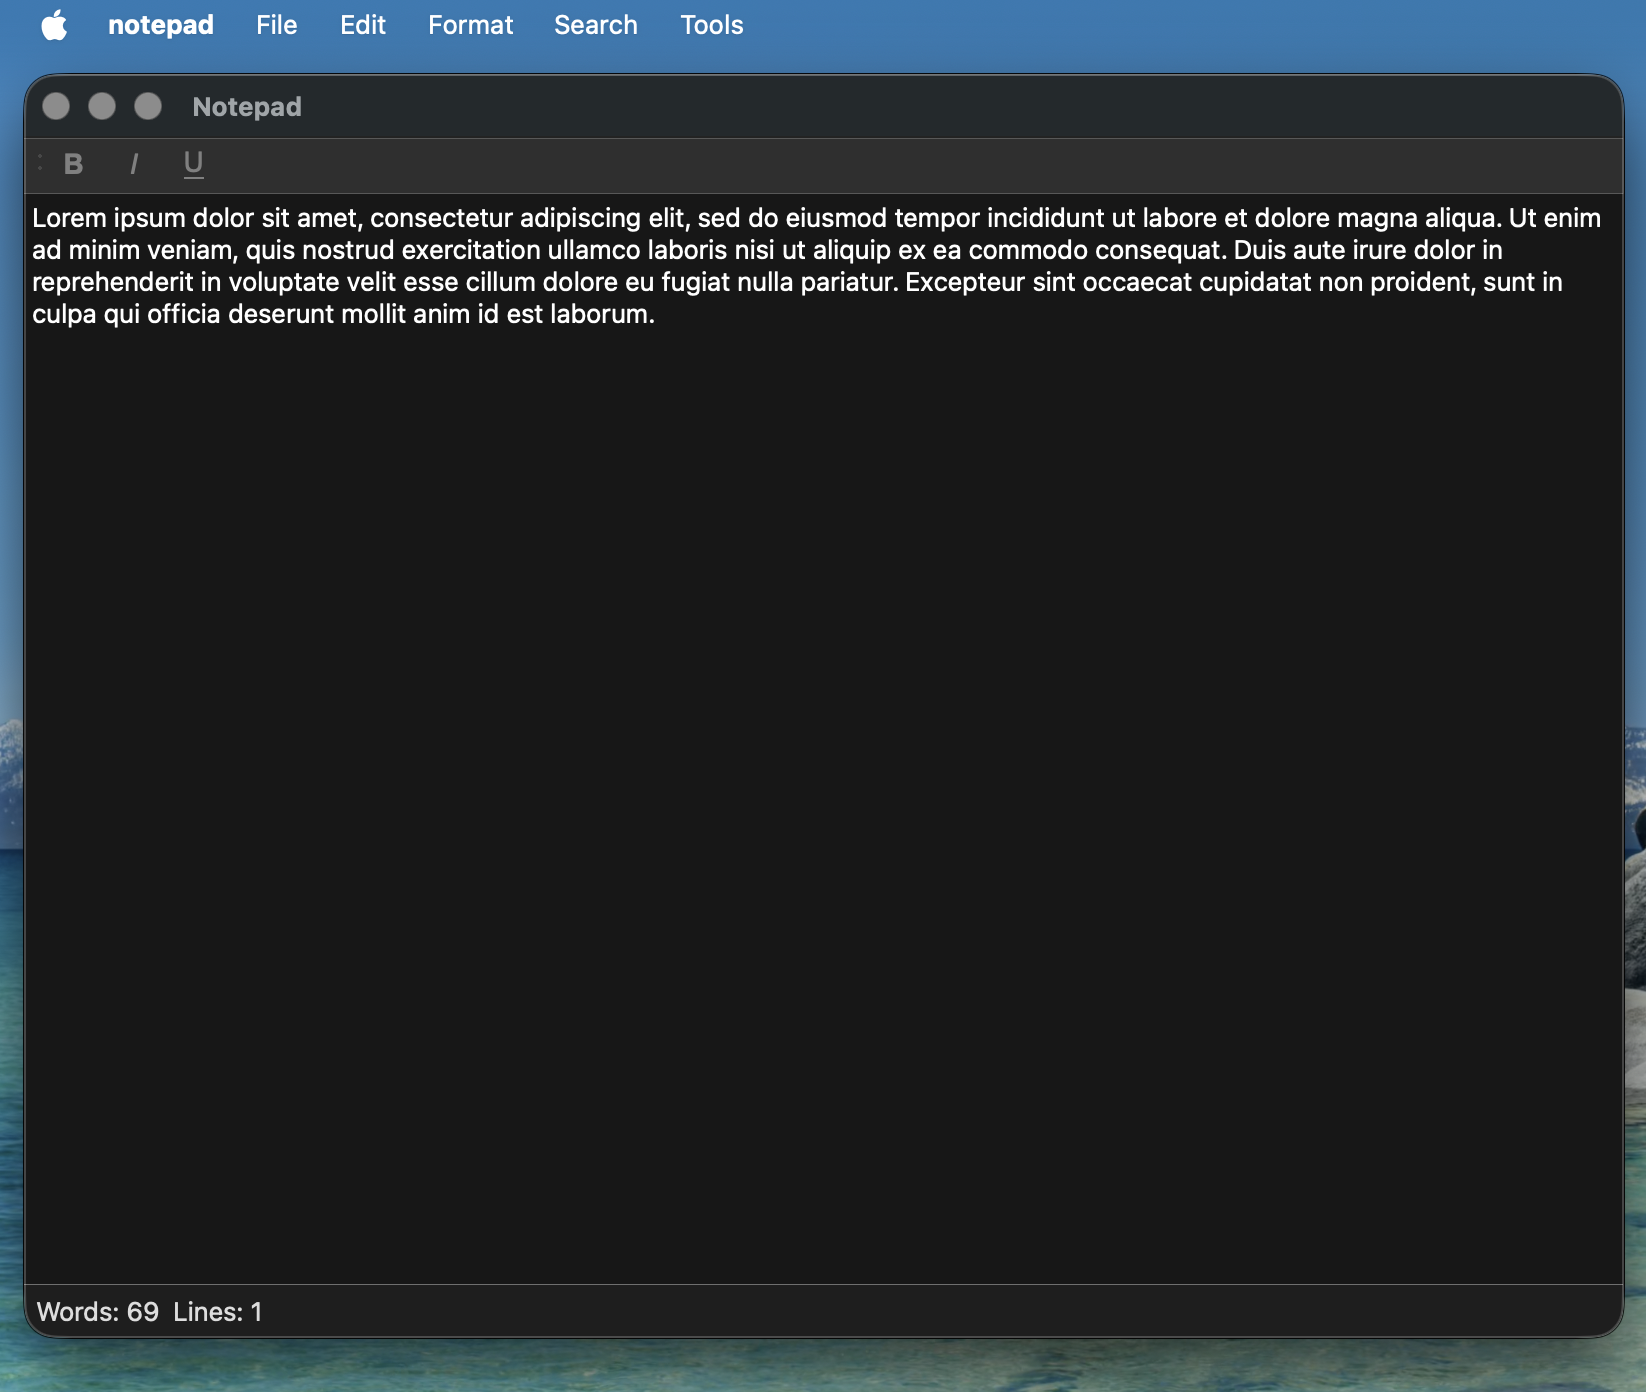
Extend the Notepad application, built across Practices 5 to 8 (lab and homework problems combined), into a more capable WordPad-like editor. Your starting point is a functional application that already supports file operations, an Edit menu (undo, redo, cut, copy, paste, select all), text case transforms (uppercase, lowercase, capitalize, sentence case, swap case), rich text formatting (bold, italic, underline), find and replace, word frequency analysis, and a status bar with live word and line counts.
You must implement both required features and at least three optional features of your choice.
When you first open the project in CLion, edit the run configuration and set Working Directory to $ProjectFileDir$ so that relative paths like data/images/bold.svg and data/words.txt resolve correctly. Otherwise the toolbar icons will not appear at runtime and the spell checker will report every word as misspelled.
The grader matches the main window by its windowTitle. Keep Notepad as the title when no file is open; the starter update_title() switches to Notepad: <path> after a file is loaded. The grader accepts any title that begins with Notepad, so if you change the format, keep Notepad as the prefix. The error dialog from QMessageBox::critical must use the title Error exactly. Dialog windowTitles Find / Replace and Word Frequency must also be preserved.
Integrate the exception hierarchy from Practice #8 into the application:
- Create
notepad_exception.hwithnotepad_exception,file_not_found_exception,file_read_exception, andfile_write_exception(as in Practice #8). - Wrap
open_file()andsave_file()intry / catchblocks; display errors withQMessageBox::critical.
Add a spell checker using the provided data/words.txt word list (one word per line). The list is words_alpha.txt from dwyl/english-words, released into the public domain under The Unlicense (370105 lowercase a-z entries).
Requirements:
- Load the word list from
data/words.txtat startup (read into astd::set<std::string>or similar). - Real-time inline highlighting: misspelled words are underlined in red as you type, using a
QSyntaxHighlightersubclass withQTextCharFormat::SpellCheckUnderline. - Right-click context menu: right-clicking a misspelled word shows a
QMenuwith up to 5 spelling suggestions; clicking a suggestion replaces the word in the editor. - Add a
Tools>Check Spelling...menu item that re-runs the highlight pass over the whole document. - A word is misspelled if, after lowercasing and stripping non-alphabetic characters, it is not found in the word list.
Choose at least three from the table below. More is better.
| # | Feature | Description |
|---|---|---|
| 1 | Cursor line / column indicator | Add current cursor line and column to the existing status bar |
| 2 | Font dialog | Format > Font... opens QFontDialog; applies selected font to selection or whole document |
| 3 | Color picker | Format > Text Color... opens QColorDialog; applies to selection |
| 4 | File > Print... opens QPrintDialog and prints via QTextEdit::print() |
|
| 5 | Recent files | File > Recent Files submenu (last 5 opened files, persisted across sessions) |
| 6 | Line numbers | Display line numbers in a margin beside the editor |
| 7 | Syntax highlight | Highlight C++ or Python keywords using QSyntaxHighlighter |
| 8 | Zoom | View > Zoom In / Zoom Out / Reset Zoom (Ctrl++ / Ctrl+- / Ctrl+0) |
By the project deadline, push your final code to your GitHub repository. During the demo you must be able to:
- Build the project from scratch with
cmake -S . -B build && cmake --build build. - Run the application and demonstrate all required and chosen optional features.
- Explain any class you added, any design decision you made.
In addition, submit a Notepad.md file in your repository that describes your implementation: which optional features you chose, why, and how each one works at a high level.
. (.idea, .gitignore, .clang-format, CMakeLists.txt, Readme.md, Notepad.md)
├── main.cpp
├── main_window.h
├── main_window.cpp
├── text_transform.h
├── find_replace_dialog.ui
├── word_frequency_dialog.ui
├── sort.h
├── notepad_exception.h
├── spell_checker.h
├── spell_checker_highlighter.h
├── ...other files you need
└── data/
    ├── words.txt
    └── images/
        ├── bold.svg
        ├── italic.svg
        └── underline.svg
Additional .h, .cpp, and .ui files for optional features are welcome.
class: https://en.cppreference.com/w/cpp/language/classconstructor: https://en.cppreference.com/w/cpp/language/constructorthis: https://en.cppreference.com/w/cpp/language/thisaccess-specifier: https://en.cppreference.com/w/cpp/language/accessstatic: https://en.cppreference.com/w/cpp/language/staticthrow: https://en.cppreference.com/w/cpp/language/throwtry-block: https://en.cppreference.com/w/cpp/language/trystdexcept: https://en.cppreference.com/w/cpp/header/stdexceptinvalid_argument: https://en.cppreference.com/w/cpp/error/invalid_argumentoperator overloading: https://en.cppreference.com/w/cpp/language/operatorsfriend: https://en.cppreference.com/w/cpp/language/friendstd::string: https://en.cppreference.com/w/cpp/string/basic_stringdestructors: https://en.cppreference.com/w/cpp/language/destructorcopy constructor: https://en.cppreference.com/w/cpp/language/copy_constructormove constructor: https://en.cppreference.com/w/cpp/language/move_constructorcopy assignment operator: https://en.cppreference.com/w/cpp/language/as_operator.htmlmove assignment operator: https://en.cppreference.com/w/cpp/language/move_assignmentrule of three/five/zero: https://en.cppreference.com/w/cpp/language/rule_of_threetemplate: https://en.cppreference.com/w/cpp/language/templateslambda expressions: https://en.cppreference.com/w/cpp/language/lambdaderived classes: https://en.cppreference.com/w/cpp/language/derived_classvirtual functions: https://en.cppreference.com/w/cpp/language/virtualabstract classes: https://en.cppreference.com/w/cpp/language/abstract_classstd::unique_ptr: https://en.cppreference.com/w/cpp/memory/unique_ptrstd::make_unique: https://en.cppreference.com/w/cpp/memory/unique_ptr/make_uniquestd::vector: https://en.cppreference.com/w/cpp/container/vectorstd::transform: https://en.cppreference.com/w/cpp/algorithm/transformstd::toupper / std::tolower: https://en.cppreference.com/w/cpp/string/byte/toupperstd::sort: https://en.cppreference.com/w/cpp/algorithm/sortstd::map: https://en.cppreference.com/w/cpp/container/mapstd::pair: https://en.cppreference.com/w/cpp/utility/pairstd::set: https://en.cppreference.com/w/cpp/container/setstd::ifstream: https://en.cppreference.com/w/cpp/io/basic_ifstream
Qt 6 Documentation: https://doc.qt.io/qt.htmlQt Widgets Documentation: https://doc.qt.io/qt-6/qtwidgets-index.htmlQMainWindow: https://doc.qt.io/qt-6/qmainwindow.htmlQTextEdit: https://doc.qt.io/qt-6/qtextedit.htmlQPushButton: https://doc.qt.io/qt-6/qpushbutton.htmlQVBoxLayout: https://doc.qt.io/qt-6/qvboxlayout.htmlQHBoxLayout: https://doc.qt.io/qt-6/qhboxlayout.htmlQMenuBar: https://doc.qt.io/qt-6/qmenubar.htmlQMenu: https://doc.qt.io/qt-6/qmenu.htmlQAction: https://doc.qt.io/qt-6/qaction.htmlQFileDialog: https://doc.qt.io/qt-6/qfiledialog.htmlQFile: https://doc.qt.io/qt-6/qfile.htmlQTextStream: https://doc.qt.io/qt-6/qtextstream.htmlQString: https://doc.qt.io/qt-6/qstring.htmlQKeySequence: https://doc.qt.io/qt-6/qkeysequence.htmlQToolBar: https://doc.qt.io/qt-6/qtoolbar.htmlQTextCharFormat: https://doc.qt.io/qt-6/qtextcharformat.htmlQTextCursor: https://doc.qt.io/qt-6/qtextcursor.htmlQDialog: https://doc.qt.io/qt-6/qdialog.htmlQTextDocument::find: https://doc.qt.io/qt-6/qtextdocument.html#findQStatusBar: https://doc.qt.io/qt-6/qstatusbar.htmlQt Designer / .ui files: https://doc.qt.io/qt-6/designer-using-a-ui-file.htmlQMessageBox: https://doc.qt.io/qt-6/qmessagebox.htmlQSyntaxHighlighter: https://doc.qt.io/qt-6/qsyntaxhighlighter.htmlQFontDialog: https://doc.qt.io/qt-6/qfontdialog.htmlQColorDialog: https://doc.qt.io/qt-6/qcolordialog.htmlQPrintDialog: https://doc.qt.io/qt-6/qprintdialog.html