
Name: Alec Keane
Student Number: C19326126
- Q and E switch settings on the rings
- W and S increase and decrease the speed of rotation of the planets
- 1 and 2 will switch the planets between a static color and a color reactive to the music
- Space will start the music
- Left click and drag to move the Camera and scroll wheel is for changing the zoom
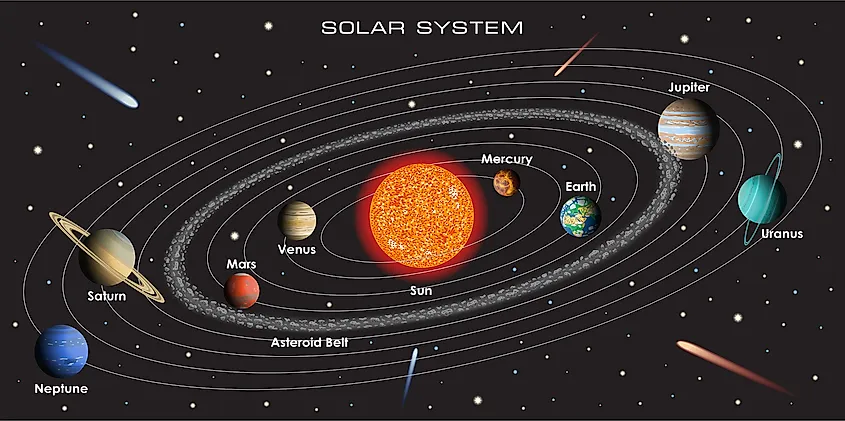
My project is a music visualizer made utilizing the graphical library "Processing" library in Java. I have a deep passion and love for space and I was inspired by this to create a space themed visualizer. The general layout of my project was inspired from the classic representation of solar system as seen in the image above.
I created multiple different parts to this assignment to complete the visualizer
- Rings for Planets paths
- A second set of rings which are reactive and rotate
- A randomly generated field of stars
- Multiple functions for the user to control the look of the system
- The ability for the user to increase and decrease the rotation speed at will
- A free floating camera for the user to explore and view from
Almost each part of this project is reactive to the music that is played and I made each planet a unique lightly changing color. I also have two groups of stars, both of which will have different colors as one starts at the max value and the other at the minimum. This makes a nice transition effect when both sets meet at the halfway point for a moment and match colors all over before transitioning onwards.
- Upon pressing F5 the file will run.
- Once inside the visualizer pressed space to begin the visualization.
- If you wish to change the look of the planets press 1 or 2.
- if you want to change the rings press Q or E.
- If you would like to view the system from a new angle or distance use right click to move or the scroll wheel for distance
Upon opening the file the primary class StarSystem will call the class Sun and generates Stars and planets through the "Draw" method For example sun is created in the settings area, this is where it's values are declared and then sent to the Sun class
Sun1 = new Sun(color(255, 255, 0), 0, 0, 50);//SunNow that it has recieved this, Draw will need to call it to display it, giving it positional data. The sun is set with a translate to Width/2, Height/2 to center it on the screen as well.
Sun1.display(30, 60);Display is a slightly complex function as once it is called upon it has to check a setting called "PlanetColor." This will tell it whether to use the recieved data from the Sun in settings or to begin a for loop which will make it's color change and react with the music.
public void display(int X, int Y){
            float Z = 100;
            //For loops for music and changing stroke and size
            noStroke();
            if(PlanetColor == true){ //The user can choose for default planet colors or for planets that change color
                fill(c);
            }else{
                for(int o = 0; o < getSmoothedBands().length; o++){//X , Y
                    fill(map(o, 0, getBands().length * SysColor, X, Y), Z, 100);
                    if(SysColor >= 5){
                        PlanetBool = false;
                    }
                    else if(SysColor <= 1){
                        PlanetBool = true;
                    }
                    if(PlanetBool == true){
                        SysColor += getBands().length * .00004f;
                    }
                    else if (PlanetBool == false){
                        SysColor -= getBands().length * .00004f;
                    }
                    if(Z >= 100){ //Changing the values for saturation
                        Z = (float) (Z - .05);
                    }
                    if(Z <= 60){
                        Z = (float) (Z + .05);
                    }
                }
            }
            sphere(s);
        }//End display
This function is used to display every single Planet in the Star System and it is all done through Draw. Each planet has it's own unique call which will give that planet it's unique position and rotation speed and call the display with it's color data. For example here is how Earth is called upon in Draw and displayed in it's position.
pushMatrix();//Sun
            translate(width/2, height/2);
            //Default rotation of all planets
            rotate(radians(rotation));
            //Displaying the sun
            Sun1.display(30, 60);

            //Begin placing planets

            Mercury(); //-150, -10

            Venus(); //220, -40

            Earth(); //320, 0 ---------This is the call I am reffering to in my documentation above

            Mars();//425, 0

            Jupiter(); //-520, -30

            Saturn(); //640, -100

            Uranus(); // 760, 70

            Neptune(); //830, 90


        popMatrix(); //end Sun
And here is Earth being translated to it's position and given it's rotation along with it's moons and their data.
	private void Earth() {
        pushMatrix();//Earth
            rotate(radians(rotation2));

            translate(320, 0);
            Sun2.display(90, 150);
            rotate(radians(rotation2));
                pushMatrix(); //Moon
                    translate(40, 0);
                    Sun3.display(190,210);
                popMatrix(); //End Moon
            popMatrix(); //End earth
    }//End Earth
Next to generate the Stars I simply made a function called StarField This function has a Boolean to make sure it only generates stars once and it has random positional data given to them. I then made 4 for loops to split each 100 stars into a different group. Half the stars on one side would be split in 2 colors and the same for the other
Star Generation
private void StarField(){
        if(!generation){

        //Range values for where stars can generate
        for(int i = 0; i < 200; i++){
            x[i] = random(-3500,3500);
            y[i] = random(-3000,3000);
            z[i] = random(150,3000);
            size[i] = random(3,10);
        }
        for(int j = 0; j < 200; j++){
            x2[j] = random(-3500,3500);
            y2[j] = random(-3000,3000);
            z2[j] = random(-3000,-150);
            size2[j] = random(3,8);
        }

        //Makes the stars only generate once
        generation = true;
        }
This For loop is how I made stars change color and react with the music. This was achieved through the usage of the amplitude, lerping, and the length of the audio bands.
for(int i = 0; i < 100; i++){
            pushMatrix(); //Beging generating first set of stars
            StarSize = size[i] + (getAmplitude() * 100);
            StarSizeSmoothed = lerp(StarSizeSmoothed, StarSize/2, 0.00125f);
            translate(x[i], y[i], z[i]);
            for(int o = 0; o < getSmoothedBands().length; o++){
                fill(map(o, 0, getBands().length * FillColor, 255, 0), 255, 255);
                if( FillColor >= 5){
                    ColorBool = false;
                }
                else if(FillColor <= 0){
                    ColorBool = true;
                }
                if(ColorBool == true){ //if it's reached zero it will increment to 5
                    FillColor += getBands().length * .0000006f;
                }
                else if (ColorBool == false){ //it's reached 5 it will decrement back to 0
                    FillColor -= getBands().length * .0000006f;
                }
            }

            sphere(StarSizeSmoothed);
            popMatrix();
        }
Next to create both of the types of rings I had it as a key press statement which would change a Boolean. On true it would make white rings, and if false it would display the reactive rings. Both recieved lengths from an array and went through a for loop, this array contained the positional data of the planets for the rings to match.
//Original white paths for planets
        if(Setting == true){
            pushMatrix();
                translate(width/2, height/2);
                for(int i = 0; i < arr.length; i++){
                    int k = arr[i];
                    Paths(k); //Displaying rings in alternate format
                }
            popMatrix();
        }
        else{
            for(int i = 0; i < arr.length; i++){
                int k = arr[i];
                Rings(k); //Displaying rings in alternate format
            }
        }
To display the white rings I used the Paths() function which made elipses double the distance of the planets away to form the correct radius ellipse. I also accounted for the moons of earth and mars as well.
private void Paths(int x){
        pushMatrix();
            noFill();
            stroke(255);
            strokeWeight((float) .8);
            rotate(radians(rotation));
            //Calling elipses and placing them in the planets path
            for(int i = 0; i < total; i++)
            {
                ellipse(0,0, x*2, x*2);
            }
            pushMatrix();//Earths ring for the moons path
                rotate(radians(rotation2));
                translate(320,0);
                noFill();
                stroke(255);
                strokeWeight((float) .8);
                ellipse(0,0, 80, 80);
            popMatrix();

            pushMatrix();//Mars' moons rings
                translate(425,0);
                noFill();
                stroke(255);
                strokeWeight((float) .8);
                ellipse(0,0, 58, 58);//Mars moon1
                ellipse(0,0, 85, 85);//Mars moon2
            popMatrix();

        popMatrix();
    }
To make the reactive rings I called the function Rings and this function was more complex It evenly placed a rectangle by it's center every 12 degrees of it's planets positional data. I did this through using cos and sin on a translate and concatonating on 12 degree's each time one was placed
private void Rings(int x){
        pushMatrix();
        translate(width/2, height/2);
        //rotate the rings against the rotation of the planets
        rotate(radians(-rotation));
        r = x; //Inputted radius of the planets arc from Arr[]
        arcLength = 0;
        for(int i = 0; i < total; i++){
            //each rect will be placed every 12 degree's
            arcLength += 12;
            //the radians of how much the plane will be rotated
            float theta = radians(arcLength);

            pushMatrix();
                //rotation of grid plane to place the boxes on the new rotated cartesian coordinate plane
                translate(r*cos(theta), r*sin(theta));

                //this will rotate the boxes
                rotate(theta);
                //Color
                fill(map(getAmplitude()/2, 0, 1, 0, 255), 255, 255);
                //Squares drawn by center of their coordinates
                rectMode(CENTER);
                float RS = 10 + (getAmplitude() * 300);
                RingSize = lerp((float) (RingSize/1.15), RS, 0.1f);
                rect(0,0,RingSize,1);
            popMatrix();
        }
        popMatrix();
    }
For the User control I made an if statment to check if the user pressed a key and many of these had a Bool assigned inside of it. This switch effectively allowed me to give the users control over the Solar Systems general look.
if(keyPressed){
            if(key == 'w' || key == 'W'){ //Speed up rotation
                rotation += .15;
                rotation2 += .85;
                rotation3 += 1.5;
                rotation4 += .65;
                rotation5 -= .1;
            }
            else if(key == 's' || key == 'S'){ //Slow rotation
                rotation -= .30;
                rotation2 -= 1.70;
                rotation3 -= 3;
                rotation4 -= 1.30;
                rotation5 += .2;
            }
            else if(key == 'q' || key == 'Q'){ //Q changes ring setting
                Setting = true;
            }
            else if(key == 'e' || key == 'E'){ //Changes ring setting as well
                Setting = false;
            }
            else if(key == '1'){ //Changes planet color
                PlanetColor = false;
            }
            else if(key == '2'){ //Default planet color
                PlanetColor = true;
            }
            else if (key == ' '){ //Play the song
                getAudioPlayer().cue(0);
                getAudioPlayer().play();
            }
        }
Finally to give the user control of the Camera. I downloaded "peasyCam" and added their .jar files to the lib folder and then assigned them to the .classpath file.
	<classpathentry kind="lib" path="lib/peasycam.jar"/>
	<classpathentry kind="lib" path="lib/peasy-math.jar"/>
I then imported PeasyCam to my file.
import peasy.*;After importing it I declared a new camera and then gave it data in the setup function
PeasyCam cam; cam = new PeasyCam(this, width/2,height/2,0,1500);
cam.setMinimumDistance(50);
cam.setMaximumDistance(4000); Finally in the draw I added two Rotate statements for X and Y so the user can control the camera.
	rotateX((float) -.5);
rotateY((float) -.5);In general I am proud of my whole project. I came up with the idea of making a 3D Solar System right from the start and came to face many difficult challenges in terms of how certain Processing functions work and the mathematics behind what I was going to do to accomplish certain ideas, but I managed to push through and commit to my idea and come out with a final product that I am very proud of.
If I had to choose I am especially happy with my stars and how they react to the music and how widely spaced they are across the area of my project and how I came up with the idea to start one at the high end and the other at the low end so while the song was playing at certain times all of the stars would sync together as one light blue color before continuing forwards in their color band.
I am also proud of commiting to make a 3D project and using my mathematics to work out the translates and positions of each planet and ring in the system and give each their own rotational speeds and unique little details to make each one special.
- https://processing.org/tutorials/
- Processing: A Programming Handbook for Visual Designers and Artists, Second Edition
- https://www.youtube.com/channel/UCvjgXvBlbQiydffZU7m1_aw
- http://mrfeinberg.com/peasycam/