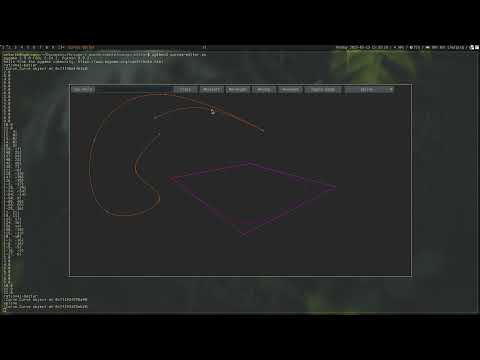
Curves is an interactive application built with Python and Pygame, designed to allow users to manipulate curves on a canvas. The app provides a set of intuitive tools for editing, transforming, and animating curves. Users can interact with the canvas using both the mouse and keyboard, and the application includes various modes and functions for manipulating the curves' properties.
The core features of the project include the ability to rotate, move, and modify the degree of curves, as well as select, join, and animate them. It also includes an image manipulation feature, where users can load and save images, clear the canvas, and export their creations.
- Python 3.x 🐍
- Pygame 🎮
- Pygame GUI 🖥️
- Arrow Keys (Up, Down, Left, Right): Move the selected object in the corresponding direction.
- Left Shift (LShift): Used in combination with other keys to modify behavior (e.g., rotate counter-clockwise).
- H: Toggle hull visibility.
- R: Rotate the selected curve. Pressing Left Shift while rotating will rotate counter-clockwise. Curve will rotate around mouse pointer position.
- N: Add a new curve.
- E: Increase the degree of the selected curve.
- L: Decrease the degree of the selected curve.
- J: Select curve for joining (activates "JOINING" mode).
- A: Select curve for animating (activates "ANIMATING" mode).
- T: Select curve for transforming (activates "TRANSFORMING" mode).
- I: Increase the thickness of selected curve points. Press Left Shift to decrease thickness.
- S: Split the selected curve at its midpoint.
- C: Copy the selected curve.
- Q: Clear the current canvas.
- Right Mouse Button: Select a curve under the cursor and perform the active mode's operation (JOINING, ANIMATING, TRANSFORMING).
- Middle Mouse Button: Drag the curve (MMB + Shift) or move a selected curve point (MMB).
- Left Mouse Button: Update selected curve, add/remove points, or perform actions based on current mode.
- Mouse Wheel: Modify the thickness of selected points (scroll up to increase, scroll down to decrease). Hold Left Shift to change point weights instead.
- Mouse Dragging (Middle Mouse Button + Shift): Drag the image or selected curve.
- Colour Picker: Open the colour picker to change the selected curve's color.
- Clear: Clear the current canvas.
- Load Image: Open a file dialog to load an image into the canvas.
- Load Canvas: Open a file dialog to load a saved canvas.
- Save Canvas: Open a file dialog to save the current canvas.
- Export: Export the current canvas or image to a file.
- JOINING: Select a curve to join with another curve.
- ANIMATING: Animate a transformation between two curves.
- TRANSFORMING: Transform a curve, such as scaling or rotating.
- DEFAULT: The default mode when no other operation is active.
-
Clone the repository:
git clone https://github.com/Sztakler/curves.git
-
Navigate into the project directory:
cd curves -
Create a virtual environment:
In the project directory, create a new virtual environment (for example, named venv): Linux/macOS:
python3 -m venv venv- Windows:
python -m venv venv
- Activate the virtual environment:
After creating the virtual environment, activate it with the following command:
-
Linux/macOS:
source venv/bin/activateor, if you are using fish shell:
source venv/bin/activate.fish -
Windows:
venv\Scripts\activate
- Install the dependencies:
With the virtual environment activated, install all the required dependencies listed in the requirements.txt file:
pip install -r requirements.txt- Run the application:
Once the dependencies are installed, you can run the application by executing:
python CurvesEditor.py- Deactivate the virtual environment (optional):
If you want to deactivate the virtual environment after using the app, run:
deactivate