

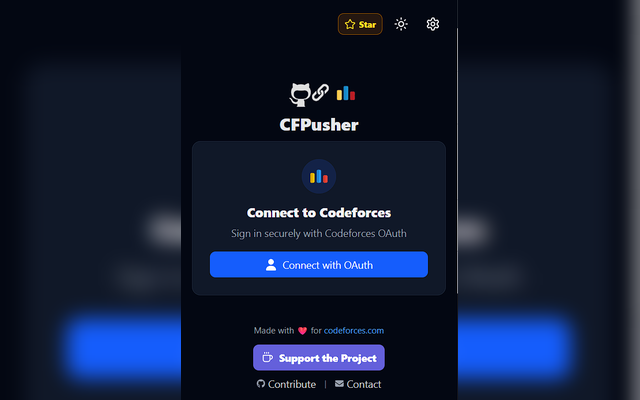
A powerful and user-friendly Chrome extension that pushes your accepted Codeforces submissions to your GitHub repository
Report Bug
·
Request Feature
A powerful and user-friendly Chrome extension that pushes your accepted Codeforces submissions to your GitHub repository. It supports fast auto-sync for the latest accepted solution and optional backfill for older accepted problems. The project is built with Vite for fast development builds and optimized production output.
Popup showing the Codeforces login Screen
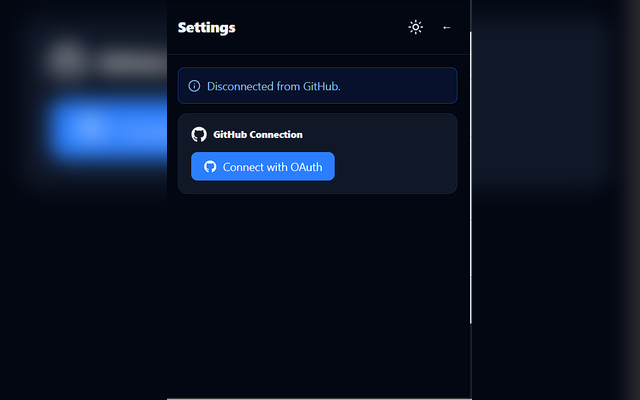
Settings section where you can link your GitHub
Settings section where you can see your Github Connection status
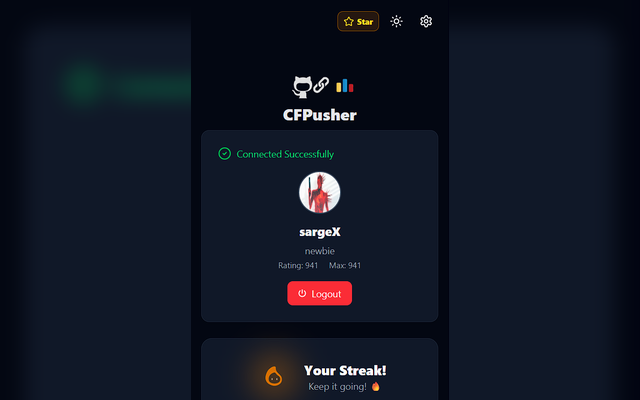
Post-Login Screen
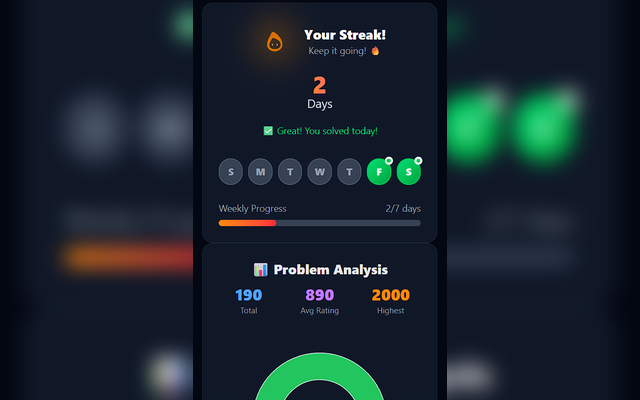
Streak chart and Solved Problems chart
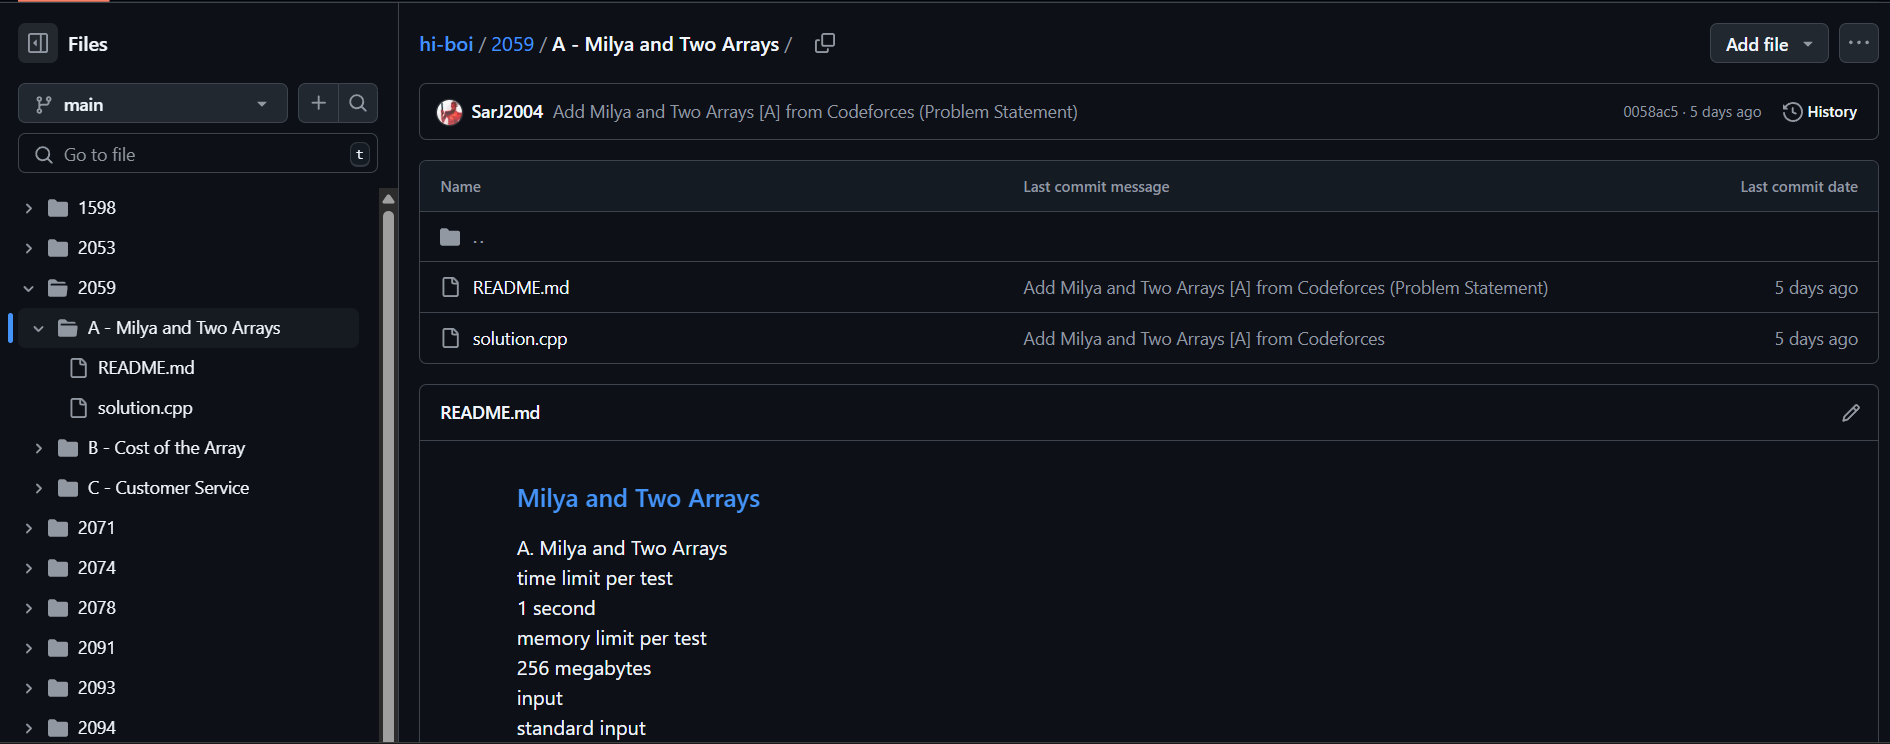
Sample GitHub repo with pushed code and problem statement
- Auto Push Accepted Submissions: Automatically pushes your latest accepted Codeforces submission to a selected GitHub repository.
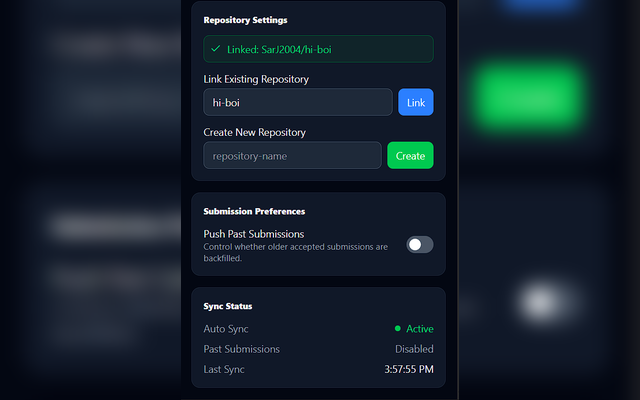
- Optional Past Submission Backfill: Enable past sync to backfill older accepted problems (latest accepted submission per problem).
- Streak Tracker Tracks your Codeforces streak for the current week and displays it visually inside the popup.
- Problem Rating Chart It has a problem rating chart and a mini info section, which tells one about the profile information, as well as the number of different problems solved in each rating range.
- Codeforces OAuth Login Sign in to Codeforces via OAuth from inside the extension.
- GitHub OAuth Integration Secured with GitHub's OAuth to authorize and manage repositories.
- Repo Selection & Creation The user can choose to select any repo of their choice to push their codes, or additionaly, create a seperate repo.
- Dark Mode Integration Yayyy you can now toggle between dark and light modes!!
Download from the Chrome Web Store Directly into your Chrome browser
OR,
You can download the latest release of the extension directly from GitHub, and proceed with the manual installation as instructed below:
-
Download and Unzip:
Download the ZIP file from the Releases section and unzip it to a desired location on your computer. -
Open Chrome Extensions Page:
Open Chrome and navigate tochrome://extensions/. -
Enable Developer Mode:
Toggle on the Developer mode switch on the top-right corner of the extensions page. -
Load Unpacked Extension:
Click the Load unpacked button and select the unzipped folder of your extension. -
Enjoy!
Your extension should now appear in Chrome, and you can start using it immediately.
Once installed, click on the extension icon in your Chrome toolbar or follow the in-page instructions provided by the extension.
-
Connect to Codeforces:
Open the popup and sign in with Codeforces OAuth. You only need the OAuth client ID (the field is prefilled by default in the extension), then complete the login flow in the browser popup. -
Connect to GitHub:
Click on the settings icon at the top right of the popup, and authorize your GitHub account. -
Connect your preferred repo:
After connecting to GitHub, choose the repository where your solutions should be pushed. You can either link an existing repo or create a new one directly from settings. -
(Optional) Enable past submission sync:
In settings, toggle Push Past Submissions if you want CFPusher to backfill previously solved accepted problems.
You are all set now!!
-
Unable to submit codes during contests
The api has no access to the codes submitted during the contests, so, after the contest is over(checking phase is over), you can resubmit them to push. -
Rapid consecutive submissions
CFPusher syncs frequently, but if many accepted submissions arrive in a very short time window, GitHub/API rate limits and extraction timing can still delay some pushes. Use manual sync or enable past submission sync to recover older accepted problems. -
Problem statement formatting edge cases Most statements are parsed correctly, but some MathJax/LaTeX-heavy problems may still have imperfect formatting in generated README files.
- Node.js (v18 or later): Download Node.js
- npm: Comes with Node.js installation.
Clone the repository to your local machine and install dependencies:
git clone https://github.com/SarJ2004/cf-pusher.git
cd cf-pusher
npm installFor development and testing, you can run the extension in development mode with Vite:
npm run devThis will start the Vite development server. Make sure to follow any additional instructions in your development documentation if the extension requires special handling during development.
To generate a production build, run:
npm run buildThis command will compile your project and output the production files into the dist/ folder. These files are ready to be zipped and installed as described above.
To create a ZIP archive from dist/ for distribution, run:
npm run zipThis project uses GitHub Actions to automate the build and release process:
-
Workflow Setup:
A workflow file is located at.github/workflows/release.yml. This file is responsible for:- Checking out the repository.
- Installing dependencies.
- Building the extension with Vite.
- Zipping the
dist/folder. - Creating a GitHub Release and attaching the ZIP file.
-
Triggering a Release:
The action runs automatically when you push a version tag (for example,v1.0.0):git tag v1.0.0 git push origin v1.0.0
-
Releases Section:
Once the workflow completes, navigate to Releases to download the zipped extension.
Contributions are warmly welcomed! If you want to help improve this project, please follow these steps:
- Fork the repository.
- Create a new branch for your feature or bug fix.
- Commit your changes with clear messages.
- Open a Pull Request describing your changes.
For major changes, please open an issue first to discuss what you would like to change. Ensure any new code follows the coding conventions used throughout the project.
This project is licensed under the MIT License. See the LICENSE file for more details.
- Vite – for the powerful and fast build tool.
- GitHub Actions – for automating builds and releases.
- LeetSyncV2 for the inspiration to make a similar extension for codeforces