gate-agent is a small and secure proxy that protects API/authentication keys from Agents.
Your Agents access APIs through Gate Agent instead of accessing them directly. This keeps your API keys safe from Agents who might do things you don't want them to (such as deciding to share them with people who shouldn't have them). You can also prevent Agents from accessing parts of APIs you don't want them to with no chance of them circumventing their instructions.

- You put your API keys and credentials into an encrypted config file managed by Gate Agent.
- You get a Gate Agent Token.
- Instead of connecting your Agent directly to an API you connect the Agent to Gate Agent via your Gate Agent Token.
- All requests to the API are made through Gate Agent. Your Agent never sees the actual API keys/authentication tokens. It only sees your Gate Agent Token.
Watch: Gate Agent: Overview/Demo
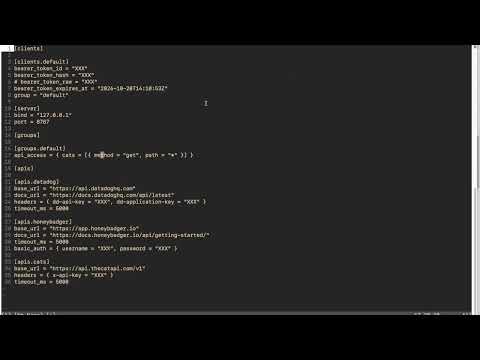
- Simple TOML text-file based config that is explicit and easy to manage.
- Single Rust binary. Run it locally, via Docker, etc.
- Encrypted config. As long as your Agents don't know the password you can even run Gate Agent on the same machine as your Agents.
- Groups with different access controls. Run one Gate Agent for many different Agents with different access needs.
- Restrict requests by method (GET, POST, etc) or URL pattern. This means you can prevent your Agents from connecting to certain API methods even if the 3rd-party API doesn't offer that granular access.
- Easily revoke individual Agent access. If you want to revoke access just revoke the one Gate Agent Token instead of rotating all your API keys. Your other Agents are unaffected.
- Log all requests so you can see which Agents try to access which methods.
- Single MCP server for your Agent that returns all the tools from all the APIs you've connected it to which makes it quick and easy to connect new Agents.
Install the latest published release:
curl -fsSL https://raw.githubusercontent.com/CrazyEggInc/gate-agent/refs/heads/master/install.sh | shInstall a pinned release or custom install directory by setting environment variables:
curl -fsSL https://raw.githubusercontent.com/CrazyEggInc/gate-agent/refs/heads/master/install.sh | VERSION=1.2.3 GATE_AGENT_INSTALL_DIR="$HOME/.local/bin" shThe installer defaults to ~/.local/bin and adds it to your shell PATH when needed.
We'll setup a remote integration with https://thecatapi.com as an example (you can register for a free key to test).
gate-agent config init
# Save the generated secret/token printed by init.

# Register for a free TheCatAPI key.
export THE_CAT_API_KEY='<thecatapi key>'

gate-agent config api \
  --name cats \
  --base-url https://api.thecatapi.com/v1 \
  --header "x-api-key=$THE_CAT_API_KEY"

gate-agent config group \
  --name default \
  --api-access "cats:get:*"

gate-agent start

export GATE_AGENT_TOKEN='<token from config init>'
curl -i -H "Authorization: Bearer $GATE_AGENT_TOKEN" \
'http://127.0.0.1:8787/proxy/cats/images/search?limit=10'gate-agent also works as an MCP server for your preferred agentic tool. You can configure it as either a remote or local MCP server.
Use this after the server is already running through gate-agent start.
{
  "gate-agent": {
    "url": "http://127.0.0.1:8787/mcp",
    "headers": {
      "Authorization": "Bearer <your-token>"
    }
  }
}Less safe: GATE_AGENT_PASSWORD must be hardcoded in the client config.
{
  "gate-agent": {
    "command": "gate-agent",
    "args": ["start"],
    "env": {
      "GATE_AGENT_CONFIG": "~/.config/gate-agent/secrets",
      "GATE_AGENT_PASSWORD": "<your-config-password>"
    }
  }
}You can use gate-agent as a local tool, or deploy it to a remote server to make it available to others. In that scenario, set up a separate client token for each user. The example Dockerfile installs gate-agent and starts it with start.sh. Update the script for your own environment. For example, you could make it fetch configuration from your preferred secrets service.
See examples/apis.toml for sample upstream API configurations.
# setup local files and dummy upstream
cp .secrets.dev .secrets
docker compose up -d dummy-upstream

# smoke test the dummy upstream
curl -i http://127.0.0.1:18081/healthz
curl -i -H 'Authorization: Bearer local-upstream-token' \
  http://127.0.0.1:18081/api/v1/projects/1/tasks

# use cargo only for local development
cargo run -- start --config=.secrets --log-level=debug
cargo test
cargo fmt --all --check
cargo clippy --all-targets --all-features -- -D warnings

# start gate-agent
cargo run -- start --config=.secrets --log-level=info

# call example upstream api
export GATE_AGENT_TOKEN='default.s3cr3t'
curl -i -H "Authorization: Bearer $GATE_AGENT_TOKEN" \
  http://127.0.0.1:8787/proxy/projects/v1/projects/1/tasks

# list MCP tools
curl -sS http://127.0.0.1:8787/mcp \
  -H "Authorization: Bearer $GATE_AGENT_TOKEN" \
  -H 'Content-Type: application/json' \
  --data '{
    "jsonrpc": "2.0",
    "id": 2,
    "method": "tools/list",
    "params": {}
  }' | jq

# list APIs available to the authenticated client
curl -sS http://127.0.0.1:8787/mcp \
  -H "Authorization: Bearer $GATE_AGENT_TOKEN" \
  -H 'Content-Type: application/json' \
  --data '{
    "jsonrpc": "2.0",
    "id": 3,
    "method": "tools/call",
    "params": {
      "name": "list_apis",
      "arguments": {}
    }
  }' | jq

# call an upstream API through MCP
curl -sS http://127.0.0.1:8787/mcp \
  -H "Authorization: Bearer $GATE_AGENT_TOKEN" \
  -H 'Content-Type: application/json' \
  --data '{
    "jsonrpc": "2.0",
    "id": 4,
    "method": "tools/call",
    "params": {
      "name": "call_api",
      "arguments": {
        "api": "projects",
        "method": "GET",
        "path": "/v1/projects/1/tasks"
      }
    }
  }' | jq
See docs/local-testing.md for the full local workflow.
- run GitHub Actions workflow
prepare releasewithdry_run=true - re-run
prepare releasewithdry_run=falseto bump Cargo metadata and create tagvX.Y.ZorvX.Y.Z-prerelease - let the dispatched
releaseworkflow validate, build, checksum, and publish assets - verify latest and pinned install commands against the published release
See docs/release.md for release assets, checksum behavior, retries, and recovery.