
NAMES OF COLLABORATORS HERE
For lab this week, we focus on creating interactive systems that can detect and respond to events or stimuli in the environment of the Pi, like the Boat Detector we mentioned in lecture. Your observant device could, for example, count items, find objects, recognize an event or continuously monitor a room.
This lab will help you think through the design of observant systems, particularly corner cases that the algorithms need to be aware of.
- Spend about 10 Minutes doing the Listening exercise as described in ListeningExercise.md
- Install VNC on your laptop if you have not yet done so. This lab will actually require you to run script on your Pi through VNC so that you can see the video stream. Please refer to the prep for Lab 2, we offered the instruction at the bottom.
- Read about OpenCV, MediaPipe, and TeachableMachines.
- Read Belloti, et al.'s Making Sense of Sensing Systems: Five Questions for Designers and Researchers.
- Pull the new Github Repo.(Please wait until thursday morning. There are still some incompatabilities to make the assignment work.)
- Raspberry Pi
- Webcam
- Show pictures, videos of the "sense-making" algorithms you tried.
- Show the filledout answers for the Contextual Interaction Design Tool.
- Show a video of how you embed one of these algorithms into your observant system.
- Test, characterize your interactive device. Show faults in the detection and how the system handled it.
Building upon the paper-airplane metaphor (we're understanding the material of machine learning for design), here are the four sections of the lab activity:
A) Play
B) Fold
C) Flight test
D) Reflect
A more traditional method to extract information out of images is provided with OpenCV. The RPI image provided to you comes with an optimized installation that can be accessed through python. We included 4 standard OpenCV examples: contour(blob) detection, face detection with the Haarcascade, flow detection (a type of keypoint tracking), and standard object detection with the Yolo darknet.
Most examples can be run with a screen (e.g. VNC or ssh -X or with an HDMI monitor), or with just the terminal. The examples are separated out into different folders. Each folder contains a HowToUse.md file, which explains how to run the python example.
The following command is a nicer way you can run and see the flow of the openCV-examples we have included in your Pi. Instead of ls, the command we will be using here is tree. Tree is a recursive directory colored listing command that produces a depth indented listing of files. Install tree first and cd to the openCV-examples folder and run the command:
pi@ixe00:~ $ sudo apt install tree
...
pi@ixe00:~ $ cd openCV-examples
pi@ixe00:~/openCV-examples $ tree -l
.
├── contours-detection
│   ├── contours.py
│   └── HowToUse.md
├── data
│   ├── slow_traffic_small.mp4
│   └── test.jpg
├── face-detection
│   ├── face-detection.py
│   ├── faces_detected.jpg
│   ├── haarcascade_eye_tree_eyeglasses.xml
│   ├── haarcascade_eye.xml
│   ├── haarcascade_frontalface_alt.xml
│   ├── haarcascade_frontalface_default.xml
│   └── HowToUse.md
├── flow-detection
│   ├── flow.png
│   ├── HowToUse.md
│   └── optical_flow.py
└── object-detection
    ├── detected_out.jpg
    ├── detect.py
    ├── frozen_inference_graph.pb
    ├── HowToUse.md
    └── ssd_mobilenet_v2_coco_2018_03_29.pbtxt
The flow detection might seem random, but consider this recent research that uses optical flow to determine busy-ness in hospital settings to facilitate robot navigation. Note the velocity parameter on page 3 and the mentions of optical flow.
Now, connect your webcam to your Pi and use VNC to access to your Pi and open the terminal. Use the following command lines to try each of the examples we provided: (it will not work if you use ssh from your laptop)
pi@ixe00:~$ cd ~/openCV-examples/contours-detection
pi@ixe00:~/openCV-examples/contours-detection $ python contours.py
...
pi@ixe00:~$ cd ~/openCV-examples/face-detection
pi@ixe00:~/openCV-examples/face-detection $ python face-detection.py
...
pi@ixe00:~$ cd ~/openCV-examples/flow-detection
pi@ixe00:~/openCV-examples/flow-detection $ python optical_flow.py 0 window
...
pi@ixe00:~$ cd ~/openCV-examples/object-detection
pi@ixe00:~/openCV-examples/object-detection $ python detect.py
***Try each of the following four examples in the openCV-examples, include screenshots of your use and write about one design for each example that might work based on the individual benefits to each algorithm.***
Using contour detecting:
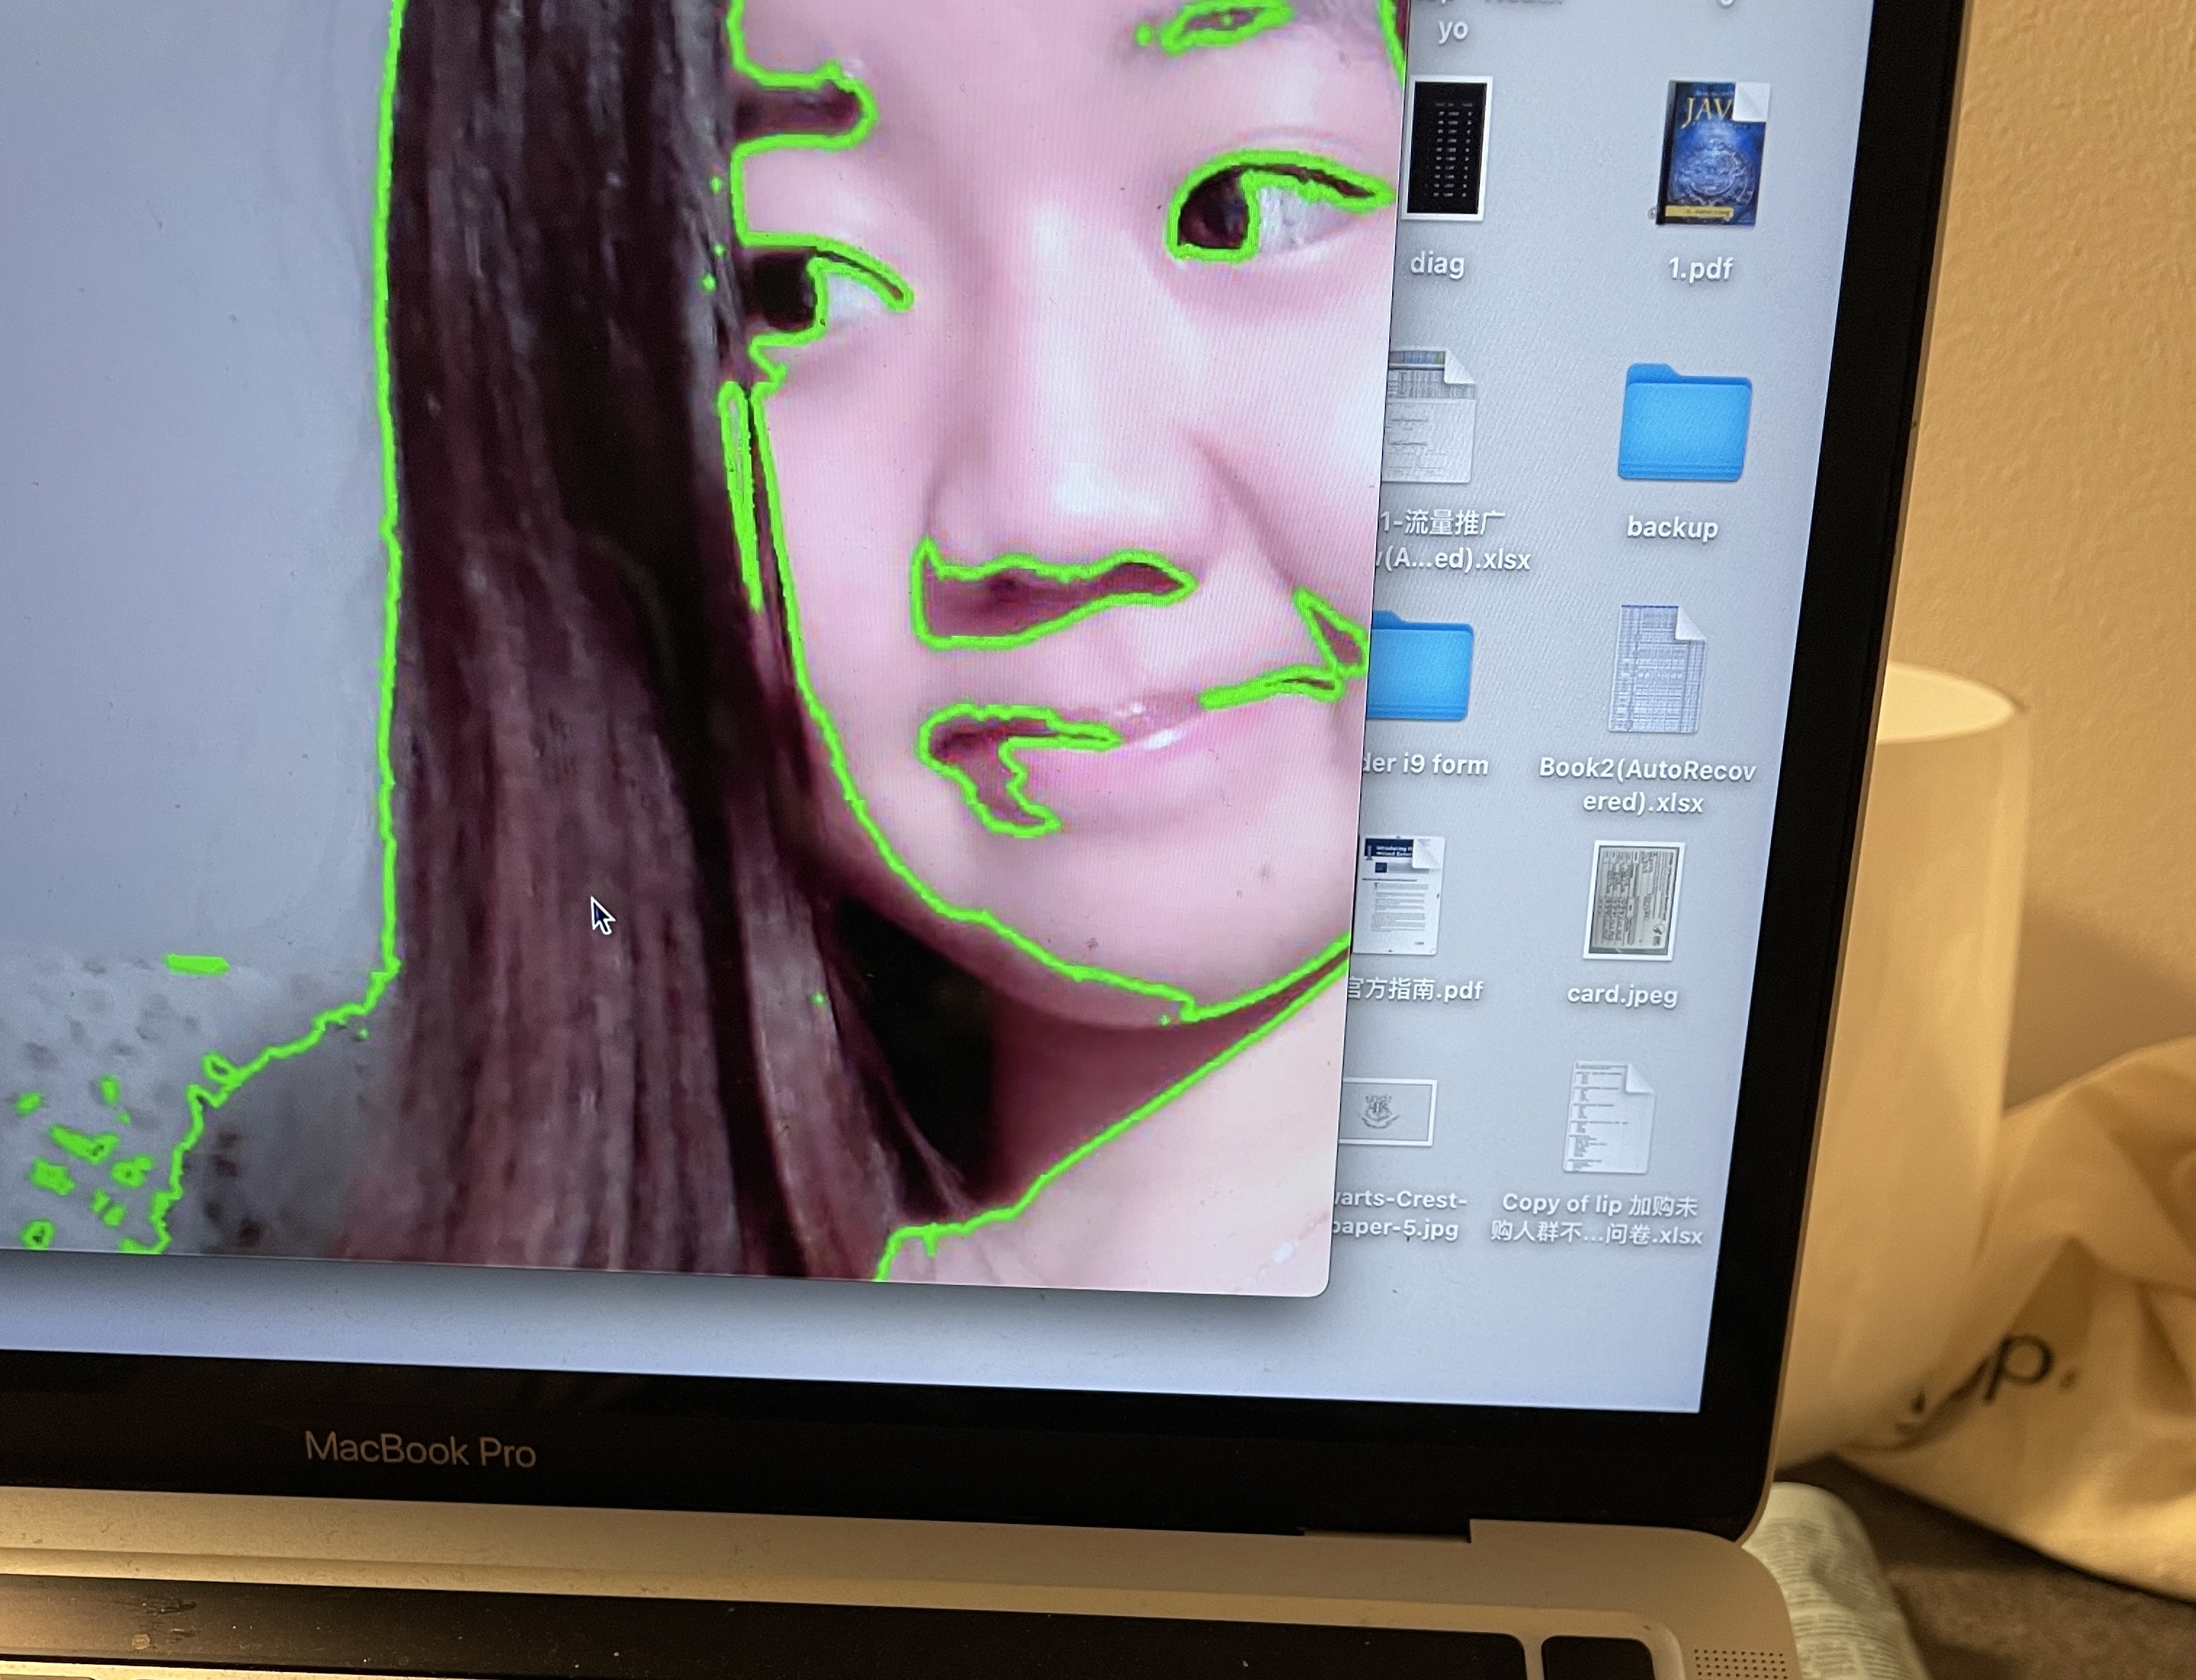 one example of design could be making sand drawings and the contour detecting can be used as a quick approach for showing silhouettes for beginner artists.
using face detecting:
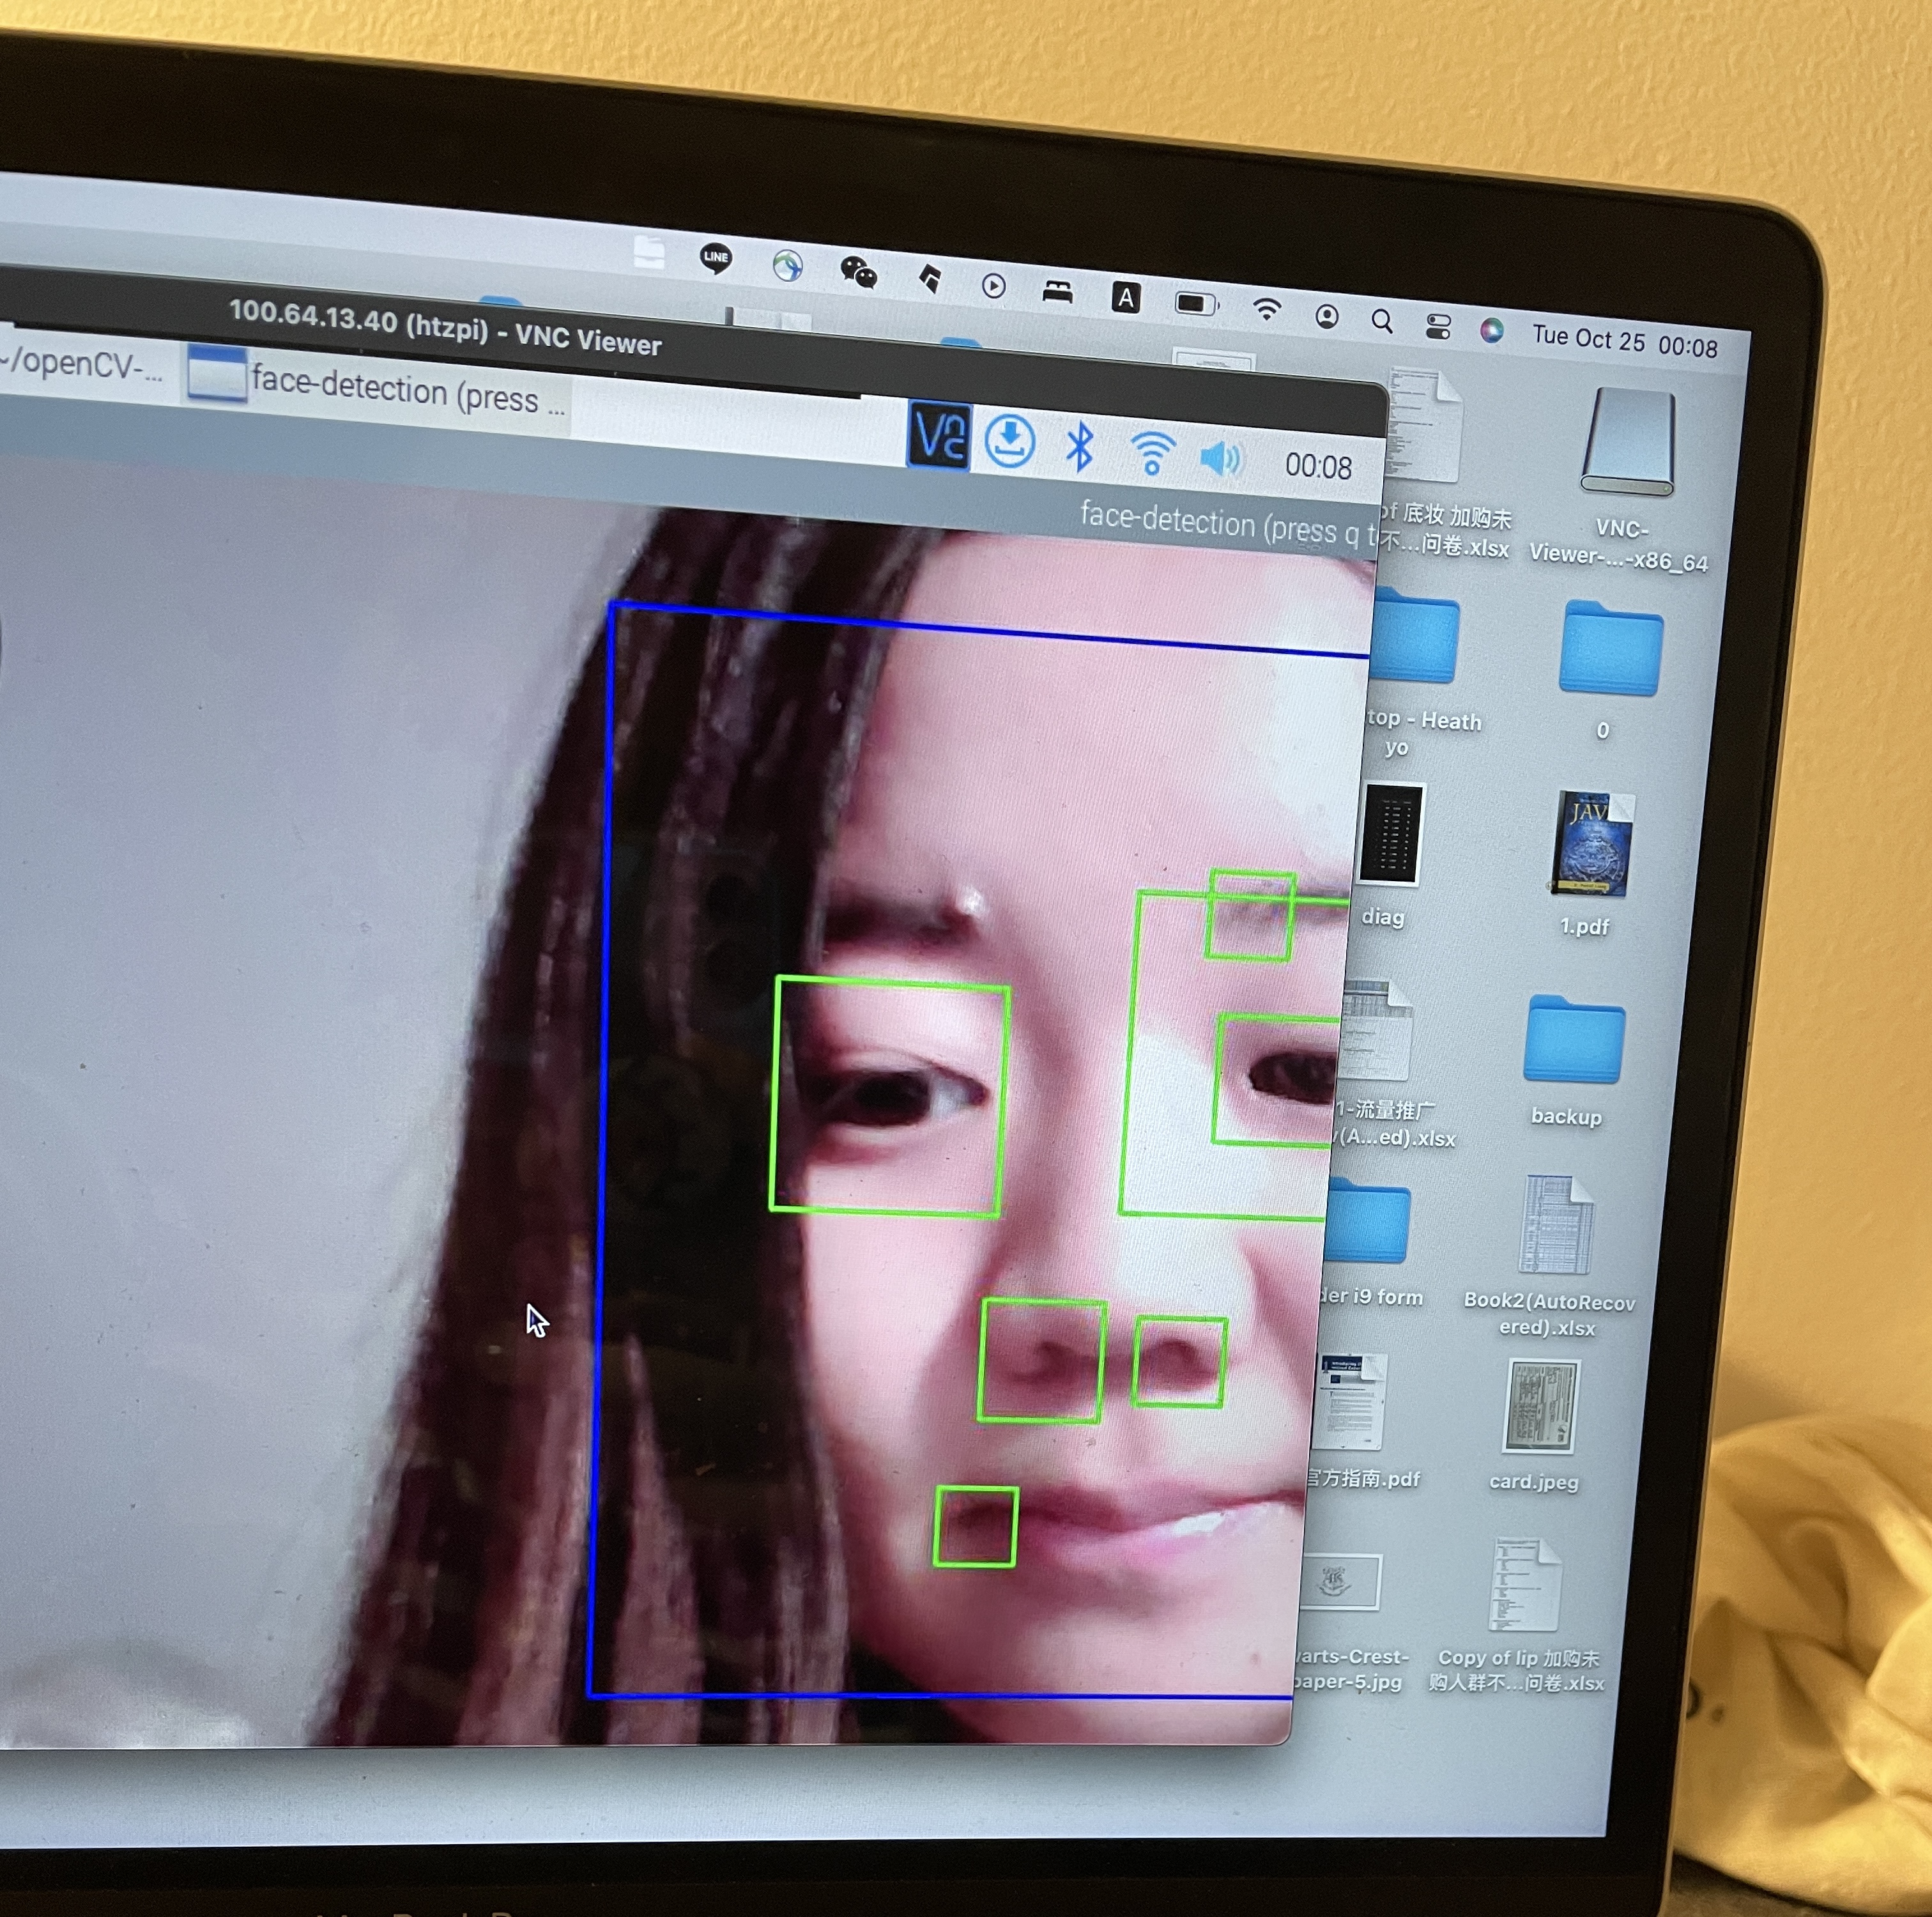 one design could be detecting different body parts and detect whether it is human or not for some vision impaired people.
using flow-detection:
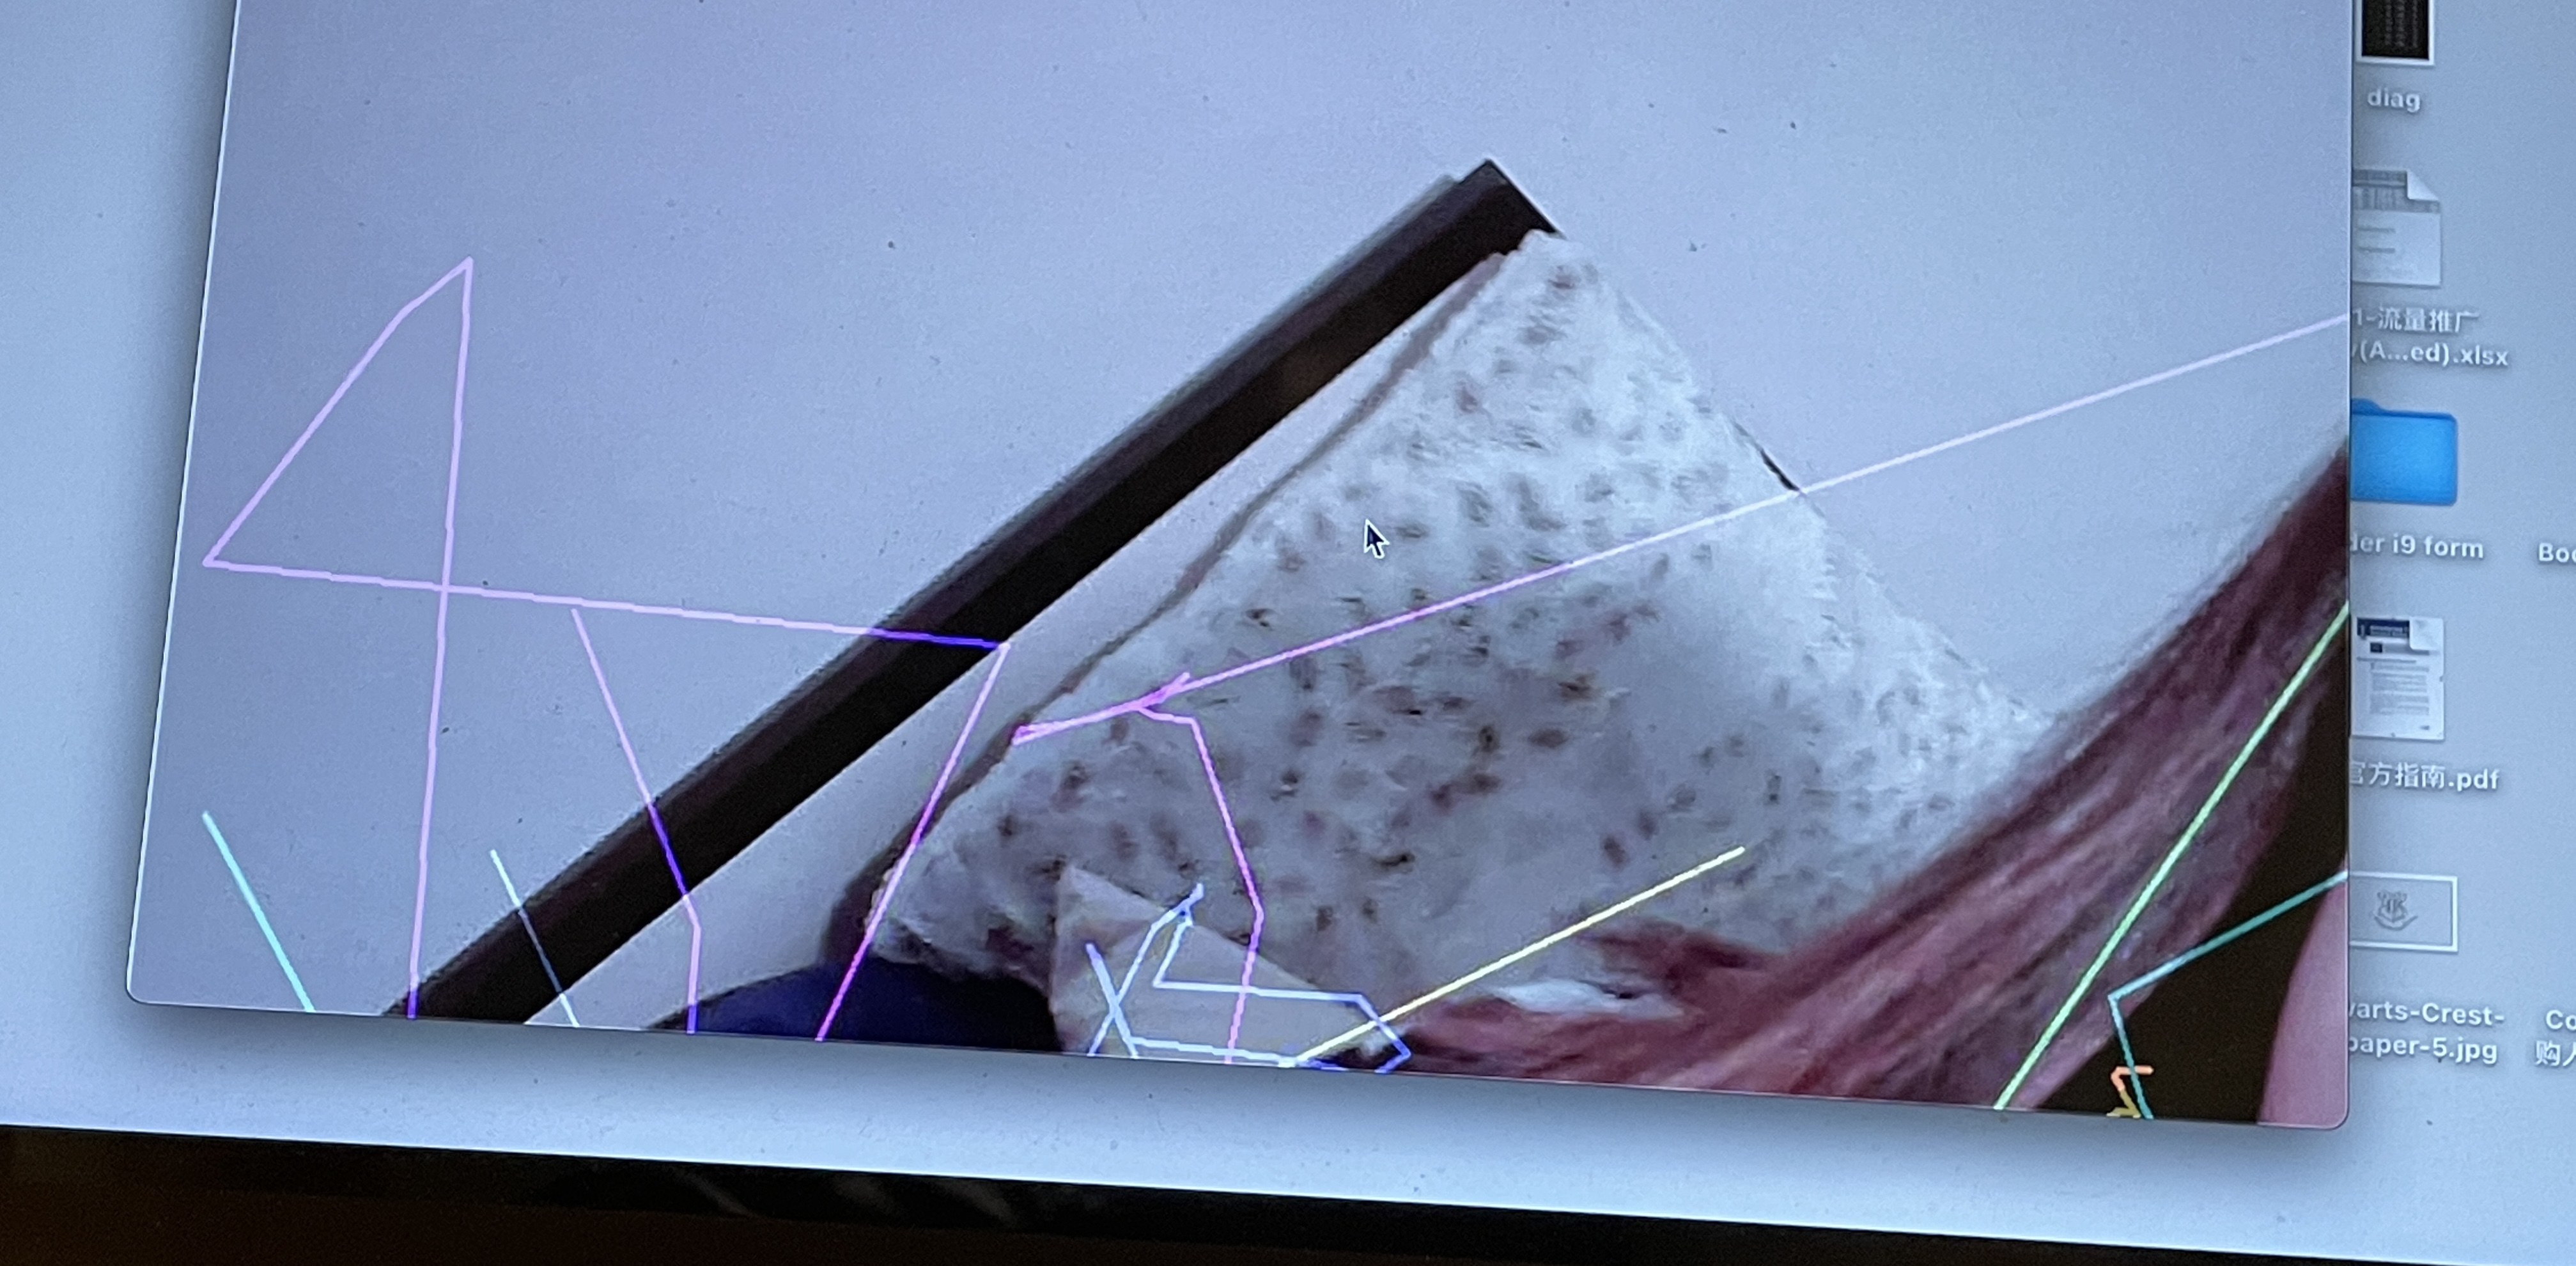 optical flow can be applied in tracking car motion detecting. Instead of using GPS, this can be very helpful in just tracking a certain object's motion.
using object-detection:
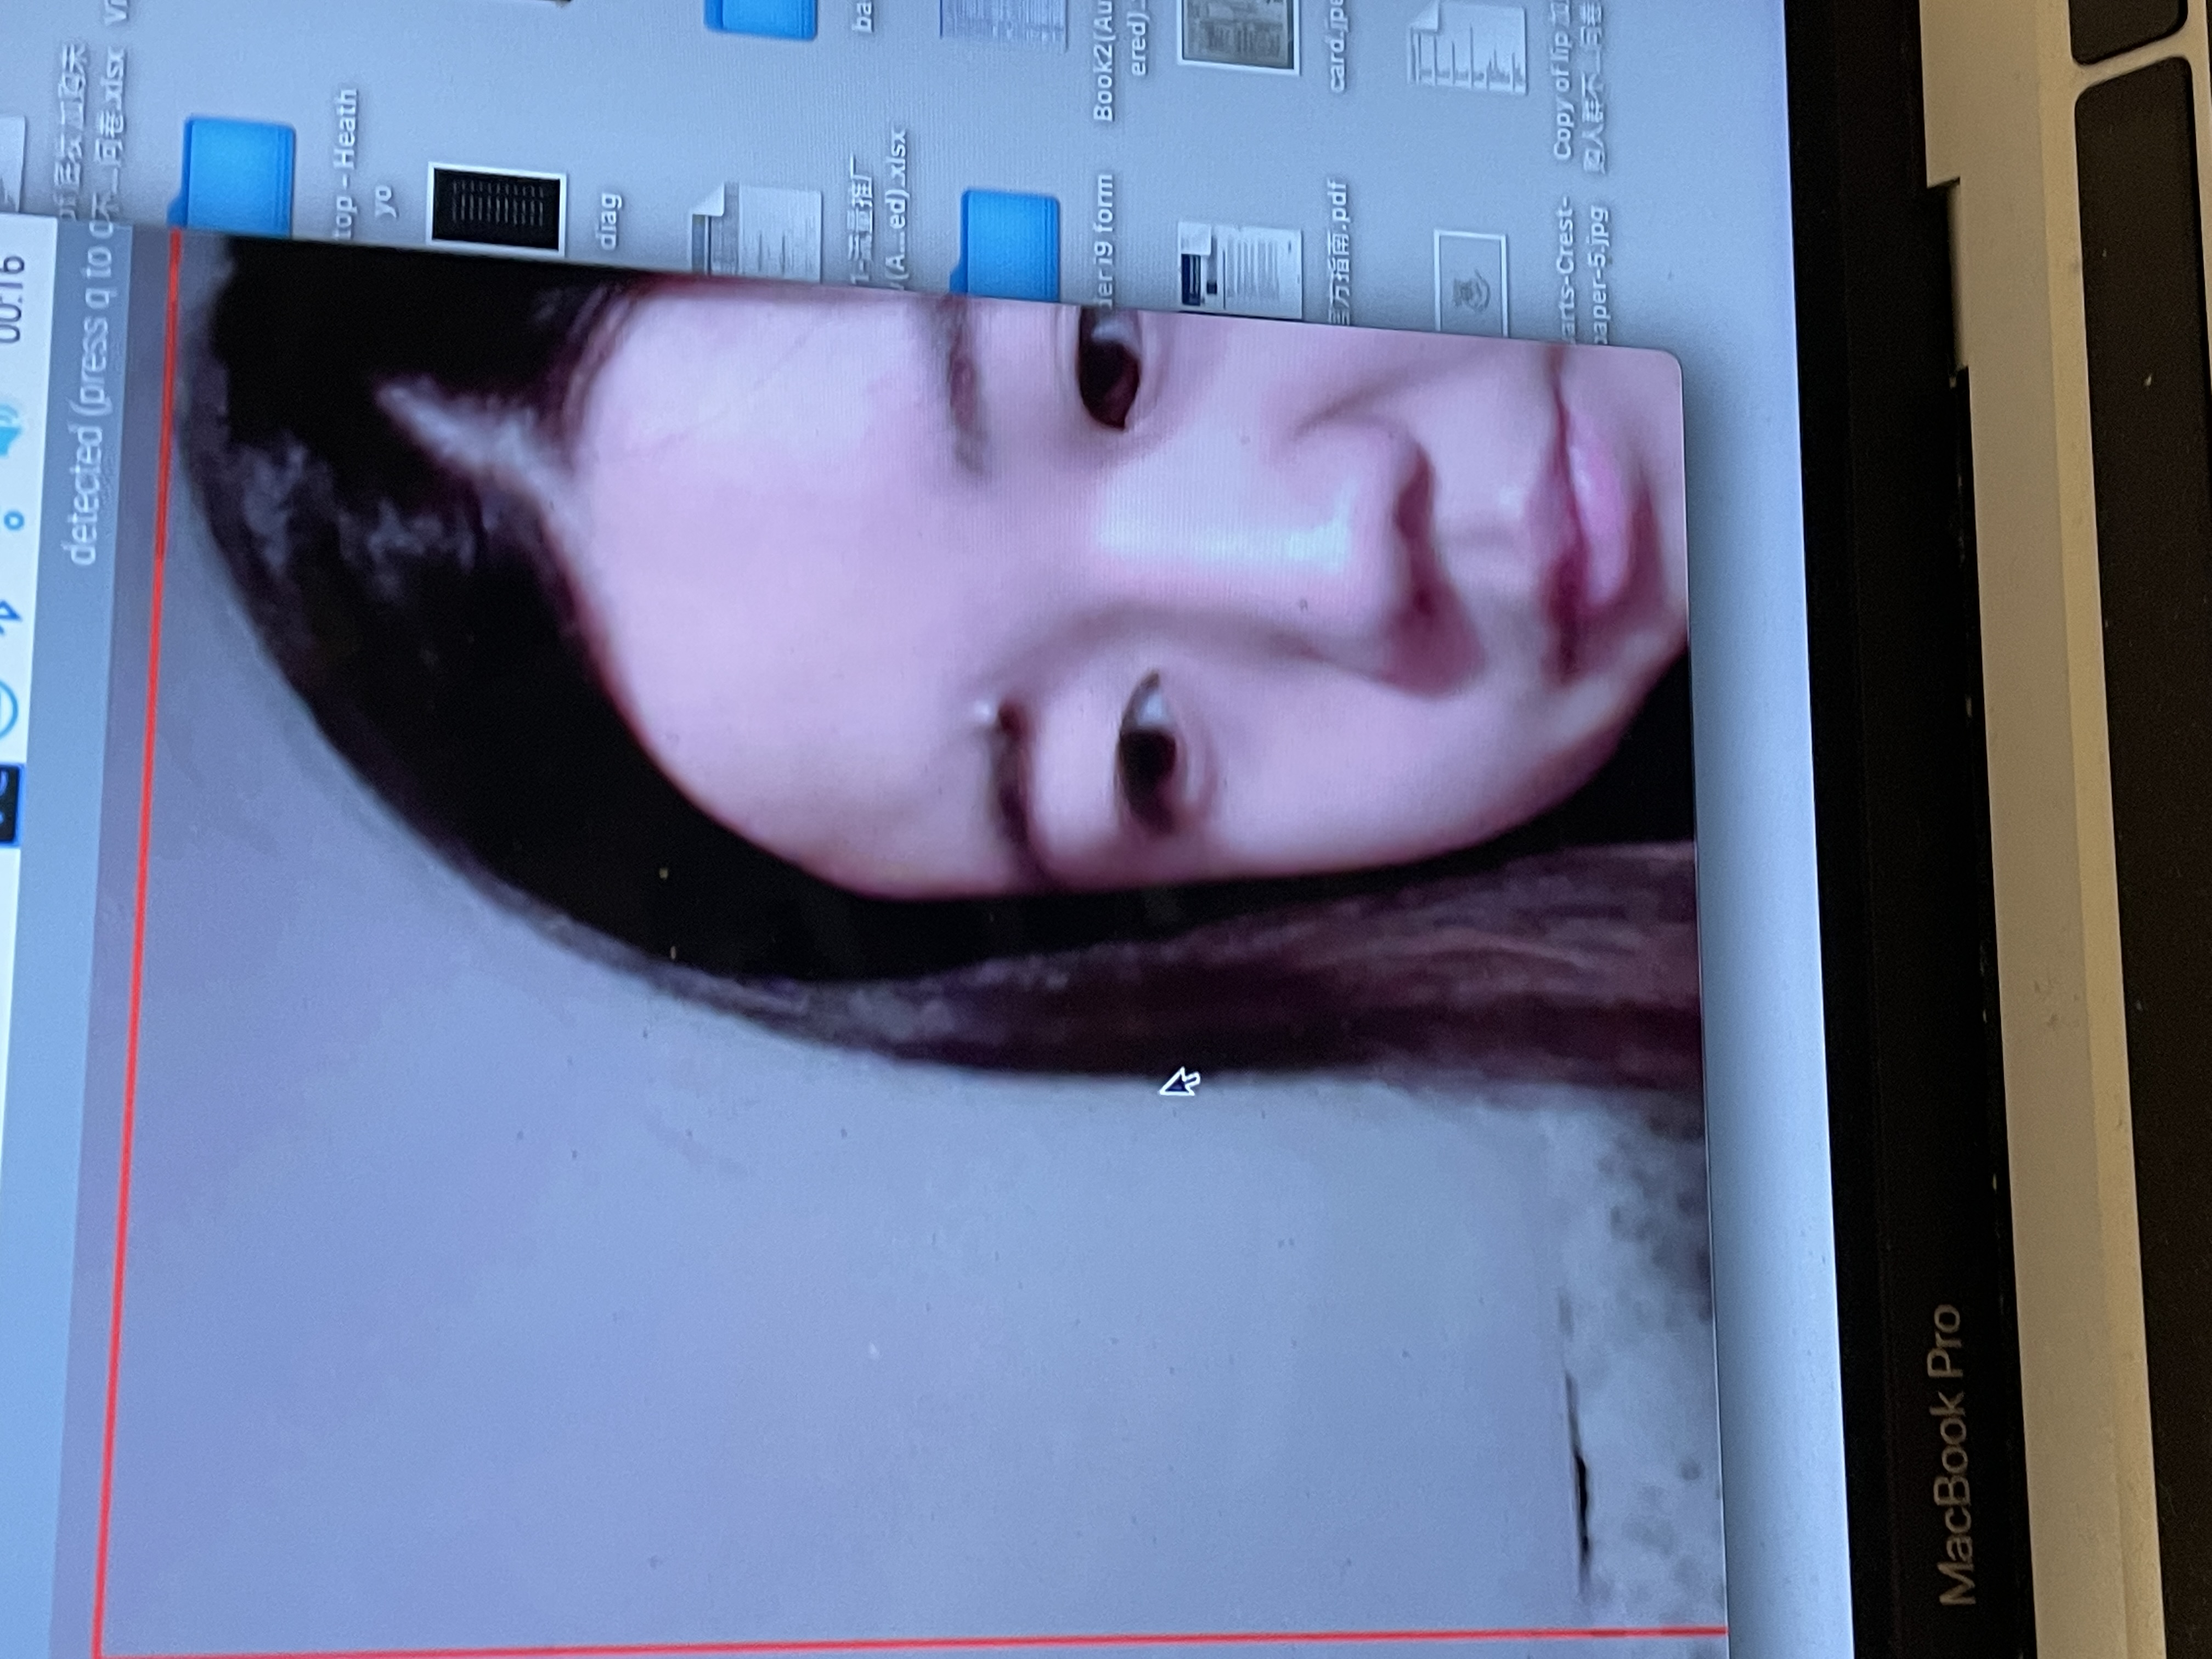 object detection can be rather simple. one design can be detecting if something is missing. For example, some people might have many things on their table, and a webcam can always detect and count how many objects are there. And a single thing missing can be detected by this.
Additional filtering and analysis can be done on the sensors that were provided in the kit. For example, running a Fast Fourier Transform over the IMU or Microphone data stream could create a simple activity classifier between walking, running, and standing.
To get the microphone working we need to install two libraries. PyAudio to get the data from the microphone, sciPy to make data analysis easy, and the numpy-ringbuffer to keep track of the last ~1 second of audio.
Pyaudio needs to be installed with the following comand:
sudo apt install python3-pyaudio
SciPy is installed with
sudo apt install python3-scipy
Lastly we need numpy-ringbuffer, to make continues data anlysis easier.
pip install numpy-ringbuffer
Now try the audio processing example:
- Find what ID the micrpohone has with
python ListAvalibleAudioDevices.pyLook for a device name that includesUSBin the name. - Adjust the variable
DEVICE_INDEXin theExampleAudioFFT.pyfile. See if you are getting results printed out from the microphone. Try to understand how the code works. Then run the file by typingpython ExampleAudioFFT.py
Using the microphone, try one of the following:
1. Set up threshold detection Can you identify when a signal goes above certain fixed values?
And volume change would always be around 0.0, but when i make sound, this will change, for example like this
Volume Change: 971.1 Loudest Frqeuncy: 29.0 RMS volume: 701.5
2. Set up a running averaging Can you set up a running average over one of the variables that are being calculated.moving average
I think a running average is very suitable for this. I would pick volume change as the variable for calculating moving average.
3. Set up peak detection Can you identify when your signal reaches a peak and then goes down?
I am not sure if there is a peek value. I have observed values above 2000.
For technical references:
- Volume Calculation with RootMeanSqare
- RingBuffer
- Frequency Analysis
***Include links to your code here, and put the code for these in your repo--they will come in handy later.*** https://github.com/heatherzh01/Interactive-Lab-Hub/blob/Fall2022/Lab%205/ExampleAudioFFT.py
The following sections (MediaPipe and Teachable Machines) are included for your own optional learning. The associated scripts will not work on Fall 2022's Pi Image, so you can move onto part B. However, you are welcome to try it on your personal computer. If this functionality is desirable for your lab or final project, we can help you get a different image running the last OS and version of python to make the following code work.
A more recent open source and efficient method of extracting information from video streams comes out of Google's MediaPipe, which offers state of the art face, face mesh, hand pose, and body pose detection.

To get started, create a new virtual environment with special indication this time:
pi@ixe00:~ $ virtualenv mpipe --system-site-packages
pi@ixe00:~ $ source mpipe/bin/activate
(mpipe) pi@ixe00:~ $
and install the following.
...
(mpipe) pi@ixe00:~ $ sudo apt install ffmpeg python3-opencv
(mpipe) pi@ixe00:~ $ sudo apt install libxcb-shm0 libcdio-paranoia-dev libsdl2-2.0-0 libxv1  libtheora0 libva-drm2 libva-x11-2 libvdpau1 libharfbuzz0b libbluray2 libatlas-base-dev libhdf5-103 libgtk-3-0 libdc1394-22 libopenexr25
(mpipe) pi@ixe00:~ $ pip3 install mediapipe-rpi3 pyalsaaudio
Each of the installs will take a while, please be patient. After successfully installing mediapipe, connect your webcam to your Pi and use VNC to access to your Pi, open the terminal, and go to Lab 5 folder and run the hand pose detection script we provide: (it will not work if you use ssh from your laptop)
(mpipe) pi@ixe00:~ $ cd Interactive-Lab-Hub/Lab\ 5
(mpipe) pi@ixe00:~ Interactive-Lab-Hub/Lab 5 $ python hand_pose.py
Try the two main features of this script: 1) pinching for percentage control, and 2) "Quiet Coyote" for instant percentage setting. Notice how this example uses hardcoded positions and relates those positions with a desired set of events, in hand_pose.py lines 48-53.
***Consider how you might use this position based approach to create an interaction, and write how you might use it on either face, hand or body pose tracking.***
(You might also consider how this notion of percentage control with hand tracking might be used in some of the physical UI you may have experimented with in the last lab, for instance in controlling a servo or rotary encoder.)
Google's TeachableMachines might look very simple. However, its simplicity is very useful for experimenting with the capabilities of this technology.

To get started, create and activate a new virtual environment for this exercise with special indication:
pi@ixe00:~ $ virtualenv tmachine --system-site-packages
pi@ixe00:~ $ source tmachine/bin/activate
(tmachine) pi@ixe00:~ $
After activating the virtual environment, install the requisite TensorFlow libraries by running the following lines:
(tmachine) pi@ixe00:~ $ cd Interactive-Lab-Hub/Lab\ 5
(tmachine) pi@ixe00:~ Interactive-Lab-Hub/Lab 5 $ sudo chmod +x ./teachable_machines.sh
(tmachine) pi@ixe00:~ Interactive-Lab-Hub/Lab 5 $ ./teachable_machines.sh
This might take a while to get fully installed. After installation, connect your webcam to your Pi and use VNC to access to your Pi, open the terminal, and go to Lab 5 folder and run the example script: (it will not work if you use ssh from your laptop)
(tmachine) pi@ixe00:~ Interactive-Lab-Hub/Lab 5 $ python tm_ppe_detection.py
(Optionally: You can train your own model, too. First, visit TeachableMachines, select Image Project and Standard model. Second, use the webcam on your computer to train a model. For each class try to have over 50 samples, and consider adding a background class where you have nothing in view so the model is trained to know that this is the background. Then create classes based on what you want the model to classify. Lastly, preview and iterate, or export your model as a 'Tensorflow' model, and select 'Keras'. You will find an '.h5' file and a 'labels.txt' file. These are included in this labs 'teachable_machines' folder, to make the PPE model you used earlier. You can make your own folder or replace these to make your own classifier.)
***Whether you make your own model or not, include screenshots of your use of Teachable Machines, and write how you might use this to create your own classifier. Include what different affordances this method brings, compared to the OpenCV or MediaPipe options.***
Don't forget to run deactivate to end the Teachable Machines demo, and to reactivate with source tmachine/bin/activate when you want to use it again.
- Pick one of the models you have tried, and experiment with prototyping an interaction.
- This can be as simple as the boat detector showen in a previous lecture from Nikolas Matelaro.
- Try out different interaction outputs and inputs.
- Fill out the
Contextual Interaction Design Toolsheet.Found here.
***Describe and detail the interaction, as well as your experimentation here.***
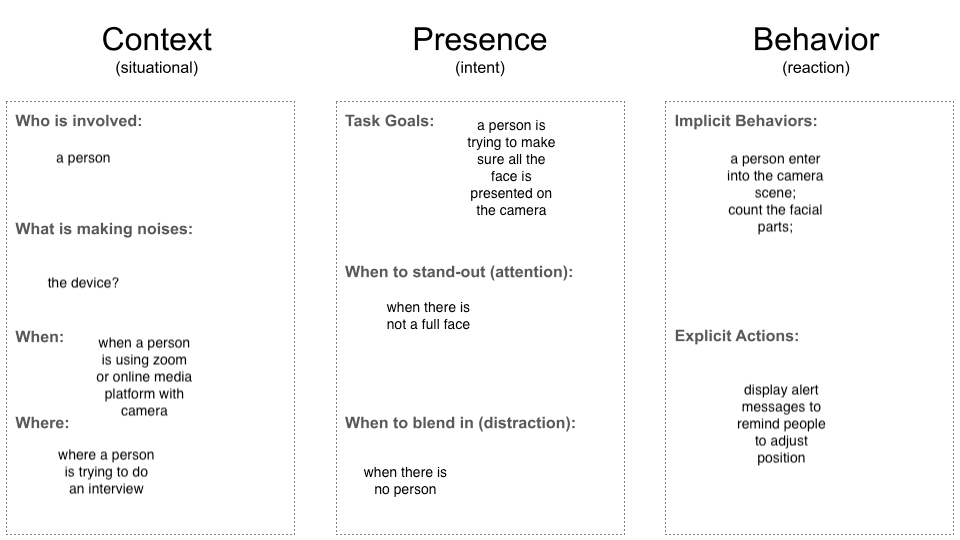
Now flight test your interactive prototype and note down your observations: For example:
- When does it what it is supposed to do?
It is supposed to send alert messages if there is no full face showing in the screen.
- When does it fail?
it would fail when there is no face showing up or too close to the webcam.
- When it fails, why does it fail?
it would fail because the movement is too fast and raspberry pi is not responding very fast with the webcam.
- Based on the behavior you have seen, what other scenarios could cause problems?
light should be bright otherwise webcam is hard to detect; the distance with the webcam too close or too far away can cause problem.
***Think about someone using the system. Describe how you think this will work.***
- Are they aware of the uncertainties in the system?
They are probably aware of the uncertainties because the system is processed by pi and webcam so it is going to be really slow.
- How bad would they be impacted by a miss classification?
It can be really bad because for example in an interview, there are always alert messages telling you to adjust position in order to fit in the screen, you cannot focus on the interview questions.
- How could change your interactive system to address this?
I can change the interactive system into maybe object detection that way it only shows if there is an object(face) there.
- Are there optimizations you can try to do on your sense-making algorithm.
maybe try better sensors to optimize the process.
Now that you have experimented with one or more of these sense-making systems characterize their behavior. During the lecture, we mentioned questions to help characterize a material:
- What can you use X for?
we can use this device to check if a person's entire face is presented on the screen in many uses, like interview to make better impression, zoom meeting for showing more respect, etc.
- What is a good environment for X?
a good environment would be clear background with good light and more steady movement.
- What is a bad environment for X?
bad environment would be messy background and dim light and many back and forth movements.
- When will X break?
when webcam is broken or the bad environment is happening a lot.
- When it breaks how will X break?
the system might not be responding and pi can be really hot.
- What are other properties/behaviors of X?
apart from sending alert messages, it can also turn on speaker mode to vocally tell user they are not in screen.
- How does X feel?
This will make users feel consistently alerted if they are in the right position of the camera screen.
***Include a short video demonstrating the answers to these questions.***
Following exploration and reflection from Part 1, finish building your interactive system, and demonstrate it in use with a video.
***Include a short video demonstrating the finished result.***
i received feedback from my friend Grace and she said I can use speech to display the text message of alert to the user. I think this is a good idea as well, because I just learned accessibility for people with impairment and this can be modified into different approach for people with different impairment.
For example, people with vision impairment can use the speech option to alert them to stay in the center of the screen. And others can probably change to other options like words in text box.
below is a demo video of the text box: